How to schedule social media posts

To schedule social media posts, open Social Media in Marketing, click Create Post, choose the accounts under Post to, write the post, then pick Schedule with a date and time. Scheduled posts publish on their own. You can post to Facebook Pages, Instagram business accounts, LinkedIn, X, YouTube and Pinterest from the same place.
Who can do this: Social Media is part of the Marketing module, which needs the Starter plan or above. Starter includes 5 connected accounts and 100 posts a month; Growth includes 15 accounts and unlimited posts; Scale has no limits on either. Chip features (captions, hashtags, images and planning) use Chip credits. Team members without full Marketing access can draft and comment, but not publish.
A good rhythm for a small business is a few posts a week that you plan in one sitting, rather than posting when you remember. Scheduling lets you do the thinking once and let the posts go out while you get on with the work.
You’ll need at least one connected account first; see the related article on connecting your accounts. For planning help, grab our free content calendar template or read about the social media tools.
Steps
- Open Social Media
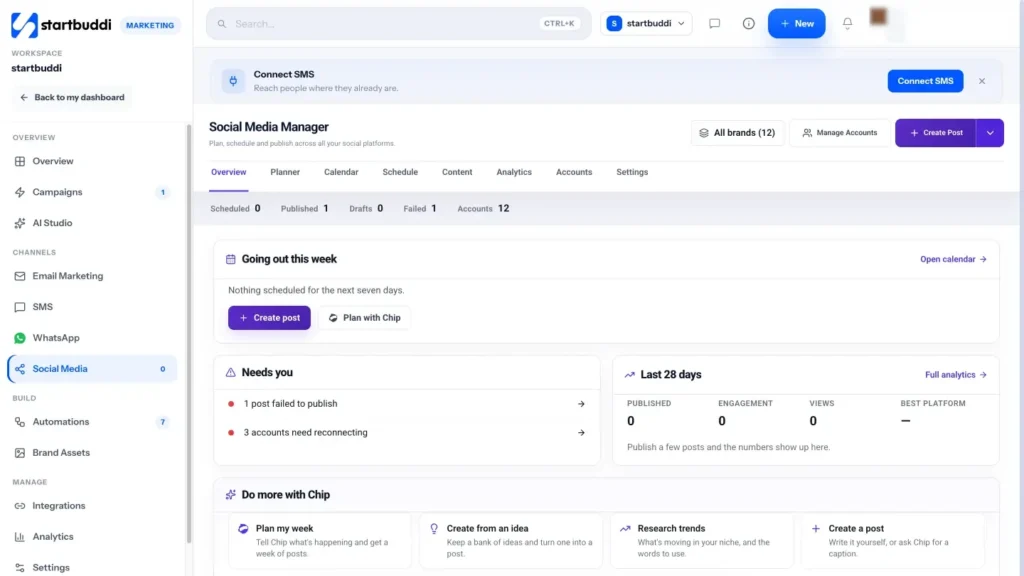
Go to Marketing and click Social Media in the rail. The Overview tab shows what's going out this week and anything that needs you. The strip underneath counts scheduled, published, draft and failed posts.
- Click Create Post and choose accounts
Click Create Post. Under Post to, tick one or more connected accounts, or a whole brand at once. Pick a content type (Post, Story, Reel or Thread) where the platform supports it. For more room, use Open full composer from the create menu.
- Write the post and add media
Write your text, or use the Chip panel: Write caption sharpens a rough idea, Hashtags suggests tags for the platform, and Generate image creates a picture. Add media from Brand Assets, Upload or Paste URL. The preview shows how the post will look on each account.
- Pick Schedule and set the time
Under When to post, choose Schedule and pick the date and time, then click Schedule. The other options are Post now, Send for approval (a teammate signs it off first) and Save as draft.
- Or plan a week with Chip
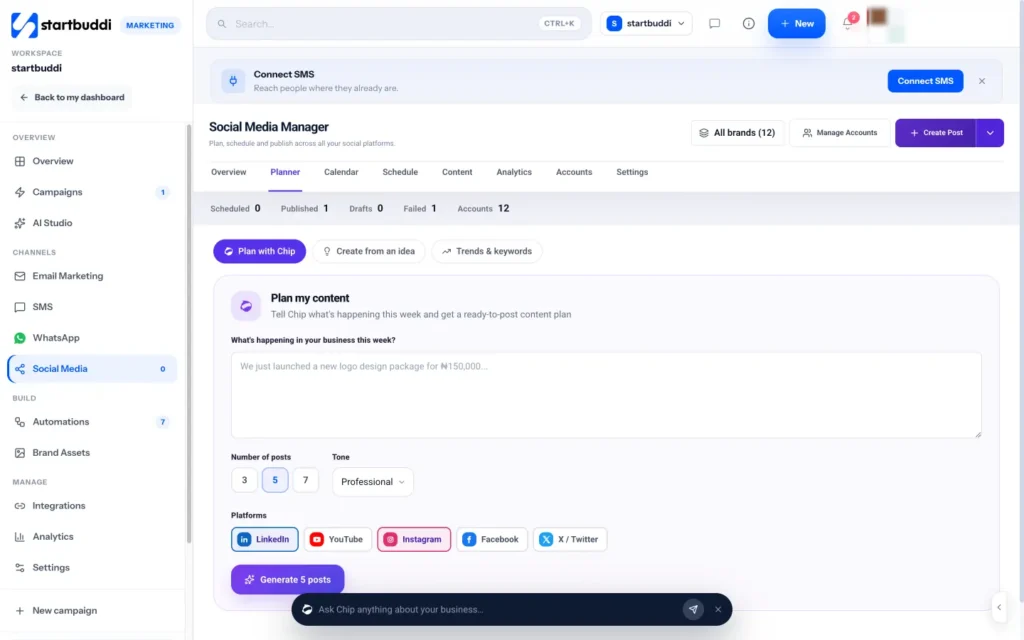
Open the Planner tab and choose Plan with Chip. Describe what's happening in your business this week, choose the Number of posts (3, 5 or 7), a tone and the platforms, then click Generate 5 posts (the number matches your choice). Edit the drafts, click Approve on the ones you like, then click Schedule 3 approved (or however many you approved) to put them on the calendar.
- Check the calendar
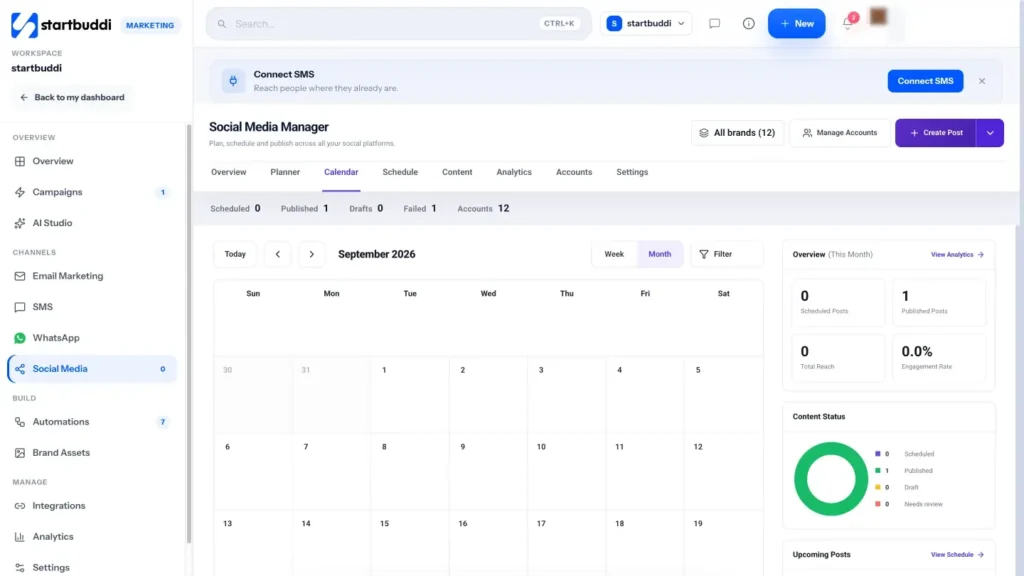
Open the Calendar tab to see everything that's planned, or the Schedule tab for a list. Click a post to edit, duplicate or cancel it. Posts that fail are retried once, then moved to Content under Failed.
Troubleshooting
My post failed. What should I do?
Open Content and look under Failed. The most common cause is an account that needs reconnecting, so check the Accounts tab for an Expired badge, click Reconnect, then use Retry on the post.
Why did my post go out at the wrong time?
Scheduled times are shown and published in the timezone set under Settings › Scheduling in Social Media. Check it matches where you and your audience are.
Can I repeat a post every week?
There's no repeat setting yet. Use Duplicate on a post, then schedule the copy for the next date.
Can a client approve posts before they go live?
Yes. On a draft, choose Generate shareable link. The link is copied for you, lasts 14 days, and lets the client review and approve the post without logging in.
Olabimpe Salami is the email and outreach specialist at startbuddi. Olabimpe writes about the messages that bring customers in and back: email, WhatsApp and SMS campaigns, follow-ups, and turning enquiries into paying clients.
Runs email and outreach at startbuddi