How to set up a webinar in startbuddi

You can set up a webinar in startbuddi in a few minutes. It makes three pages for you (registration, thank-you and replay), sends confirmation and reminder emails, and adds everyone who registers to your contacts. On Starter and up you can host the session in startbuddi Live; on any plan you can run it on Zoom, Google Meet or YouTube Live and paste the joining link in.
Your team hears about the new webinar in chat, it lands on your calendar, and a prep project with a short checklist is created in Work. After the session, startbuddi records who attended and for how long, so you can follow up with each group differently.
Before you set up a webinar
- Webinars are part of Publish and work on every plan.
- Having Chip build the whole webinar costs 80 Chip credits. Templates and blank webinars are free.
- Have your meeting link ready, or add it later before the day.
For more on what is included, see the webinars overview.
Steps
- Create the webinar
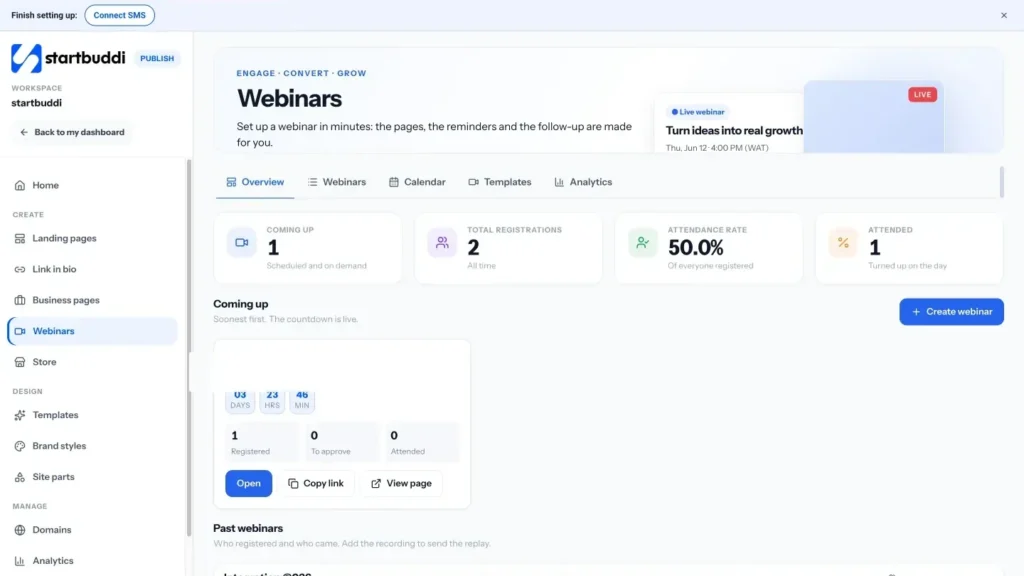
Open Publish and click Webinars, then Create webinar. Choose Build with Chip, Start from a template or Start blank.
- Enter the basics
Add a Title, then the Date and time. Under Live or on demand, choose Live, at a set time or On demand, watch any time. For an on-demand webinar, leave the date empty. Click Create and open editor.
- Choose where it happens
Open the webinar's Sessions tab and click Edit details. Under Where it happens, choose startbuddi Live (Starter and above) and press Go live when it is time, or choose Your own link and paste it into Joining link (Zoom, Meet, YouTube Live). Set the Duration (minutes) and Seats. Click Save and update pages. The pages, confirmation and reminders all update to match.
- Publish the pages and share
On the webinar's Overview, find the Pages card and click Publish all. Then click Copy link to copy the registration page, and share it by email, WhatsApp and social media.
Start sharing a week or two before a live session, and again the day before. Registrations show on the Overview as they come in, with the seats left.
- Check the emails
Open the Emails tab. Under Sent automatically you will see the confirmation that goes out when someone registers and the reminders before a live session. Under Follow-ups, check the notes that go to people who attended and to people who missed it. Each email carries the person's own join link.
- Add the recording afterwards
After the session, go back to Sessions, click Edit details and paste the link into Recording. Click Save and update pages so the replay page and replay email have it. Then open Registrants to see who registered and who attended.
Troubleshooting
Can I host the video inside startbuddi?
Yes, on Starter and above. Choose startbuddi Live under Where it happens and press Go live; each registrant joins from their own link, and your co-hosts get host controls. On Free, run the session on Zoom, Google Meet or YouTube Live and paste its link into Joining link.
Can I run the same webinar every week?
There is no repeating series yet. Save the webinar as a template, then create a new one from it for each date.
People registered but say they got no reminder
Check the Emails tab shows reminders under Sent automatically and that the date and time are right in Sessions. On-demand webinars do not send reminders, because the recording is ready as soon as someone registers.
Where can I see who registered?
Open the Registrants tab. Everyone who registers is also added to your contacts, and you can download the guest list as a CSV file.
Tiwalade Joanna Okedara-Kalu is the founder, CEO and CTO of startbuddi, the business system that brings clients, bookings, invoices, projects, marketing and the Chip AI assistant into one place. Tiwalade builds software around how service businesses really work day to day, and writes about client management, getting paid on time and why small businesses outgrow the tools they start with.
Founded startbuddi and leads its product and engineering