How to use the expenses section in Money Manager


Recording expenses as they happen is what makes your money in and money out numbers, cash forecast and profit report accurate. In startbuddi you record expenses in Money Manager, and the expenses section is included on every plan, Free too.
Expenses are entered by hand or from a receipt you upload. startbuddi doesn’t connect to your bank, so it won’t import them for you. For the why, read what expense tracking is, or see expenses, bills and reimbursements.
A simple habit that works
Record each expense the day you pay it, snap the receipt with your phone, and clear the Review tab once a week. Ten minutes a week keeps your numbers honest and makes tax time far easier.
Money you owe but haven’t paid yet (a supplier invoice) goes on the Bills tab instead, and money a team member spent for the business goes on Reimbursements.
Steps
- Open Expenses
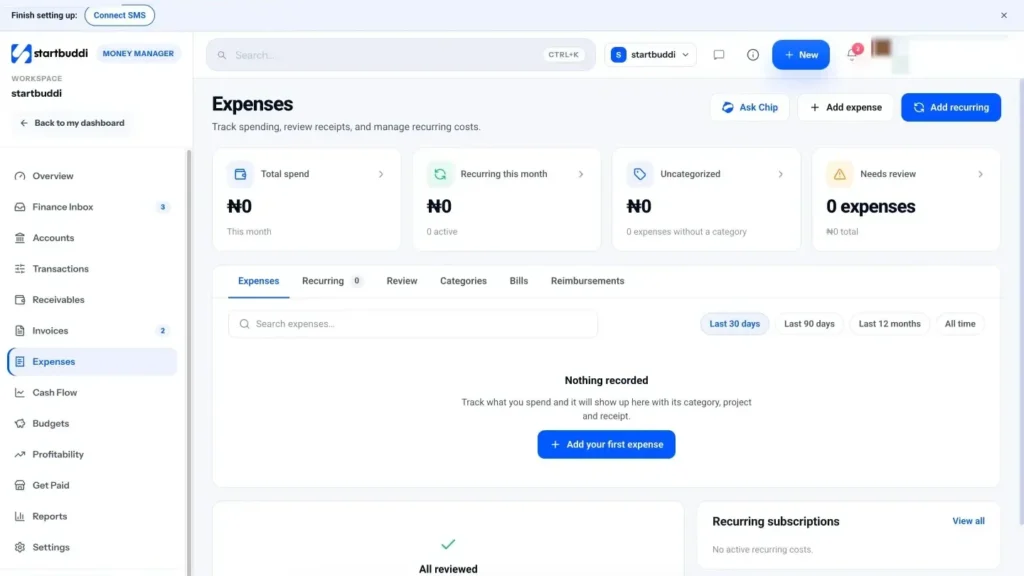
Go to Money Manager, then Expenses, and click Add expense. The Add an expense form opens.
- Fill in the basics
Enter the Vendor (who you paid), Amount, Currency and Date. Choose a Category, such as Software and tools, Marketing or Travel. Not sure? Leave it as Uncategorized and it will wait for review. Set Paid with to Card, Bank transfer, Cash, Paystack or Stripe.
- Attach the receipt and links
Under Receipt, upload a photo or PDF. Link the expense to a Project or Customer if it belongs to one, so it counts in their profitability. Add any Notes, then click Save expense. It shows in Transactions as money out.
- Add costs that repeat
For rent, software and other regular bills, click Add recurring. Enter the vendor and amount, set Repeats to Monthly or Quarterly and pick the Day of month (1 to 28). Click Save recurring cost. You can pause or resume it on the Recurring tab, and active ones feed your cash forecast and budgets.
- Clear the review queue
Open the Review tab. Receipt review shows one uncategorised expense at a time, with a suggested category and project based on what you chose for that vendor last time. Accept or change it and click Confirm. When you see "All reviewed", you are done.
- See where the money goes
The Categories tab shows spend by category for the period. The Chip insight card compares this month with last, and What can I cut? asks Chip for ideas. Chip uses your Chip credits.
Every expense also shows in Transactions as money out, next to the payments you receive, so you have one feed of everything that moved.
Next step: add your regular monthly costs as recurring expenses today, then open Cash Flow to see how they shape the month ahead.
Troubleshooting
The category I need isn't in the list.
Categories are a fixed list so reports stay tidy. Use the closest match or Other, and put the detail in Notes.
The receipt won't upload.
Receipts must be an image or a PDF. Try a clearer photo or a smaller file, or save the expense first and add the receipt later.
Total spend on Expenses doesn't match Money out on the overview.
They count slightly different things. Total spend counts the expenses you recorded; Money out on the overview can include other outgoings, so small differences are normal.
Chinedu Kalu is the co-founder and chief operating officer of startbuddi, responsible for how the company runs day to day. Chinedu writes about the operational side of a small business: registering and running the company, money, hiring and the routines that keep a team on track.
Co-founded startbuddi and runs its operations