How to send an estimate and turn it into an invoice

An estimate (or quote) tells a customer what the work will cost before you start. In startbuddi you send an estimate from Money Manager, and when the customer says yes, you turn it into an invoice with the same line items.
Estimates are on every plan. Your customer answers by replying to the email, and you record their decision; there is no online accept button. See estimates, proposals and contracts for the full picture, or try the free quote generator.
Tips for estimates that get a yes
- Break the price into clear lines so the customer sees what they are paying for.
- Say what is not included in the notes, so there are no surprises later.
- Set a valid-until date, usually 14 to 30 days, so old prices don’t come back to bite you.
- Ask for a deposit in the terms if the job is large.
Steps
- Start a new estimate
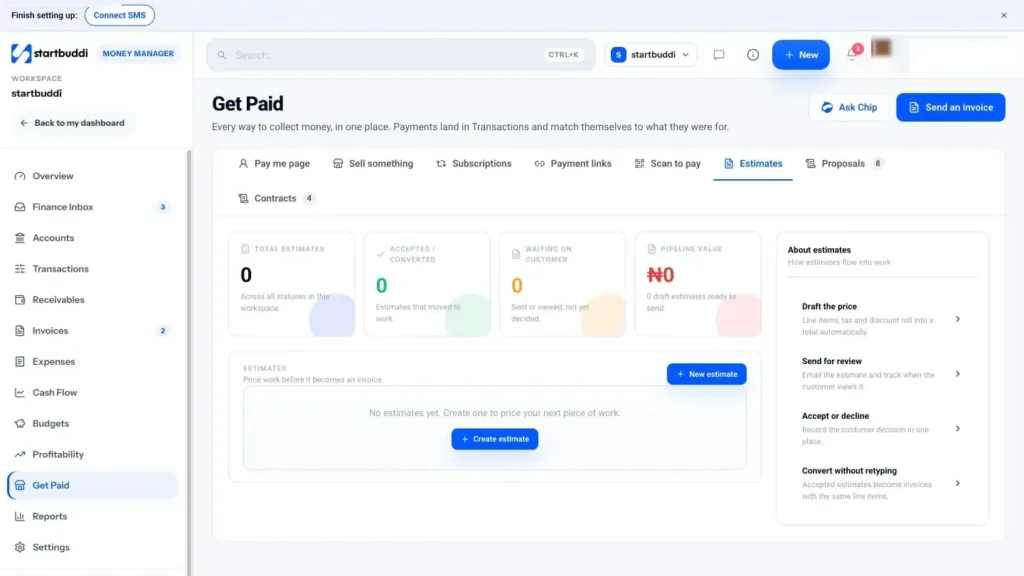
Go to Money Manager, then Get Paid, and open the Estimates tab. Click New estimate.
- Choose the customer
Pick Existing client and choose from the list, or switch to One-off recipient and type their name, email and company. Tick Also save as a contact to keep them for later. Set the Currency and a Valid until date.
- Price the work
Under What are you pricing?, add each part of the job with a Description, Qty and Unit price. Click Add item for more lines. Enter a Tax rate and Discount if you need them.
- Add notes and terms, then save
Use Notes for scope and assumptions, and Terms for things like "Valid for 30 days. 50% deposit to begin." Click Save as draft.
- Send it
Open the estimate and click Send estimate. Your customer gets an email with the total, the valid-until date and the line items, and is asked to reply to accept, decline or request changes.
- Record their answer
When they reply, open the estimate and click Mark accepted or Mark declined. The Estimates tab shows what is waiting on customers and your pipeline value.
- Convert it to an invoice
Click Convert to invoice. startbuddi creates a draft invoice with the same line items and links it to the estimate. Check it and click Send invoice when you are ready. On Free, the invoice counts towards your 5 a month.
The estimate keeps a record of what happened: when it was created, sent, accepted or declined, and which invoice it became. The Converted to column on the Estimates tab links straight to that invoice.
Need something signed rather than just agreed? The Contracts tab on Get Paid lets you start from a template, add signers and send it for signature. Templates are a starting point, not legal advice.
Next step: connect Paystack or Stripe so the invoice you convert can be paid online.
Troubleshooting
The Send estimate button is greyed out.
The estimate has no recipient email. Add an email to the contact or recipient, then send again.
Can my customer accept the estimate online?
Not yet. They reply to the email, and you click Mark accepted. If you need a signature, use a contract from the Contracts tab.
It won't let me convert the estimate.
Declined or expired estimates can't be converted, and the estimate needs at least one line item. If it was already converted, open the linked invoice instead.
Chinedu Kalu is the co-founder and chief operating officer of startbuddi, responsible for how the company runs day to day. Chinedu writes about the operational side of a small business: registering and running the company, money, hiring and the routines that keep a team on track.
Co-founded startbuddi and runs its operations