How to complete your startbuddi workspace setup


To complete your startbuddi workspace setup, answer four short questions when you first sign in, check your business details in Settings, then tick off the Quick start steps on Home. Most people are done in about 15 minutes, and it works the same on every plan, including Free.
The setup questions are only asked of the workspace owner. Teammates you invite later go straight to Home.
What the setup questions create for you
From your answers, Chip writes your business copy and sets up a published page with a contact form on it, a draft About document, a draft first invoice and one sample contact. The sample contact is tagged sample – replace me so you always know it isn’t real. Everything it creates can be edited or deleted.
What to do in your first week
- Replace the sample contact with a real client or two.
- Open your published page from Publish, check the words Chip wrote, and share the link.
- Connect Paystack or Stripe in Money Manager, then send your first real invoice.
- Update your own details in Settings, then Profile: your photo, time zone and sign-in details.
- Invite a teammate when you’re ready (this needs a paid plan).
Take the quick tour of startbuddi if you’d like to see where each of these lives first.
Steps
- Answer the setup questions
On first sign-in you're asked Who are you?, What do you do?, your Type of business and Who is your customer?. Only the first step is required. Write your one sentence the way you'd explain it to a customer, then click Continue. The build screen takes a few seconds and opens Home.
- Check your business details
Open Settings, then Workspace. Under Business Identity, upload your logo (PNG or SVG, up to 2MB) and check your business name, type and tagline. Add your phone, email and address under Contact & Address.
- Set your currency and time zone
In Regional Settings, choose your Currency, Timezone and Date Format. These are used on invoices, bookings and reports, so set them before you send anything.
- Pick your brand colour and hours
Choose a Brand Color, which is used on booking pages, invoices and forms your customers see. Set your Business Hours, then click Save Changes.
- Work through Quick start on Home
Go back to Home. The Quick start card lists the next steps: add your first client, create a booking or form, send an invoice, start a campaign and invite your team. Each one ticks itself off when you do it.
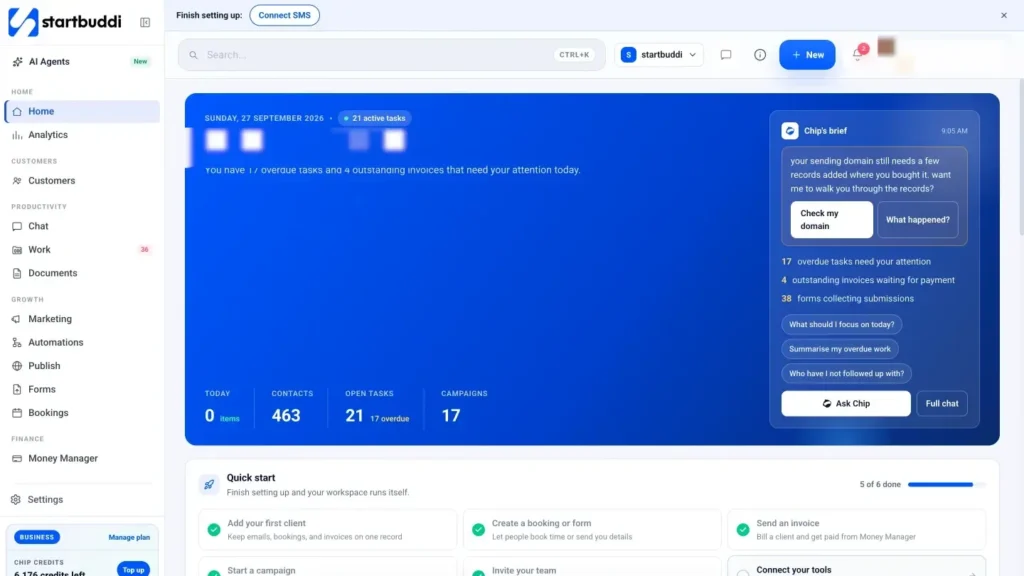
- Connect your tools
From the Quick start card, open Connect your tools. It shows what's connected and what isn't: email domain, SMS, WhatsApp, social accounts, payments and Google Calendar. Start with payments if you want to get paid online. See connecting your other tools for the full list.
Troubleshooting
I skipped some setup questions. Can I answer them later?
Yes. Home shows a Finish setup card with a link to fill in the details you skipped. Your progress is kept.
The build screen showed an error.
Your account is still ready to use. Open Settings, then Workspace, to fill in anything that's missing, and replace the sample content yourself.
My invoices show the wrong currency.
Change the Currency in Settings, then Workspace, under Regional Settings, and click Save Changes. Check any draft invoices before you send them.
How do I get rid of the sample contact?
Open Customers, find the contact tagged sample - replace me, and delete it or overwrite it with a real client.
Omolola Akiyode is the operations and project manager at startbuddi, leading cross-functional projects and the content that helps founders get set up. Omolola writes about projects, websites and getting found online, and turns complex ideas into clear, practical steps.
Runs operations and projects at startbuddi