How to connect a custom domain to your pages

To connect a custom domain, add it in Publish, copy the one DNS record startbuddi shows you into your domain registrar, and wait for the check to pass. startbuddi then sets up the security certificate (the padlock in the browser) for you, and your pages can open on your own web address instead of a startbuddi link. A web address with your business name looks more trustworthy on flyers, invoices and social profiles, and it is easier for customers to remember.
Before you connect a custom domain
- You need a domain you already own, bought from a registrar such as GoDaddy, Namecheap or Cloudflare. You cannot buy a domain inside startbuddi.
- You need to be able to sign in to that registrar and change its DNS settings.
- Anyone on your team with access to Publish can add a domain. Connecting one is not tied to a paid plan.
See the custom domains overview for what your domain can be used for.
Steps
- Open Domains
Open Publish and click Domains under Manage. If you have no domains yet, click Add your domain. Otherwise click Connect domain.
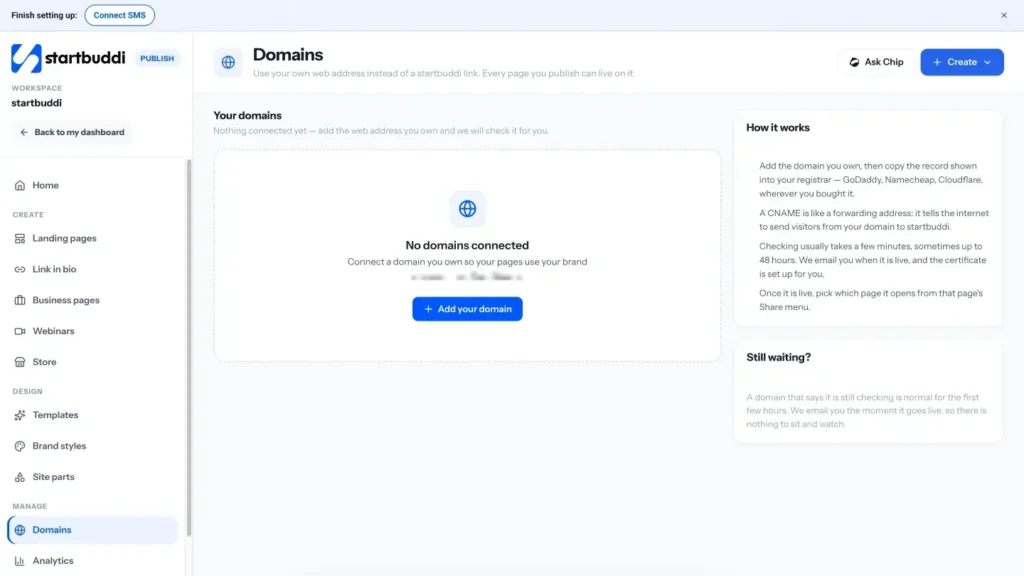
- Enter your domain
Type your domain, for example yourbusiness.com, without "https://" in front. Click Add. You will see "Domain added! Configure the DNS record below."
- Copy the DNS record
Under your domain, startbuddi shows one record with a Type, Name and Value. It is a CNAME record that points to domains.startbuddi.com. Use the copy button next to it.
A CNAME is like a forwarding address: it tells the internet to send visitors from your domain to startbuddi.
- Add the record at your registrar
Sign in to your registrar and open the DNS settings for your domain. Add a new record with the same Type, Name and Value that startbuddi shows, then save. If there is already a record with the same name, you may need to edit or remove it first.
- Wait for the check
startbuddi checks your domain for you. It usually takes a few minutes, and sometimes up to 48 hours while the change spreads across the internet. The status moves from Pending DNS to Live · SSL active, and you get an email when it is live.
- Choose which page it opens
Once the domain is live, open the page you want visitors to land on and pick the domain from that page's Share menu. The domain card then shows how many pages are connected.
Before you share the new address, open it in your browser and on your phone to check the right page loads with the padlock showing.
Troubleshooting
My domain has said Pending DNS for hours
That is normal for the first few hours. Check the record at your registrar matches exactly, with no typing mistakes or extra full stops. If it still has not gone live after 48 hours, contact our support team.
My registrar will not accept the record
Some registrars limit which records can be added to the main domain. Ask your registrar's support how to add the CNAME record startbuddi shows, or contact our support team for help.
Can my link in bio use my domain?
Not yet. Landing pages and other published pages can use it, but your link in bio stays on your startbuddi link for now.
Will my old startbuddi links stop working?
No. Links you have already shared keep working. Your domain is an extra, nicer address for the page.
Tiwalade Joanna Okedara-Kalu is the founder, CEO and CTO of startbuddi, the business system that brings clients, bookings, invoices, projects, marketing and the Chip AI assistant into one place. Tiwalade builds software around how service businesses really work day to day, and writes about client management, getting paid on time and why small businesses outgrow the tools they start with.
Founded startbuddi and leads its product and engineering