How to add live chat to your website with startbuddi

You can add live chat to your website in about ten minutes. startbuddi gives you a chat bubble that works on any site (WordPress, Wix, Shopify, a custom build or your startbuddi pages). Visitors can chat with your team or with Chip, and every conversation arrives in your Inbox under Website Chat, with the page the visitor was on.
Plans for live chat on your website
- The chat widget only loads on your website on a paid plan, Starter or above. Every paid plan starts with a 30-day trial.
- Having Chip reply to visitors automatically needs Growth or above, and each reply uses Chip credits.
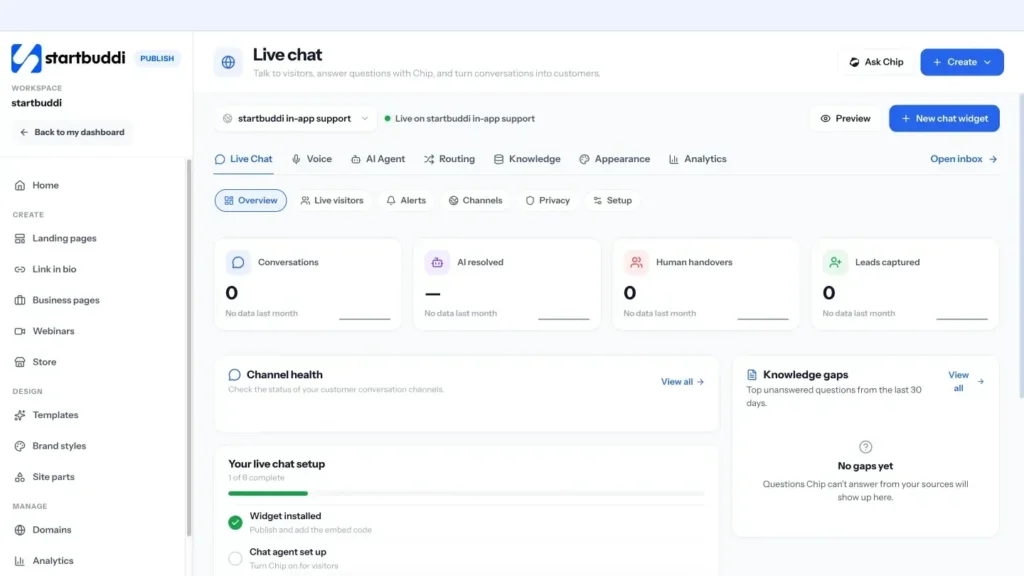
Live chat has its own dashboard. Open it from Live chat in the sidebar, or from the Customers menu. You can read more about what it does on the website chat product page.
Steps
- Open Live chat and start the setup
Click Live chat in the sidebar. If you haven't added live chat yet, click Set up live chat. (Already have one? Use New chat widget at the top right.) The Chat Widget Builder opens.
- Pick the type of chat
Under Select the type of chat, choose Live chat for a simple chat with your team, or All-in-one chat to also offer WhatsApp, email, SMS, Facebook and Instagram in the same bubble. Click Continue.
- Customise how it looks and what Chip says
Set the Widget name, Welcome message, Brand color, Launcher position (bottom right or bottom left), Offline message and Business hours.
In the Chip AI assistant section, tell Chip what to say and what tone to use. Paste a page address in Teach Chip about your site so it can answer from your own pricing, FAQs and policies. Click Continue.
- Choose who gets the chats and add quick links
In Routing, pick the team inbox that should receive website chats, or leave them unassigned. In Quick links, add shortcuts such as your booking page or a form, so visitors can book or sign up without typing. Click Continue.
- Publish and copy the embed code
On the Installation step, click Publish widget. When you see Widget ready, copy the embed code: one line that starts with a script tag.
Paste it once on your website, just before the closing body tag. In most website builders this goes in a "custom code" or "footer scripts" setting.
- Lock it to your website
In Live chat, open Appearance, then Installation. Under Allowed websites, list your domains, one per line (for example yourbusiness.com and www.yourbusiness.com), and click Save. Only those sites can then load your widget. Leave the list empty while you are testing.
- Add knowledge, then test it
Open Knowledge and click Add your first source: add a website page, upload a document or write an answer. Chip only answers visitors from sources marked Public.
Visit your website (or use Open test page) and send a message. It appears in Live visitors and in your inbox under Website Chat, where you can reply, assign and close it like any other conversation.
Troubleshooting
The chat bubble doesn't appear on my website.
Check three things: the widget is published (Installation shows Published), your workspace is on Starter or above or in a trial, and your domain is listed exactly under Allowed websites, including or excluding www as your site uses it. Then clear your browser cache and reload.
The code box says to publish the widget first.
The embed code is created when you publish. Open the widget, go to the Installation step and click Publish widget, then copy the code.
Chip isn't answering visitors.
Chip replying on its own needs the Growth plan or above and available Chip credits. Also make sure you have at least one Public knowledge source, because Chip only answers from approved information and hands over to your team otherwise.
Tiwalade Joanna Okedara-Kalu is the founder, CEO and CTO of startbuddi, the business system that brings clients, bookings, invoices, projects, marketing and the Chip AI assistant into one place. Tiwalade builds software around how service businesses really work day to day, and writes about client management, getting paid on time and why small businesses outgrow the tools they start with.
Founded startbuddi and leads its product and engineering