
How to run client projects without chaos
A practical guide to client project management: agree the scope, plan realistic tasks, keep clients in the loop, and track time and budget so projects pay.

This guide is for freelancers, agencies, consultants and service businesses who deliver work for clients and want it to feel calmer. Client project management is not about complicated software or certificates. It is a handful of habits: agree what you are doing, plan it honestly, keep the client informed, and watch the numbers.
Over four chapters you will write a one-page scope, turn it into tasks with owners and dates, set up a way for clients to follow progress and approve work, and learn to track time and budget so every project makes money. Each chapter starts with the thinking, then shows how to do it in startbuddi Work.
Client project management starts before the work: scope and kickoff
- What a client project actually is
- Why client projects go wrong
- The one-page scope document
- A worked example
- A simple change request process
- Price the project so it survives surprises
- Run a short kickoff
- Common mistakes at the start
- What good looks like
- Setting up the project in startbuddi
- Your task for this chapter
Good client project management starts before anyone opens a design file or writes a line of copy. Most projects that go wrong do so in the first week, not the last: the scope was fuzzy, nobody wrote down what "done" means, and the client and the business each carried a different picture in their heads. This chapter shows how to agree the scope, write it down in a page, run a short kickoff, and set up the project so the rest of the work has a firm base.
What a client project actually is
The Association for Project Management defines a project as "a unique, transient endeavour, undertaken to achieve planned objectives" (APM). For a small business, that translates to something simple: a piece of work for a client, with a start, an end, and a result both sides can point to. A website, a rebrand, a bathroom refit, an event, a three-month consulting engagement, a set of product photos.
Client projects add something internal projects do not have: another person's expectations, time and money. You are not only managing tasks. You are managing a relationship, and the project plan is the written version of the promise you made.
Why client projects go wrong
When service businesses describe a project that went badly, the same few causes come up again and again.
- Scope creep. APM describes scope creep as the continual extension of a project's scope: extra features, extra deliverables, extra rounds of changes, added bit by bit without anyone agreeing to the extra time or money.
- Optimistic timelines. People are consistently bad at estimating their own work. In a well-known study of the "planning fallacy", students predicted they would finish their theses in about 34 days on average; they actually took about 56 (Buehler, Griffin and Ross, 1994). Most of us plan for the best case.
- Waiting on the client. Content that never arrives, feedback that takes three weeks, a decision-maker who appears at the end and changes everything.
- Work scattered everywhere. Briefs in email, feedback in WhatsApp voice notes, files in three different drives, tasks in the founder's head.
- No visible progress. The client cannot see what is happening, so they worry, chase and micromanage.
Every chapter in this guide tackles one or more of these. This one deals with the first: getting the scope clear enough that everyone knows what they are agreeing to.
The one-page scope document
You do not need a long contract to start every project, but you do need a one-page scope that the client has read and agreed to. It can live in a proposal, a statement of work or a shared document. Here are the sections that matter:
- Goal. Why the client wants this, in their words. "Get more bookings from the website" is a goal; "a five-page website" is a deliverable.
- Deliverables. Exactly what you will hand over. Be specific: "home, about, services, contact and booking pages, written copy for each, set up on the client's domain".
- Out of scope. What you will not do. This is the most useful section of all. "Product photography, logo design, ongoing hosting and blog posts are not included."
- Timeline and milestones. The main checkpoints with dates, such as "design approved", "content complete", "site live".
- Revisions. How many rounds of changes are included at each stage, and what happens after that.
- Client responsibilities. What you need from them and by when: content, logins, feedback within a set number of working days, one person who can approve.
- Price and payment. The fee, the deposit, and when the other payments are due.
- How changes work. The process for anything new (see below).
If you want a starting point, our free statement of work template covers these sections.
A worked example
Imagine a two-person design studio taking on a rebrand for a small restaurant. Here is how the scope might read:
Goal: A fresh brand that makes the restaurant feel modern and helps it attract a younger lunchtime crowd.
Deliverables: A logo in full colour, one colour and white; a colour palette and two fonts; a one-page brand guide; a menu design for print and PDF; three social media templates.
Out of scope: Signage production, photography, website changes, printing costs.
Milestones: Discovery call (week 1), three logo concepts (week 2), chosen concept refined (week 3), full brand kit and menu (week 5), handover (week 6).
Revisions: Two rounds on the chosen logo, two rounds on the menu. Further rounds billed at the hourly rate.
Client provides: Current menu text by week 2; feedback within three working days; the owner signs off each milestone.
Payment: 50% deposit, 50% on handover.
The whole scope fits on one page, and the owner can read it in three minutes. That matters: a scope nobody reads protects nobody. If yours runs to several pages, move the detail into an appendix and keep the summary short.
Notice how much arguing this prevents. When the owner asks in week 4 "could you also do the website?", the answer is friendly and easy: "Happy to. That's outside this project, so I'll send a separate quote."
A simple change request process
Changes are normal. Clients learn things during a project, and some changes make the result better. The problem is not change; it is unagreed change. A three-step process keeps it fair:
- Write it down. Every new request goes into the project, not just a chat message. "Add a gallery page."
- Say what it costs. Extra time, extra money, or what gets dropped to make room. "About two days' work, or we swap it for the menu PDF."
- Get a yes before starting. A written approval, even a one-line reply, before the work begins.
Our blog post on how to scope a client project so it doesn't creep goes deeper into wording and difficult conversations.
Price the project so it survives surprises
A scope is only half the agreement. The other half is a price that still works if things take longer than planned, which, as the planning fallacy research shows, they usually do. Three habits help.
- Estimate from tasks, not from a feeling. List the main tasks, estimate hours for each, add them up, then multiply by your hourly rate. If you are not sure what your rate should be, work it out from your yearly costs and the hours you can really bill, not the hours you are at your desk.
- Add a buffer you can explain. Many small studios add 15 to 25% for meetings, feedback rounds and the unknown. It is not padding; it is the time every project needs that never appears on a task list.
- Take a deposit. A deposit confirms commitment and protects your cash flow if the project stalls. Half up front is common for short projects; for longer ones, tie payments to milestones.
Write the price and payment schedule into the scope, next to the milestones they relate to. When the client approves the design milestone, they know the next payment is due, and so do you.
If the project is large or risky, consider splitting it. A paid discovery phase of a week or two, with its own small fee, lets both sides learn enough to price the main project properly. It also filters out clients who are not ready to commit.
Run a short kickoff
Once the scope is agreed and the deposit is paid, hold a kickoff meeting. It does not need to be long; 30 to 45 minutes is enough for most small projects. The goal is to make sure everyone starts with the same picture and knows how the project will run. A simple agenda:
- Introductions (5 minutes): who is on each side and who makes final decisions.
- Goal and success (10 minutes): restate the goal and ask, "if this goes brilliantly, what will be different in three months?"
- Scope walk-through (10 minutes): read the deliverables and the out-of-scope list together.
- Timeline and what we need from you (10 minutes): milestones, feedback windows, content deadlines.
- How we will communicate (5 minutes): where updates will appear, how often, and where to send questions.
- Next steps (5 minutes): the first two or three actions, with owners and dates.
Send a short written summary the same day. It becomes the reference point if anyone remembers the meeting differently later.
Common mistakes at the start
- Starting before the deposit or sign-off. It feels helpful, but it quietly tells the client that the agreement is optional.
- Vague deliverables. "Social media support" can mean anything. Count it: "12 posts a month on two platforms".
- No out-of-scope list. Without it, every request looks like it might be included.
- Unlimited revisions. They lead to endless loops. Two rounds per stage is common and fair.
- Not naming the decision-maker. If the person giving feedback cannot approve, you will redo work when the real approver finally looks.
What good looks like
A good start also feels different for the client. They leave the kickoff knowing who to contact, when they will hear from you, and what they need to do next. Nothing surprises them in week two.
At the end of the first week of a well-started project: the client has agreed a written scope, the deposit is in, the kickoff summary has been sent, the milestones have dates, and the first tasks have owners. You could hand the project to a colleague and they would know what to do next. That is the test.
Setting up the project in startbuddi
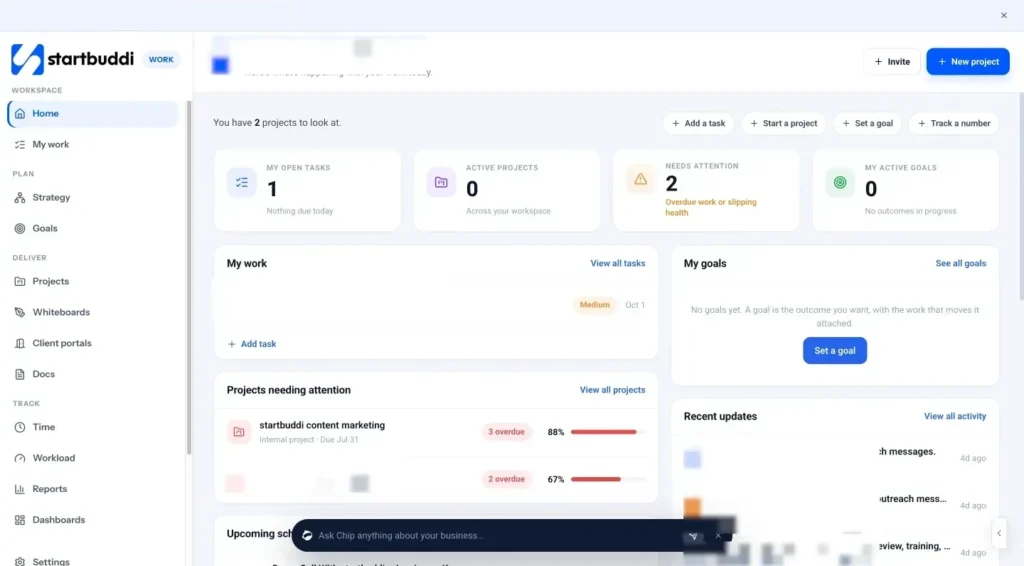
Client projects in startbuddi live in Work, alongside your tasks, time tracking and client portals. Because Work sits in the same system as your customers and your money, the proposal, the project and the invoice are all connected to the same client.
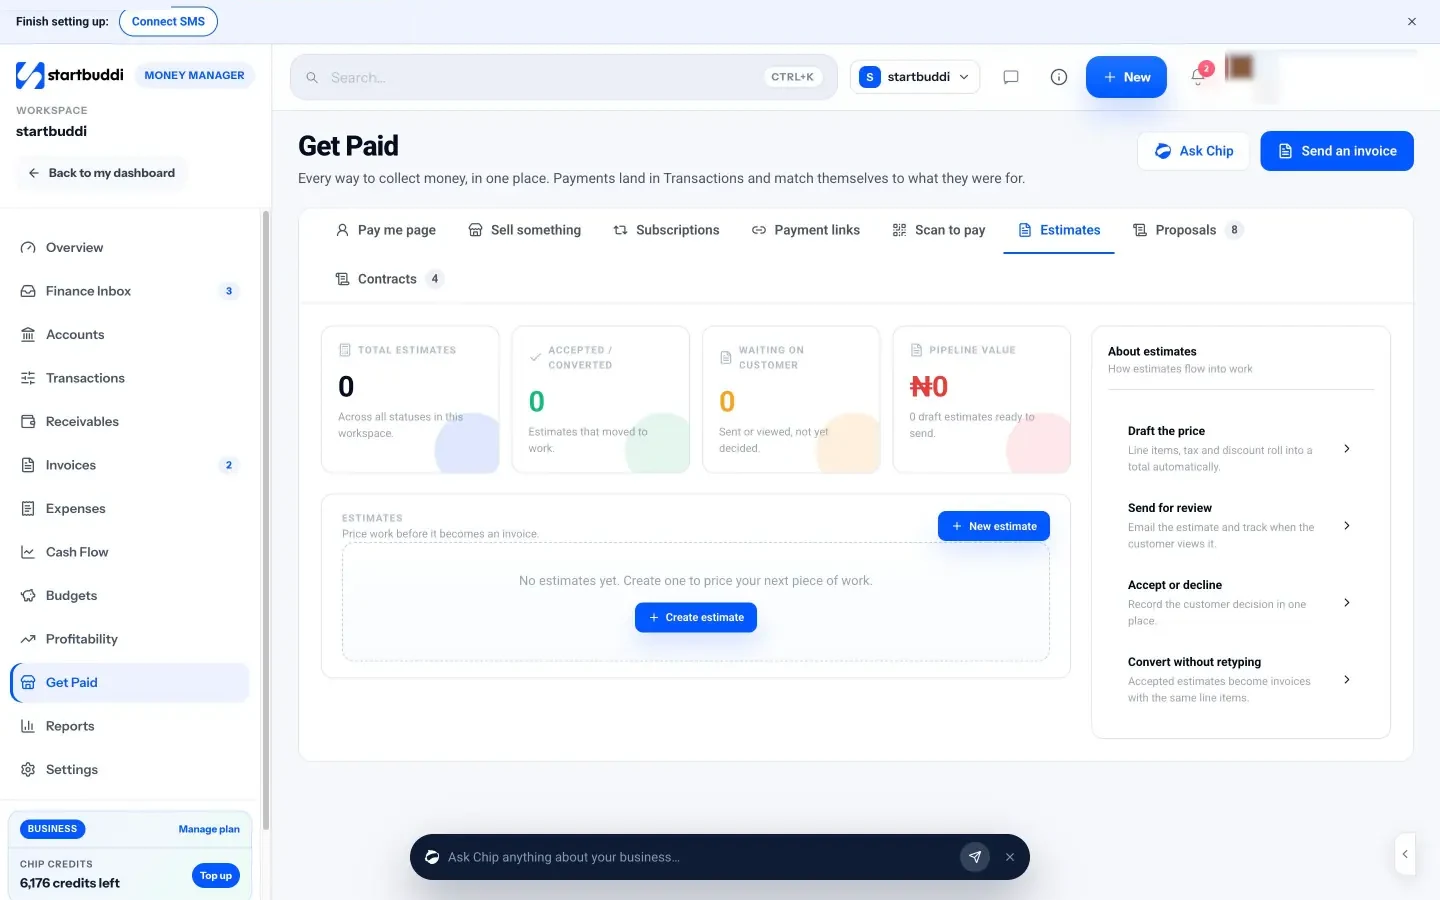
Send the proposal or contract first. In Money Manager, the Get Paid area holds estimates, proposals and contracts. You can start a proposal or a contract from a template (contract templates include Website Development, Brand Design and Freelance contracts), add pricing, and send it for signature. The status moves to Signed when everyone has signed. Templates are a starting point, not legal advice, so have anything important reviewed. See estimates, proposals and contracts for more.
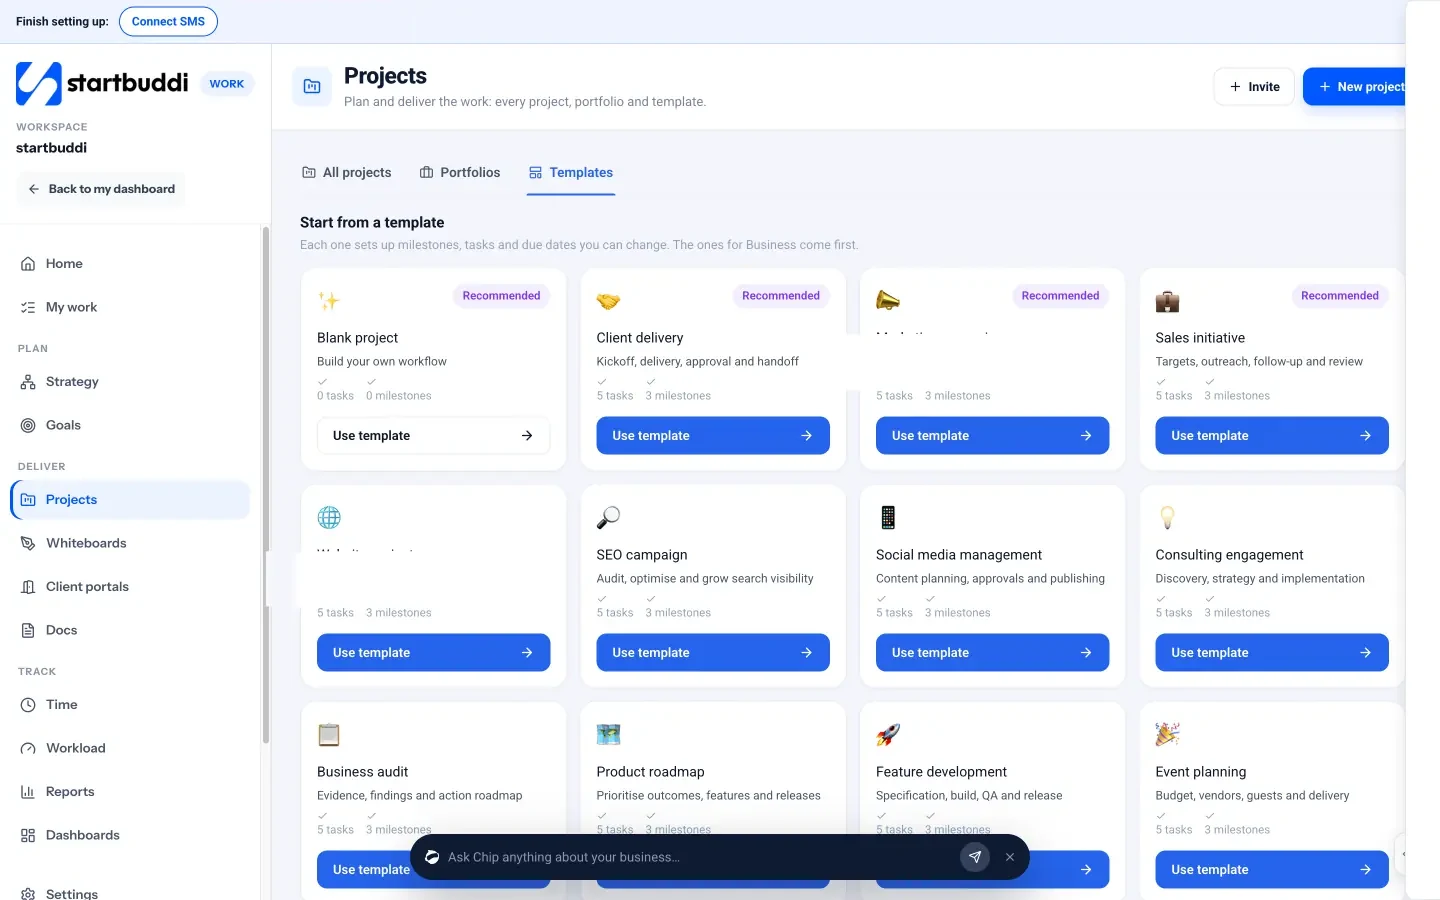
Start the project from a template. Go to Work, then Projects, and open the Templates tab. Each template sets up milestones, tasks and due dates you can change, and the ones that match your type of business come first with a Recommended label. There are templates for Client delivery, Website project, Consulting engagement, Creative production, Marketing campaign, Event planning and more. For a new kind of project, start blank instead: click Start a project, type the name ("What are you working on?"), add a one-sentence description if you like, pick a colour, and link the customer or mark it as an internal project. Only the name is needed; everything else can change later.
Put the scope where the work is. Write the scope in Documents and link it to the project from the References tab, so the whole team works from the latest version. Then add the milestones from your scope on the Milestones tab, each with a due date and an owner. The project's Overview shows progress, open tasks, overdue items and the milestone snapshot at a glance.
Keep the change log in the project. When a new request comes in, add it as a task (for example "Change request: gallery page") and discuss the cost in the task's comments, so the decision and the approval sit next to the work. Each project also gets its own discussion room in Chat for day-to-day questions.
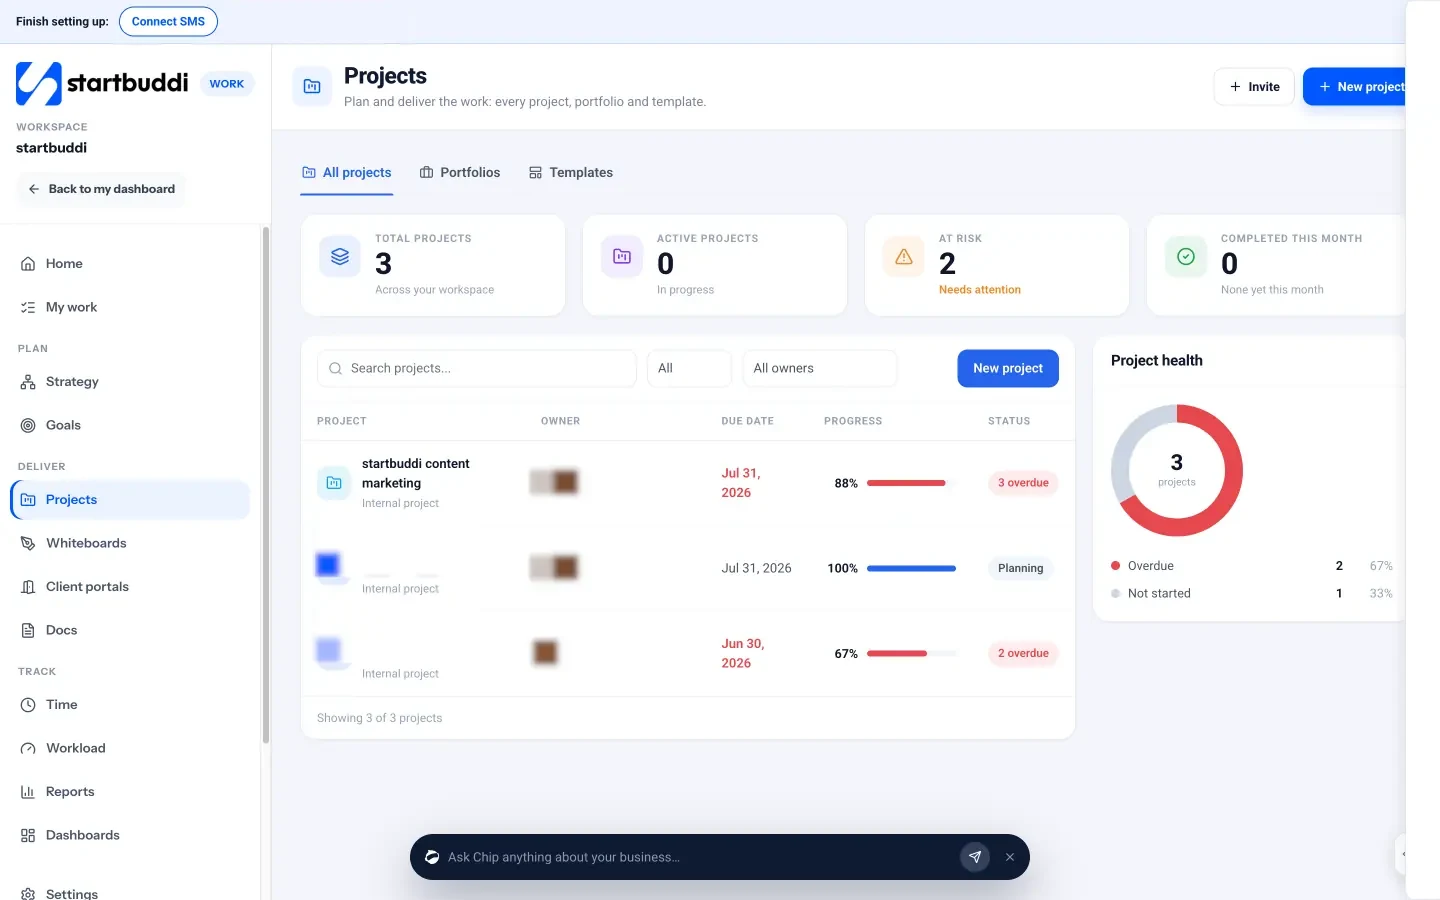
You can read more about how projects work on the Projects page.
Your task for this chapter
Take your next (or current) client project and write its one-page scope, with a real out-of-scope list and a named decision-maker. Book a 30-minute kickoff, and set the project up in Work with its milestones. In the next chapter, we will turn those milestones into tasks with owners and realistic dates.
Plan the work: milestones, tasks, owners and realistic dates
- From deliverables to milestones to tasks
- How to write a good task
- Who does what
- Estimate honestly
- Dependencies and the critical path
- A worked example: the restaurant rebrand, planned
- Reuse your plans
- Balance the workload
- A weekly planning rhythm
- Priorities when everything feels urgent
- Common planning mistakes
- What good looks like
- Planning the work in startbuddi
- Your task for this chapter
A scope tells everyone what you will deliver. A plan tells everyone how and when. For small teams, the plan does not need to be elaborate, but it does need three things: work broken into pieces small enough to finish, one clear owner for every piece, and dates that allow for real life. This chapter covers how to break a project into milestones and tasks, how to estimate honestly, how to handle work that depends on other work, and how to keep one person from carrying the whole team.
From deliverables to milestones to tasks
Think of a project as three levels.
- Deliverables are what the client receives: the logo, the menu, the website.
- Milestones are the checkpoints on the way, usually where the client approves something: "concepts presented", "design approved", "content complete", "site live".
- Tasks are the actual pieces of work people do between milestones: "draft three logo concepts", "prepare concept presentation", "send concepts to client".
Start with the milestones from your scope. For each one, ask: "What has to be done for this milestone to be reached?" Write each answer as a task. Keep going until every task is something one person could finish in a day or two. If a task would take a week, it is really several tasks.
How to write a good task
A task list is only useful if anyone on the team can read it and know what to do. Four rules make tasks clear:
- Start with a verb. "Homepage" is a topic. "Write homepage copy" is a task.
- Make "done" obvious. "Send three logo concepts to client as a PDF" leaves no doubt about when it is finished.
- One owner. Two names on a task usually means nobody feels responsible. Others can help, but one person is accountable.
- A realistic due date. Not every task needs a date, but anything on the critical path (see below) does.
Here is a before and after from a website project:
| Before | After |
|---|---|
| Content | Collect services text and photos from client (owner: Ada, due Tue) |
| Design | Design homepage in desktop and mobile (owner: Tunde, due Fri) |
| Fix stuff | Apply client's round 1 changes to homepage (owner: Tunde, due next Wed) |
| Launch | Connect client domain and test booking form (owner: Ada, due launch day) |
Who does what
On a small team, confusion about roles causes more delays than lack of skill. A simple way to clear it up is a RACI list for the main parts of the project: for each area, name who is Responsible for doing the work, who is Accountable for the result (usually one person), who should be Consulted before decisions, and who should be Informed afterwards. For a solo founder the list is short, but it still helps: often the "consulted" person is the client, and writing that down reminds you to ask before, not after.
If you work alone, owners still matter. Some tasks belong to the client ("send logo files"), and giving them an owner and a date makes the dependency visible to both of you.
Estimate honestly
Remember the planning fallacy from chapter 1: in Buehler, Griffin and Ross's study, students' thesis predictions were on average about three weeks short, and fewer than a third finished by the date they predicted. Business projects are no different. Some habits that help:
- Use your own history. If the last three websites took 30, 34 and 41 hours, the next one will not take 20. This is why tracking time (chapter 4) pays for itself.
- Estimate in hours, then convert to days. A task that takes six hours of focused work rarely fits into one day of meetings, messages and interruptions.
- Add review and feedback time explicitly. "Client feedback: 3 working days" is a real item on the timeline.
- Keep a buffer before the final date. Promise the client a date a few days after your internal target.
Dependencies and the critical path
Some tasks cannot start until others are done. You cannot design the menu until the client sends the menu text. You cannot launch the site until the domain is connected. These links are called dependencies, and they decide how long the project really takes.
The critical path is the longest chain of dependent tasks from start to finish. Any delay on that chain delays the whole project. Delays on other tasks may not matter at all, as long as they finish before the tasks that depend on them. Knowing the critical path tells you where to focus: chase the client for the menu text, because everything else is waiting on it; do not worry that the social templates slipped a day.
A simple way to find it is to draw the milestones in order on paper, then for each task ask "what does this wait for?" The chain with no slack is your critical path.
A worked example: the restaurant rebrand, planned
Let us take the rebrand scope from chapter 1 and turn one milestone into a plan. The milestone is "Chosen concept refined (week 3)". Here is how the two-person studio might break it down.
| Task | Owner | Estimate | Waits for |
|---|---|---|---|
| Owner picks one of three concepts | Client | 2 working days | Concepts presented |
| Refine chosen logo (round 1) | Tunde | 6 hours | Owner picks concept |
| Choose colour palette and fonts | Ada | 4 hours | Owner picks concept |
| Send refined logo and palette for feedback | Ada | 1 hour | Both tasks above |
| Client feedback on round 1 | Client | 3 working days | Refined logo sent |
| Apply round 1 changes | Tunde | 3 hours | Client feedback |
| Owner signs off the logo | Client | 1 working day | Changes applied |
A few things stand out once it is written down. The client owns three of the seven tasks, and together they account for six working days, more than all the studio's work combined. The logo refinement and the palette can happen at the same time, because both only wait for the owner's choice. And the critical path runs through the client's decisions, so the most useful thing Ada can do this week is not design at all: it is booking a 15-minute call to get the concept choice made on day one instead of day two.
That is the real value of planning at this level. It shows you where time actually goes, and it turns vague worry ("we are behind") into a specific action ("get the decision today").
Reuse your plans
Most service businesses run the same kinds of project again and again. After two or three, you will have a plan that works: the same milestones, the same tasks, similar estimates. Save it as your starting point. Next time, you adjust dates and names instead of starting from a blank page, and your estimates get more accurate with every project.
Balance the workload
Plans fail quietly when one person has too much. On a small team it is usually the founder or the most experienced person, who ends up as the owner of every hard task. Before you commit to dates, look at the week ahead for each person:
- Add up the estimated hours of their tasks due that week.
- Compare it with the hours they actually have, after meetings, admin and other clients.
- If someone is over, move a task, change a date, or tell the client now rather than on the due date.
A weekly planning rhythm
A plan is not a document you write once. It is a list you look at every week. A 30-minute planning session every Monday keeps it true:
- What did we finish last week? Mark it done.
- What is due this week, and who owns it?
- What are we waiting on, and from whom? Chase it today.
- Is anything at risk? Change dates or scope now, and tell the client.
Keep it to 30 minutes by standing up, or by agreeing that anything needing a longer discussion gets its own meeting.
Priorities when everything feels urgent
When several clients are active at once, everything can feel urgent. A simple order of priority helps the team decide without asking the founder every time:
- Tasks on a critical path with a client date this week.
- Anything the client is waiting on from you, because every day you hold it is a day lost on their side.
- Tasks due this week that are not on a critical path.
- Everything else, including internal improvements.
Write this order down and share it. It turns "what should I work on?" into a question people can answer for themselves.
Common planning mistakes
- Tasks that are really projects. "Build website" as one task hides fifty decisions.
- Everything due on the final date. If every task shares the deadline, you have no early warning.
- Forgetting client tasks. Their content and feedback are on the critical path too.
- Planning once and never looking again. A plan that is out of date is worse than none, because people trust it.
- Hiding problems. A slipped date told early is a conversation; told on the day it is a crisis.
What good looks like
A healthy plan has every milestone broken into tasks, every task owned by one person, dates on everything that matters, the client's tasks visible, and nobody booked beyond their real hours. When someone asks "what is next?", anyone on the team can answer by looking, not by asking the founder.
Planning the work in startbuddi
Inside a project in Work, the tabs along the top follow the same shape as this chapter: Milestones, Tasks and Timeline, plus Budget, Activity, References, Client portal and Settings.
Add milestones. On the Milestones tab, add each checkpoint with a name (such as "Design approved"), a due date, an owner and a health status (On track, At risk or Blocked). You can link tasks to a milestone so its progress reflects the work behind it.
Add tasks. Use the + Add menu or the Tasks tab to create a task. The New task form has a title, description, project, assignee, status, priority (Urgent, High, Medium or Low), due date, a parent task if it belongs under another, and a repeat option for recurring work. Open any task to add subtasks, set an estimate in hours, log time, link a document, attach files and comment. Type @ to mention a teammate. You can also type @chip in a comment to ask Chip, the built-in AI assistant, for help with that task.
Set dependencies. In a task, the Blocked by and Blocking fields record what it waits for, with an optional lag in working days. On the Timeline tab, the project appears as a Gantt chart: bars for each task, arrows for dependencies, diamonds for milestones and a line for today. You can drag a bar to move it, drag its ends to change the dates, and drag from one task onto another to make it wait. The Critical highlight shows your critical path, and when you move a task that others depend on, startbuddi asks whether to move them too.
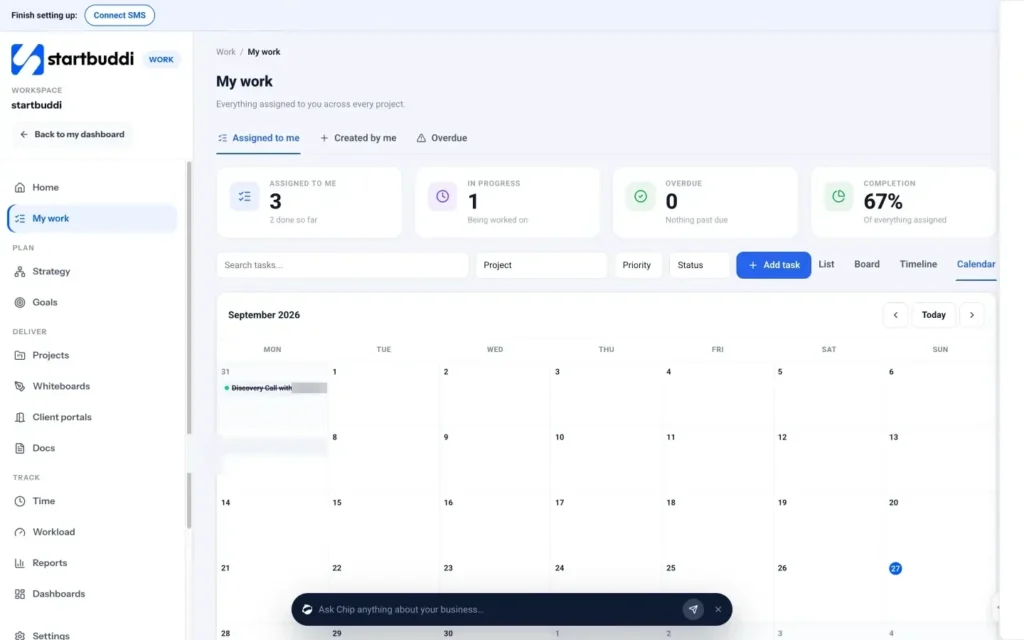
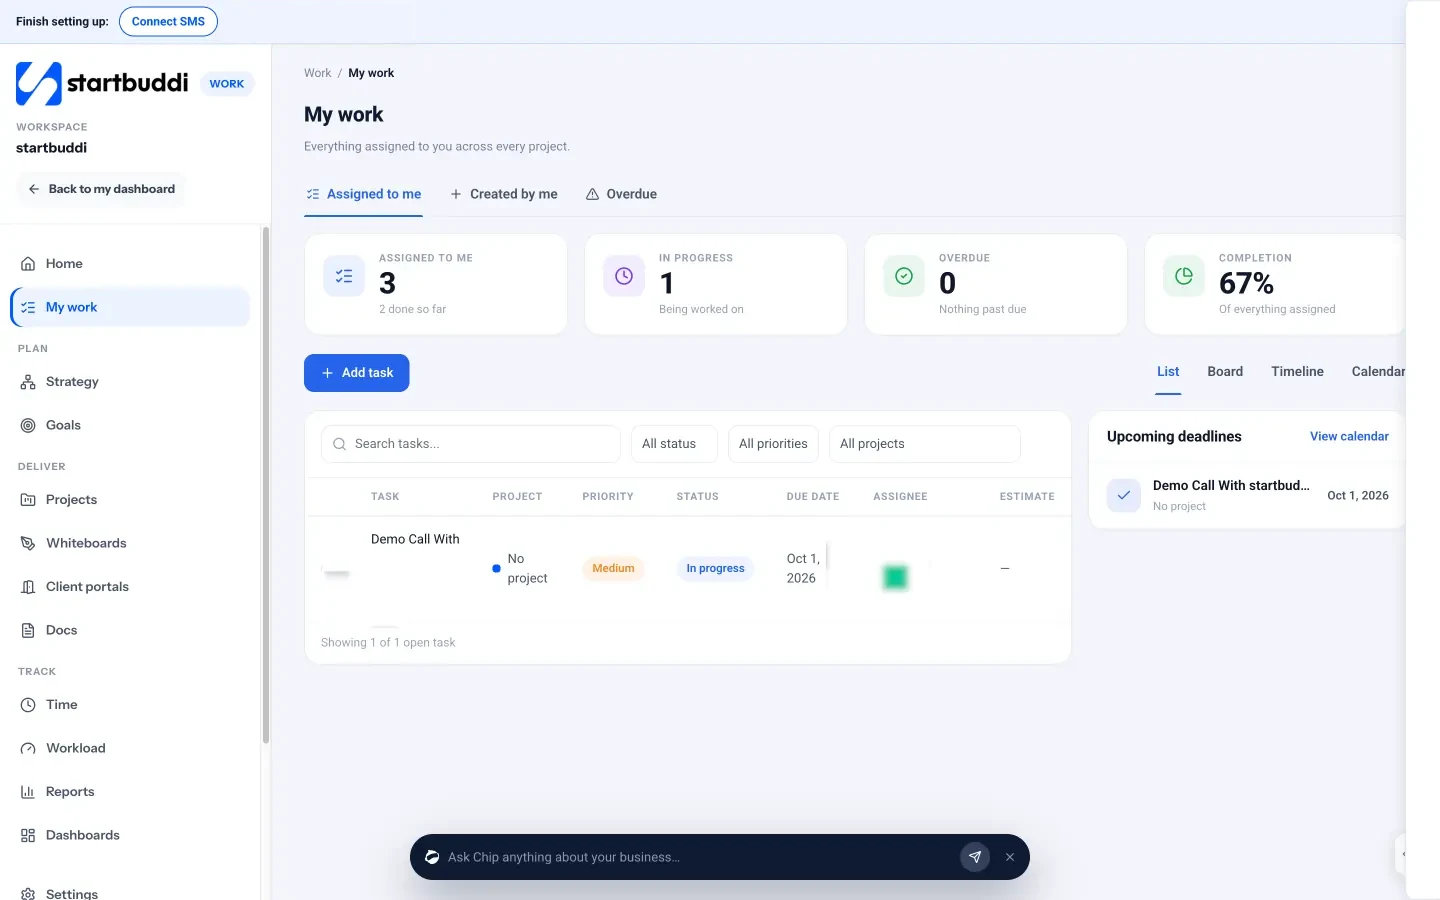
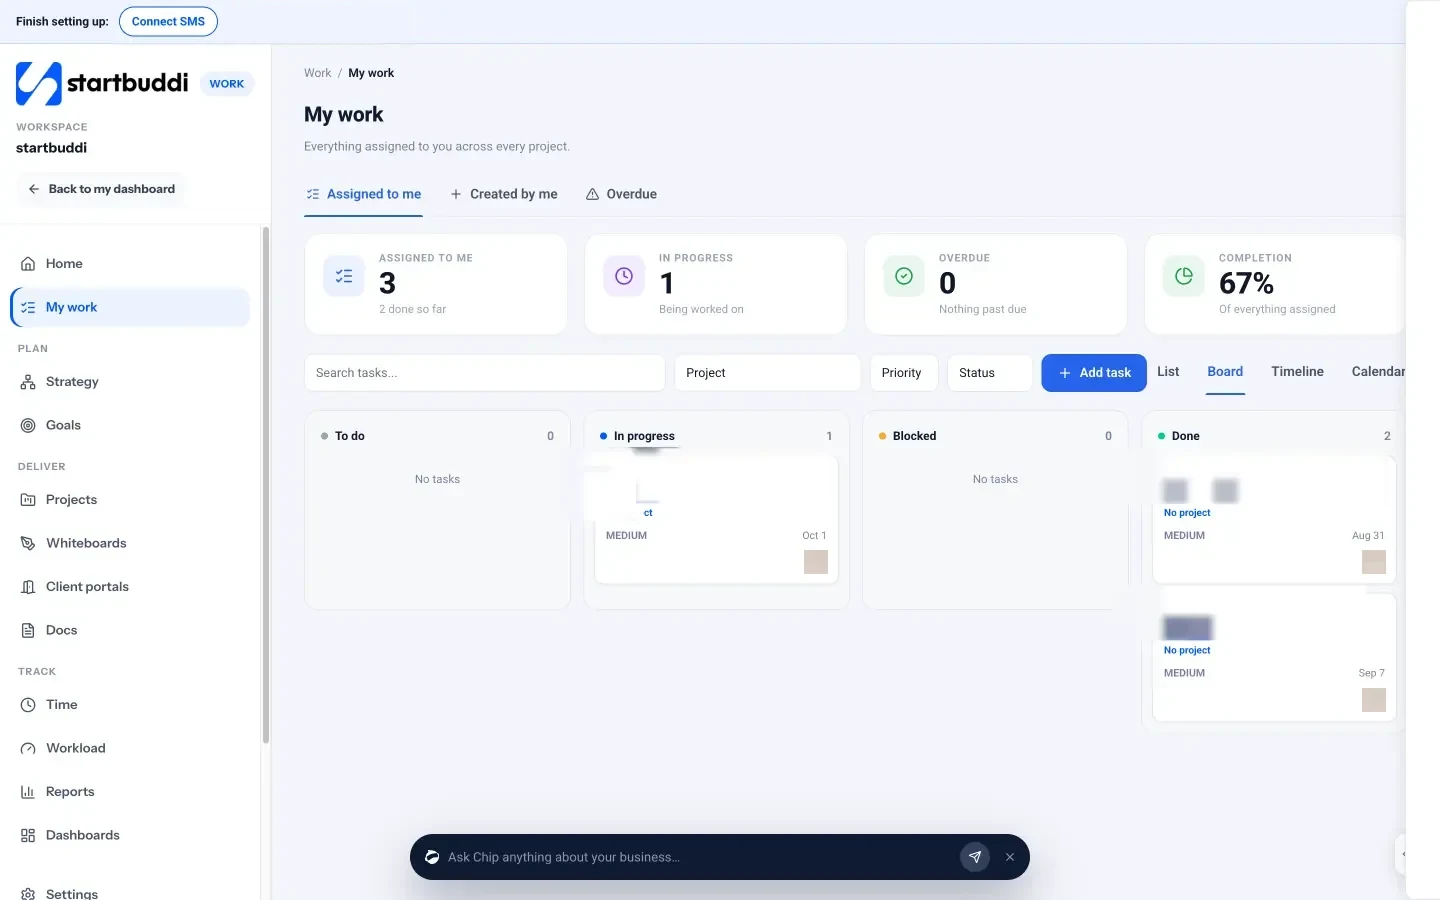
See everyone's week. Each person has My work, which lists every task assigned to them across all projects, with List, Board, Timeline and Calendar views and a filter for overdue work. The Board view groups tasks into To do, In progress, Review and Done, and you drag cards to move them along.
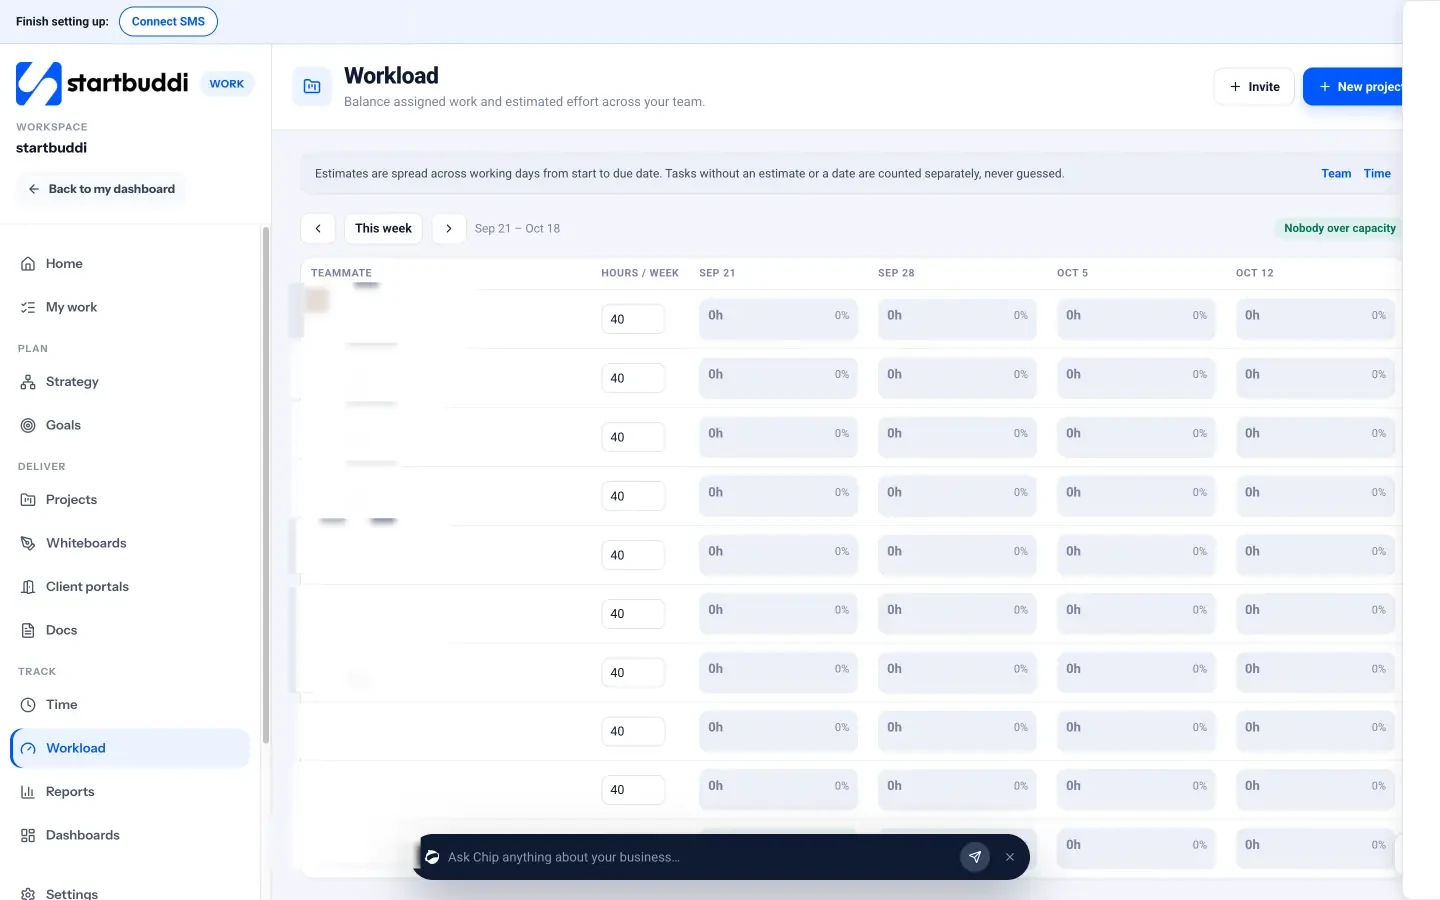
Balance the load. Managers, admins and owners can open Workload, which shows each teammate's hours per week, worked out from task estimates spread across working days from start to due date. Tasks without an estimate or a date are counted separately rather than guessed. If someone is over capacity, reassign a task straight from the grid.
For more detail, see the Projects page.
Your task for this chapter
Break each milestone of your project into tasks that take a day or two, give every task one owner and the important ones a due date, and mark what each task waits for. Look at the timeline and find your critical path, then check nobody is booked beyond their real hours next week. In the next chapter, we will open the project up to the client.
Keep clients in the loop: updates, approvals and a client portal
- Why communication is part of the work
- Decide the communication rules at the kickoff
- The weekly update template
- Approvals that do not stall the project
- Meetings: fewer, shorter, with a purpose
- Different clients need different amounts of contact
- Handling feedback well
- Why a client portal helps
- When the client goes quiet or turns difficult
- A message for when things slip
- Common communication mistakes
- What good looks like
- Keeping clients in the loop with startbuddi
- Your task for this chapter
Clients rarely complain about the work itself when they can see it moving. Most frustration on client projects comes from silence: not knowing what is happening, chasing for updates, and feedback that gets lost between email, WhatsApp and phone calls. This chapter covers how to keep clients informed without spending your whole week writing updates, how to run approvals so feedback arrives on time, and how a client portal gives each client one place to see everything.
Why communication is part of the work
From the client's side, a project is mostly invisible. They see the kickoff, then nothing for two weeks, then a presentation. If that silence makes them nervous, they fill it with messages: "any update?", "just checking in", "can we have a quick call?". Each one interrupts your work and, worse, signals that trust is slipping.
The fix is not more messages. It is predictable, regular updates in one place. When clients know that every Friday afternoon they will get a short update, and that they can look at progress any time, they stop chasing. You spend less time on communication overall, not more.
Decide the communication rules at the kickoff
Agree three things in the kickoff meeting from chapter 1, and write them in the summary:
- Where things live. "All files, updates and approvals will be in your project page. Please send feedback there rather than by WhatsApp, so nothing gets lost."
- How often you will update them. "A short update every Friday, and a message whenever we need something from you."
- How fast each side responds. "We reply to messages within one working day. We need feedback on each milestone within three working days to keep to the timeline."
It is much easier to hold these rules if you set them at the start than to introduce them after the client has got used to sending voice notes at 10pm.
The weekly update template
A good update takes 10 minutes to write and two minutes to read. Use the same four headings every week so clients know exactly where to look:
Done this week: Three logo concepts presented. Colour palette drafted.
Next week: Refine the chosen concept. Start the menu layout.
Needed from you: Your choice of concept by Tuesday, and the final menu text by Thursday.
Risks or changes: None. We are on track for handover on 14 November.
The "Needed from you" line is the most important. It turns the client's tasks into something specific and dated. The "Risks" line builds trust: when you do need to say "the menu text is late, so handover moves by three days", it does not come as a shock.
Approvals that do not stall the project
Approvals are where projects most often slow down. The client means to look, gets busy, and a three-day review becomes three weeks. Some ways to keep approvals moving:
- Ask for one decision at a time. "Please approve the logo" is easier than "please review everything".
- Give a deadline and a reason. "If we have your approval by Tuesday, we keep the 14 November handover."
- Make feedback specific. Ask the client to comment on the thing itself, not in a separate email, and to separate "must change" from "nice to have".
- Count the rounds. If the scope includes two rounds, say so when you send round two: "This is the second of two included rounds."
- Record the approval. A written "approved" next to the deliverable, with a date, prevents "I never agreed to that" later.
- Send one reminder, then escalate politely. If there is no response by the deadline, remind once, then explain the effect on the timeline.
Meetings: fewer, shorter, with a purpose
Some clients want a weekly call. Others would rather never speak. Match the client, but give every meeting a job. Three kinds of meeting cover most client projects:
- Milestone reviews. Presenting a deliverable for approval. Walk through the thinking, ask for the decision, and agree the feedback deadline before the call ends.
- Short check-ins. Fifteen minutes, only on longer projects, to clear blockers. If the written update already covers everything, cancel the call and say why: "Nothing needs discussing this week, so I've cancelled to give you the time back."
- Problem calls. When something has gone wrong, a call is better than a long email. Prepare the facts and two or three options before you dial.
After every meeting, send a short note with the decisions made and the next actions with owners and dates. It takes five minutes and prevents most "I thought we said" arguments later.
Different clients need different amounts of contact
A first-time client who has never hired an agency may need more reassurance: a slightly longer update, a quick voice note when you hit a milestone, an explanation of why a step takes as long as it does. A repeat client who knows how you work may want only the essentials. A client with a board or a boss above them may need updates they can forward as they are. Ask at the kickoff: "What do you need from our updates so you can report back internally?" Then shape your update to fit, while keeping the same four headings so it stays quick to write.
Handling feedback well
Feedback can feel personal, especially on creative work. A few habits make it easier on both sides:
- Thank the client, even when the feedback is hard to hear. They are telling you what they need.
- Ask about the problem behind a request. "Make the logo bigger" often means "I'm worried people won't notice it".
- Collect all feedback for a round before changing anything, so you do not redo work.
- When feedback falls outside the scope, use the change request process from chapter 1 rather than quietly absorbing it.
Why a client portal helps
A client portal is a private page where a client can see their project: progress, files, documents, things waiting for their approval, messages and invoices. The glossary entry on client portals explains the idea in more detail. For a small business, a portal solves four problems at once.
- One place for everything. The client never asks "which email was the latest version in?"
- Progress is visible. The client can check any time, so they chase less.
- Approvals are recorded. Each approval sits next to the deliverable, with a date.
- It looks professional. A branded page for their project says "this is a business that has its act together".
The trade-off is that you choose what the client sees. Internal notes, rough drafts and team discussion should stay internal. A good portal shares only what you decide to share. Our post on why client portals save service businesses hours each week covers when a portal is worth setting up.
A portal also does not replace conversation. It replaces the chasing, the lost files and the "which version?" questions. You still pick up the phone at the important moments: when you present a big milestone, when something goes wrong, and at the end of the project. The portal just means those conversations are about decisions, not about finding things.
When the client goes quiet or turns difficult
Even with good habits, some projects hit trouble. Two situations are common.
The client goes silent. You need content or a decision, and nothing comes. Send one friendly reminder with the deadline and the reason. If there is still nothing, send a short, factual note: "We are paused until we receive the menu text. Once it arrives, we'll need about two weeks to finish, so handover will move to [date]." This is not a threat; it is information, and it moves responsibility back to where it belongs.
The client keeps changing their mind. Go back to the scope and the approval record. "You approved the logo on 3 November. Changing it now is possible, but it's outside this project. Shall I send a quote?" Most clients accept this calmly when the record is clear. If you have no record, you are negotiating from memory, and memory always loses.
A message for when things slip
Sooner or later you will need to tell a client that a date is moving. Keep it short, factual and forward-looking. A template:
"Hi [Name], a quick heads-up on the rebrand. The menu design is taking longer than planned because [reason]. The new handover date is [date], three days later than planned. Everything else is on track, and nothing is needed from you right now. Happy to talk it through if useful."
Common communication mistakes
- Different conversations on email, WhatsApp, calls and social DMs, with nobody able to find the final decision.
- Only contacting the client when you need something.
- Sending big files as attachments that get lost or blocked.
- Hiding a delay until the due date.
- Sharing internal notes or unfinished drafts by accident.
What good looks like
On a project with good communication, the client knows what is happening without asking, feedback arrives inside the agreed window, every approval is written down, and the team spends minutes a week on updates rather than hours. At the end, the client says the project felt easy, which is often the reason they come back or refer you.
Keeping clients in the loop with startbuddi
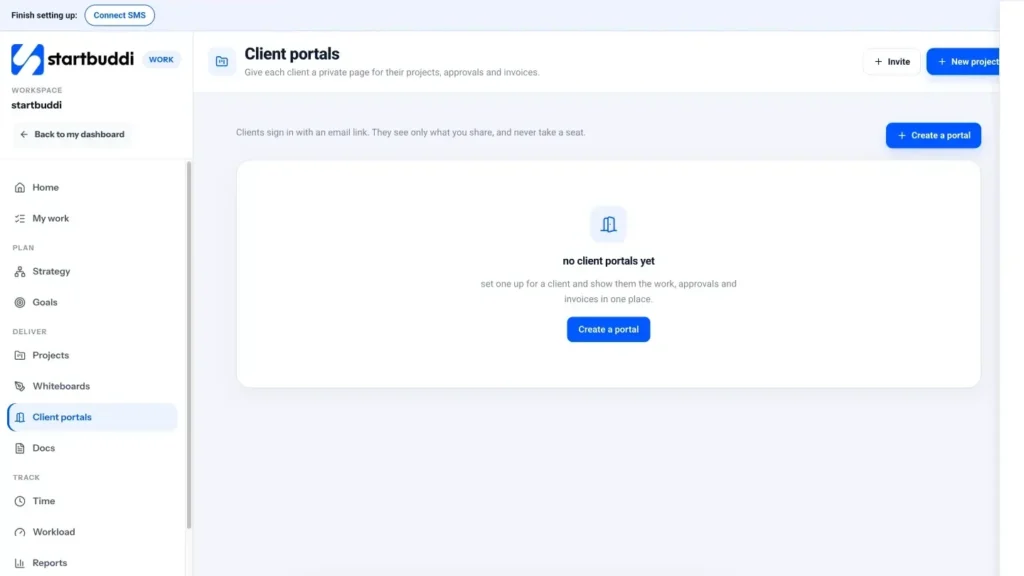
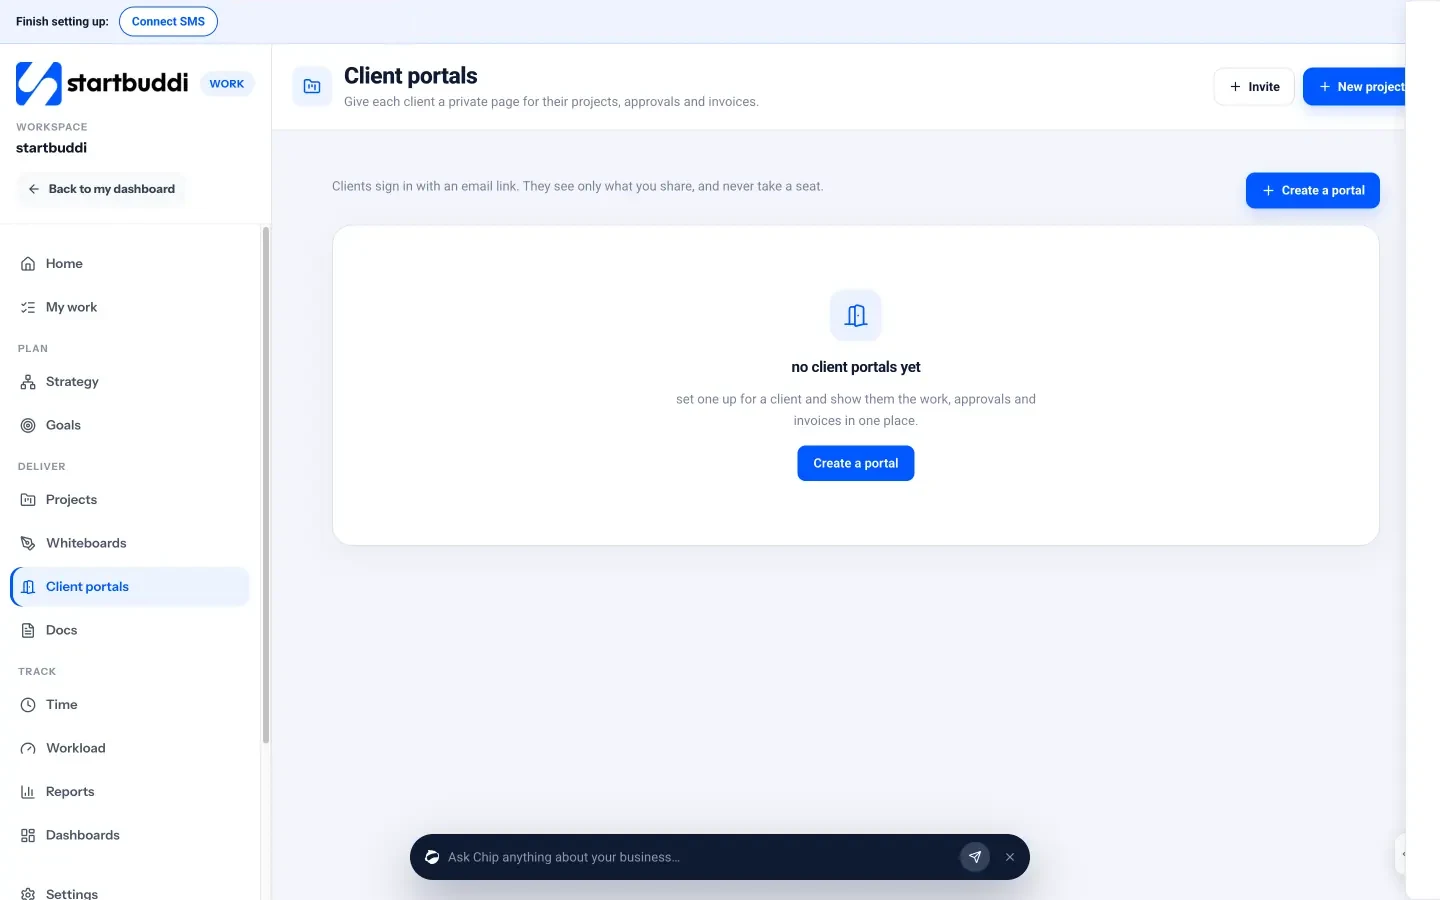
In startbuddi, Client portals live in Work. Each portal is a private, branded page for one client, linked to their projects.
Create a portal. Open Work, then Client portals, and create a portal. Pick the client contact and company, name the portal (for example "Amaka's rebrand"), and choose which projects it covers. Linking a project does not show anything inside it yet; nothing reaches the client until you share it. Then choose what the client can see: modules include Projects, Tasks, Milestones, Deliverables, Files, Documents, Reports, Messages, Contracts, Invoices, Approvals and Forms. Add your brand colour, logo and a welcome message such as "Hi! This is where you can follow our work together, approve deliverables and message us."
Decide how items reach the portal. You can share only the items you pick, or share everything in the linked projects that is marked as visible to the client. When you share a deliverable, you can share it for approval. With approvals switched on, a shared deliverable cannot be marked done until the client approves it, and you can turn on reminders so the client is nudged about anything waiting for them.
Start with a checklist. In the portal's Checklists tab, start from the new client onboarding template, or a launch or handover one. Each item is for the client or your team: book a time, upload files, answer a question, share a link or share a login. Logins go into the portal's access vault, encrypted, where only named people can see them and every view is logged.
Invite the client. In the portal's People tab, invite the client by email. They get a one-time sign-in link: no password, no startbuddi account, and no seat used on your plan. Use View as client to see exactly what they will see before you send the invite. The Activity log records invites, shares, approvals and requests, which is your approval record from earlier in this chapter.
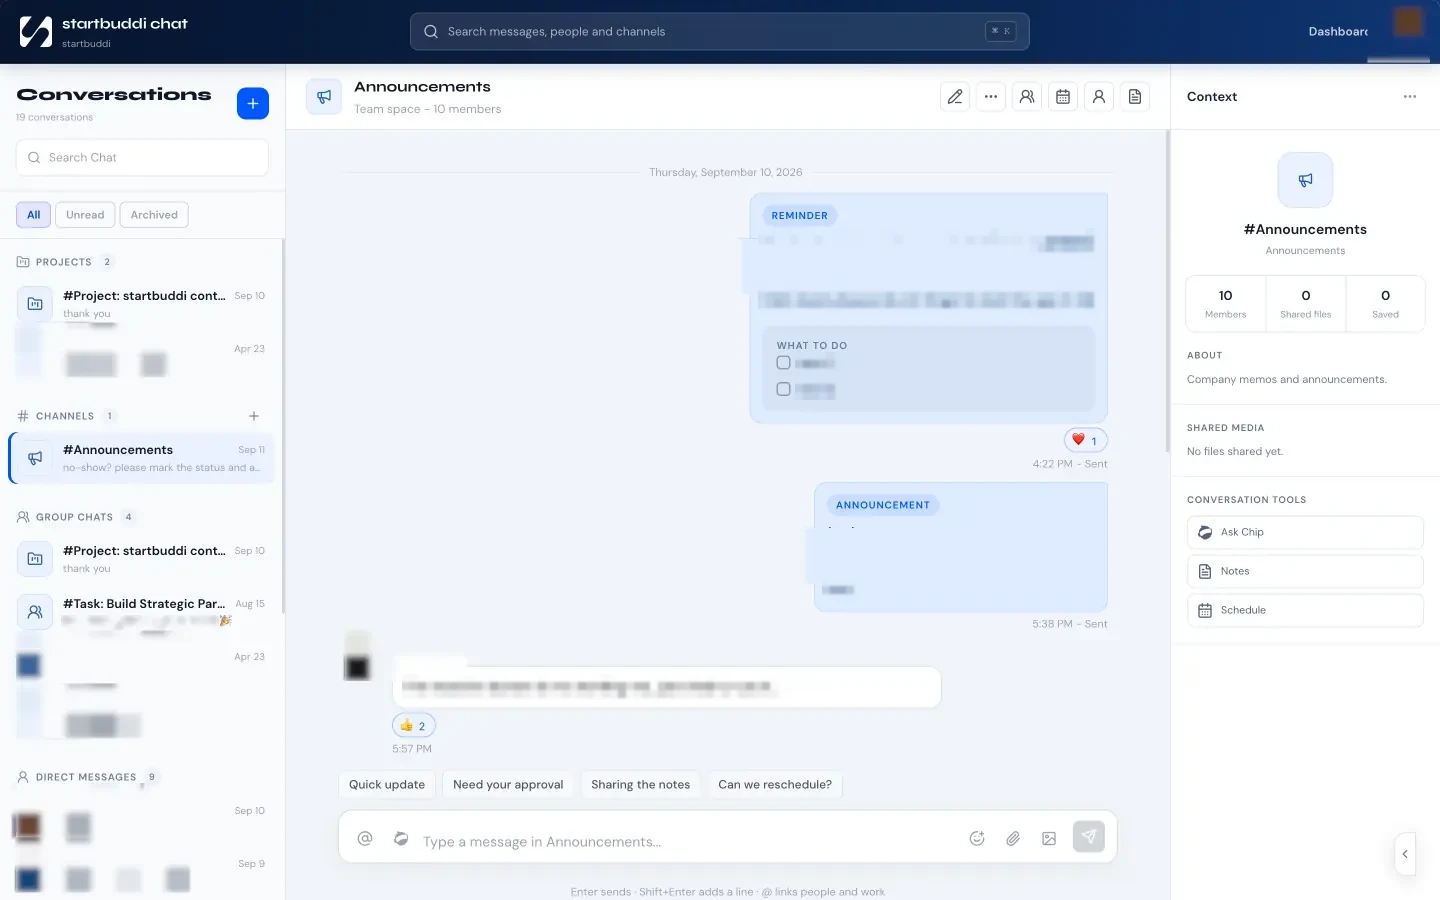
Talk in one place. The portal's Messages tab is a two-way conversation with the client, kept next to their project. For your own team, every project also gets a discussion room in startbuddi Chat, so internal talk stays internal.
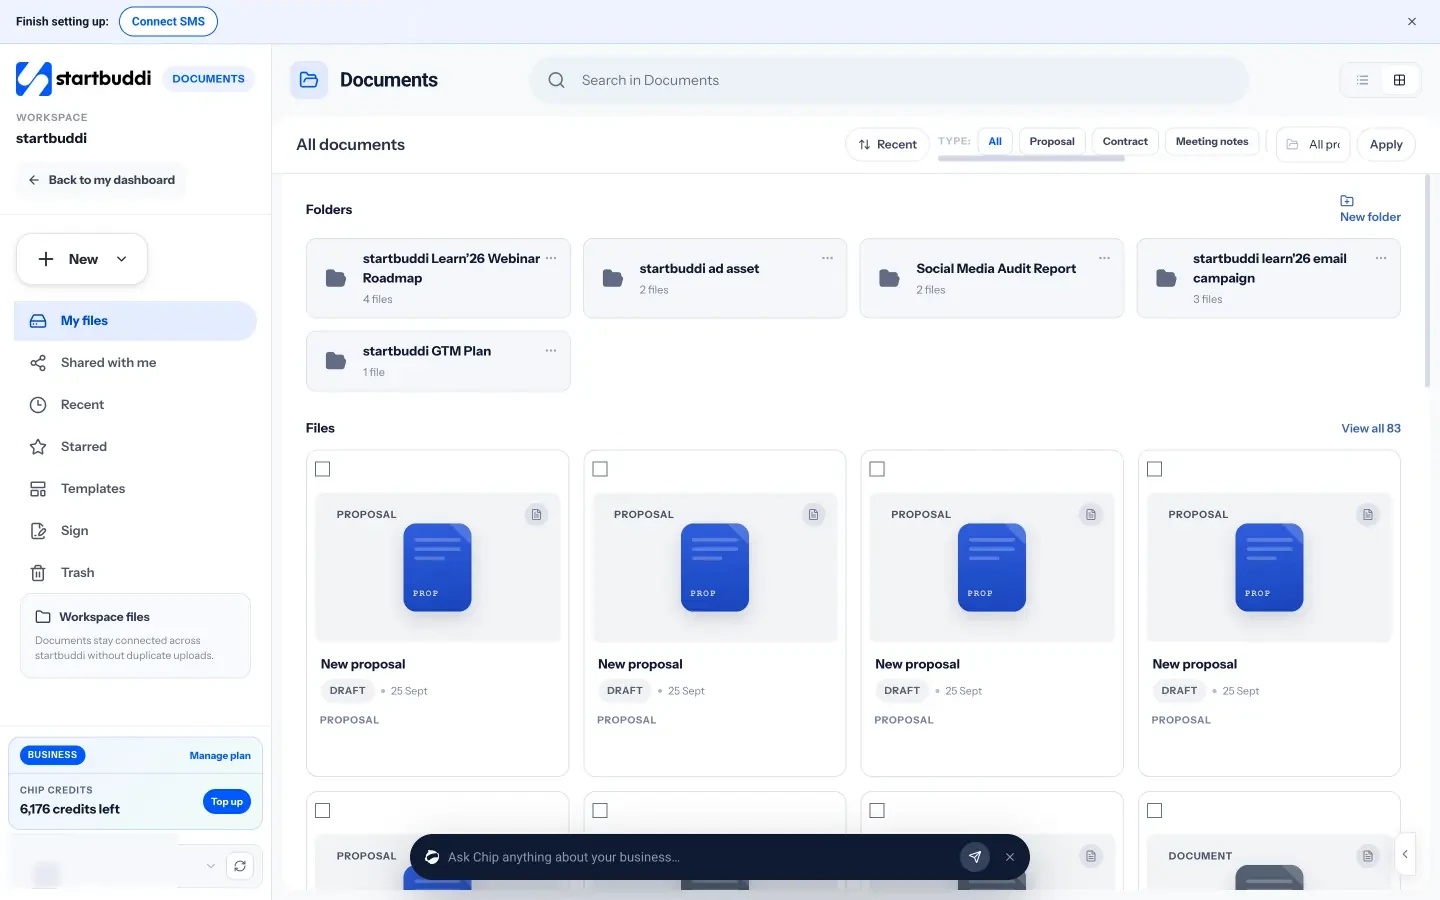
Keep files in Documents. Store briefs, scope documents and deliverables in Documents, then link them to the project from its References tab so everyone uses the latest version. The client sees a document only if you share it to their portal.
A note on plans: on the Free plan you can build a client portal and preview it, but inviting clients needs a paid plan. Starter includes one client portal, Growth includes 10 and Scale includes 50. See Client portals for the details, and pricing for the plans.
Your task for this chapter
Write down your three communication rules and share them with your client. Set a recurring Friday reminder to send the four-line update. Then set up a client portal for your current project, preview it as the client, share the next deliverable for approval, and send the invite. In the final chapter, we will track time and budget and close the project well.
Track time and budget, then close the project well
- Why track time, even on fixed-price work
- How to track time without hating it
- Watch budget and health every week
- Work out what each project really earned
- What to do when a project runs over
- Close the project properly
- Run a 30-minute retrospective
- A worked example: the numbers behind a rebrand
- Turn one project into the next
- Common mistakes at the end
- What good looks like
- Tracking time, budget and health in startbuddi
- Your next step
A project can deliver everything the client asked for and still lose you money. The work took twice the hours you priced, the last invoice went out a month late, and nobody wrote down what to do differently next time. This final chapter covers the numbers side of client project management: tracking time, watching budget and project health each week, handling overruns, and closing the project so it pays, leaves a happy client, and makes the next one easier.
Why track time, even on fixed-price work
If you bill by the hour, tracking time is obviously how you get paid. But it matters just as much on fixed-price projects, because it is the only way to know whether the price was right. Without it, you guess. With it, you know that websites take you about 35 hours, that the second round of changes always takes longer than the first, and that one type of client costs twice as much time as another.
Time tracking also protects your estimates. Remember the planning fallacy from chapter 2: people consistently underestimate their own work. Your own time records are the best cure, because they replace optimism with evidence. Billable hours are the ones you can charge a client for; non-billable hours are everything else it takes to run the project.
How to track time without hating it
- Track against tasks, not just projects. "Rebrand: 6 hours" tells you little. "Refine logo round 1: 6 hours" tells you where time goes.
- Use a timer when you start, not a memory at the end of the week. Reconstructed timesheets are usually wrong, and almost always too low.
- Mark what is billable. Client calls, admin and internal meetings still cost you time, even if you do not bill them. Knowing the split shows your real hourly rate.
- Keep it light. Round to the nearest 15 minutes. The aim is a good picture, not perfect accounting.
Watch budget and health every week
Every project has two budgets: money and hours. For a fixed-price project they are linked. If you priced the rebrand at 50 hours and you have used 40 with the menu still to design, you have a problem to solve now, not at the end.
A five-minute weekly health check covers it. For each active project, ask:
- Time: how many hours have we used, and how many are left in the budget?
- Progress: what share of the tasks or milestones are done?
- Dates: are any milestones late or at risk?
- Money: have the invoices due so far been sent and paid?
Compare the first two answers. If you have used 80% of the hours and finished 50% of the work, the project is heading for an overrun. A simple traffic-light status keeps it quick to read: green (on track), amber (at risk, action planned), red (off track, client needs to know).
Work out what each project really earned
Revenue is not the same as profit. A project that brings in a large fee can still be your worst of the year if it swallowed twice the hours. The simplest measure for a service business is your effective hourly rate on each project:
Effective hourly rate = (project fee − direct costs) ÷ total hours spent
Direct costs are things you paid out specifically for this project: a freelancer, stock images, printing, travel. Total hours include everything, billable or not: calls, admin, revisions and the email chains nobody planned for.
Here is how it plays out. Imagine two projects that each paid ₦600,000. The first had ₦50,000 of printing costs and took 55 hours, so it earned about ₦10,000 an hour. The second had no direct costs but took 110 hours because of endless revisions, so it earned about ₦5,450 an hour. On paper they were the same size. In reality, the second paid you roughly half as much for your time.
Once you work this out for a handful of projects, patterns appear. Some kinds of work, or some kinds of client, are consistently more profitable. That is the information you need to raise prices, change your scope templates, or say no to projects that look good but pay badly.
What to do when a project runs over
Overruns happen. What matters is catching them early and choosing a response deliberately. Your options, roughly in order of preference:
- Check for unagreed scope. Often the overrun is a change that slipped in without a change request. If so, raise it with the client now, using the process from chapter 1.
- Simplify the rest of the work. Is there a lighter way to deliver the remaining milestones that still meets the goal?
- Talk to the client early. If the cause is on their side (late content, extra feedback rounds), explain the effect and agree a fair adjustment.
- Absorb it and learn. Sometimes the overrun was your estimate. Finish well, then fix the price next time.
What you should not do is stay quiet, rush the work, and let quality drop. The client remembers the result long after they forget the timeline.
Close the project properly
The end of a project is where many small businesses leave value on the table. A clear close-out takes an hour or two and pays back for years. Here is a closing checklist:
- Final approval. Get a written sign-off on the last deliverable.
- Handover. Send every file, login and document the client needs, organised and labelled. Include a short "how to use this" note if it helps.
- Final invoice. Send it the day the project is approved, not weeks later. Invoices sent promptly tend to be paid promptly.
- Ask for feedback. Two questions are enough: "What worked well?" and "What could we have done better?"
- Ask for a review or referral. If the client is happy, this is the best moment to ask. Make it easy with a direct link.
- Offer what comes next. Many projects lead to ongoing work: maintenance, a retainer, the next phase. Mention it once, without pressure.
- Archive the project. Close open tasks, move files into the right folders, and mark the project complete.
A handover note can be short. Include what you delivered and where each file lives, any logins and who now owns them, how to make simple changes themselves, and what to do if something breaks. Clients who have this rarely need to message you for small things, which protects your time after the project ends.
Run a 30-minute retrospective
Before the project fades from memory, spend 30 minutes with the team (or on your own) answering four questions:
- What went well that we should repeat?
- What went badly that we should avoid?
- How did our estimate compare with the hours we actually used, and where was the gap?
- What will we change in our scope, plan or price for the next project like this?
Write the answers somewhere you will see them when you start the next similar project, ideally in the project template itself. This is how a small business gets steadily better at projects rather than repeating the same mistakes.
A worked example: the numbers behind a rebrand
Here is how the example studio's rebrand might look at close-out. It priced the project at 50 hours. The time records show 58 hours: logo work came in on estimate, but the menu took 14 hours against a planned 8 because the client sent the text in three separate batches, and the second round of menu changes added four hours. The retrospective produces three decisions for next time: ask for all menu text in one document before design starts, count each partial content delivery as a revision round, and raise the price for menu design by 20%. The studio still made money on this project, and the next one will be priced more accurately.
Turn one project into the next
The cheapest new project is the one that comes from a client you have already delivered for. They know your work, trust your process, and do not need convincing. A few weeks after handover, send a short, useful check-in: "How is the new menu working? Anything we can help with?" It is not a sales pitch; it is care, and it often leads to the next piece of work. If you offered ongoing support at close-out, this is a natural moment to mention it again. Keep a note of every past client and when you last spoke, so good relationships do not fade by accident.
Record the lesson where you will trip over it: in the scope template, the project template and your price list. A lesson written only in a meeting note is usually forgotten by the next project.
Common mistakes at the end
- Letting the final invoice wait until "things calm down".
- Leaving the project open forever, with small requests trickling in for free.
- Never looking at the time records, so the same underpricing repeats.
- Forgetting to ask for a review while the client is happiest.
- Handing over files in a messy folder that generates support questions for months.
What good looks like
A well-run project ends with the client's written sign-off, a paid final invoice, a tidy handover, a review or referral, a short list of lessons, and a clear picture of whether the project made money. Across several projects, your estimates get closer to reality and your margins rise.
Tracking time, budget and health in startbuddi
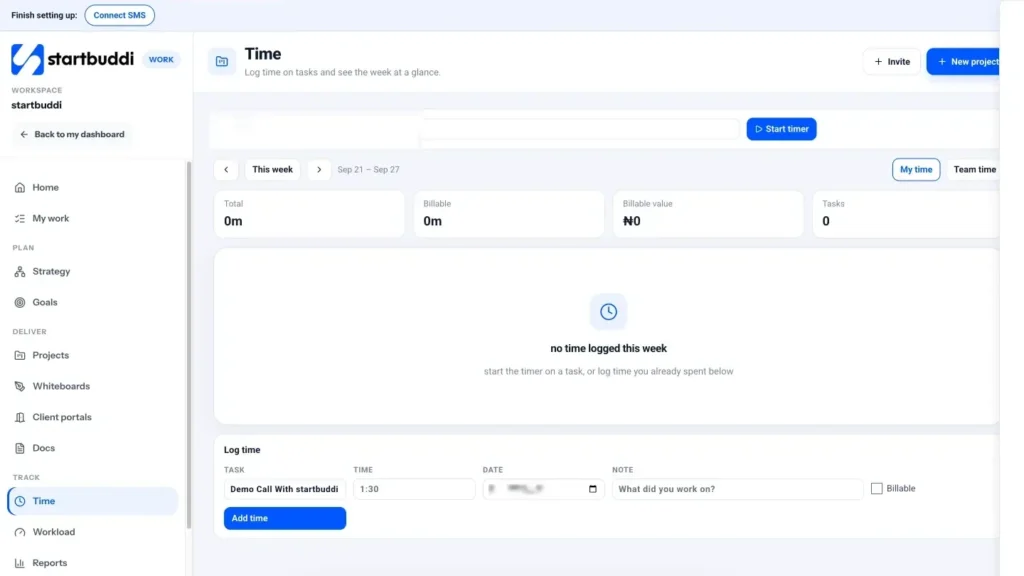
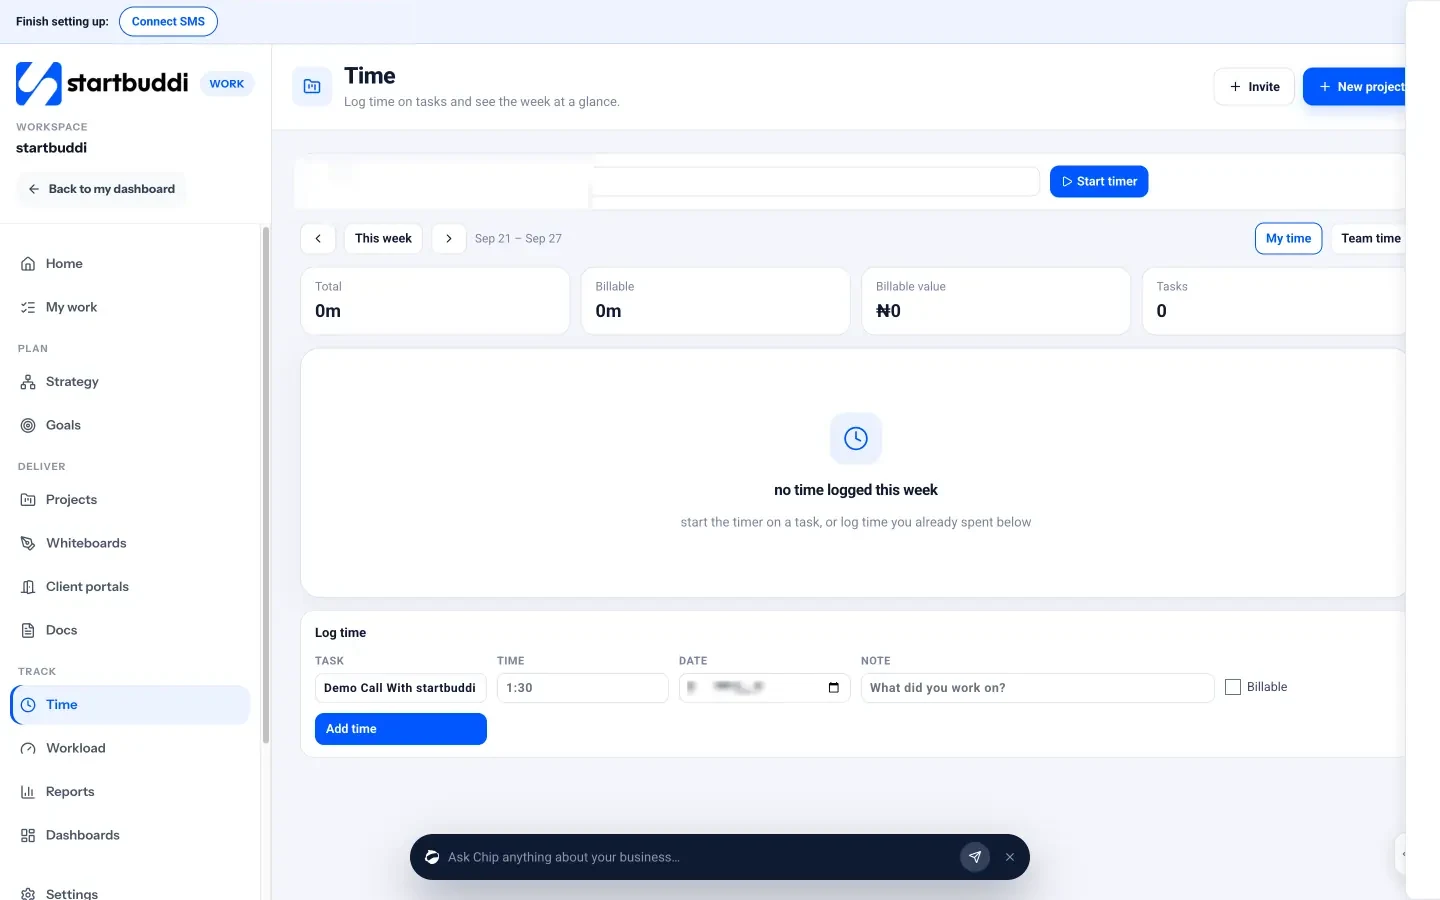
Track time. In Work, open Time. Pick a task and click Start timer, then Stop when you are done. If you forgot, use Log time to add an entry by hand with the task, time spent, date, a note and a Billable tick box. The week view shows your total hours, billable hours, the billable value where rates are set, and a grid of tasks by day. You can also log time directly on a task from its drawer. Managers, admins and owners can switch to Team time to see everyone's week.
Watch the budget. Each project has a Budget tab where you set a money budget and an hours budget. It shows time logged, spent so far, what is still to do and the cost to complete, with an hours burn-down chart. Expenses recorded in Money Manager and linked to the project appear here too, so costs like stock photos or printing are counted.
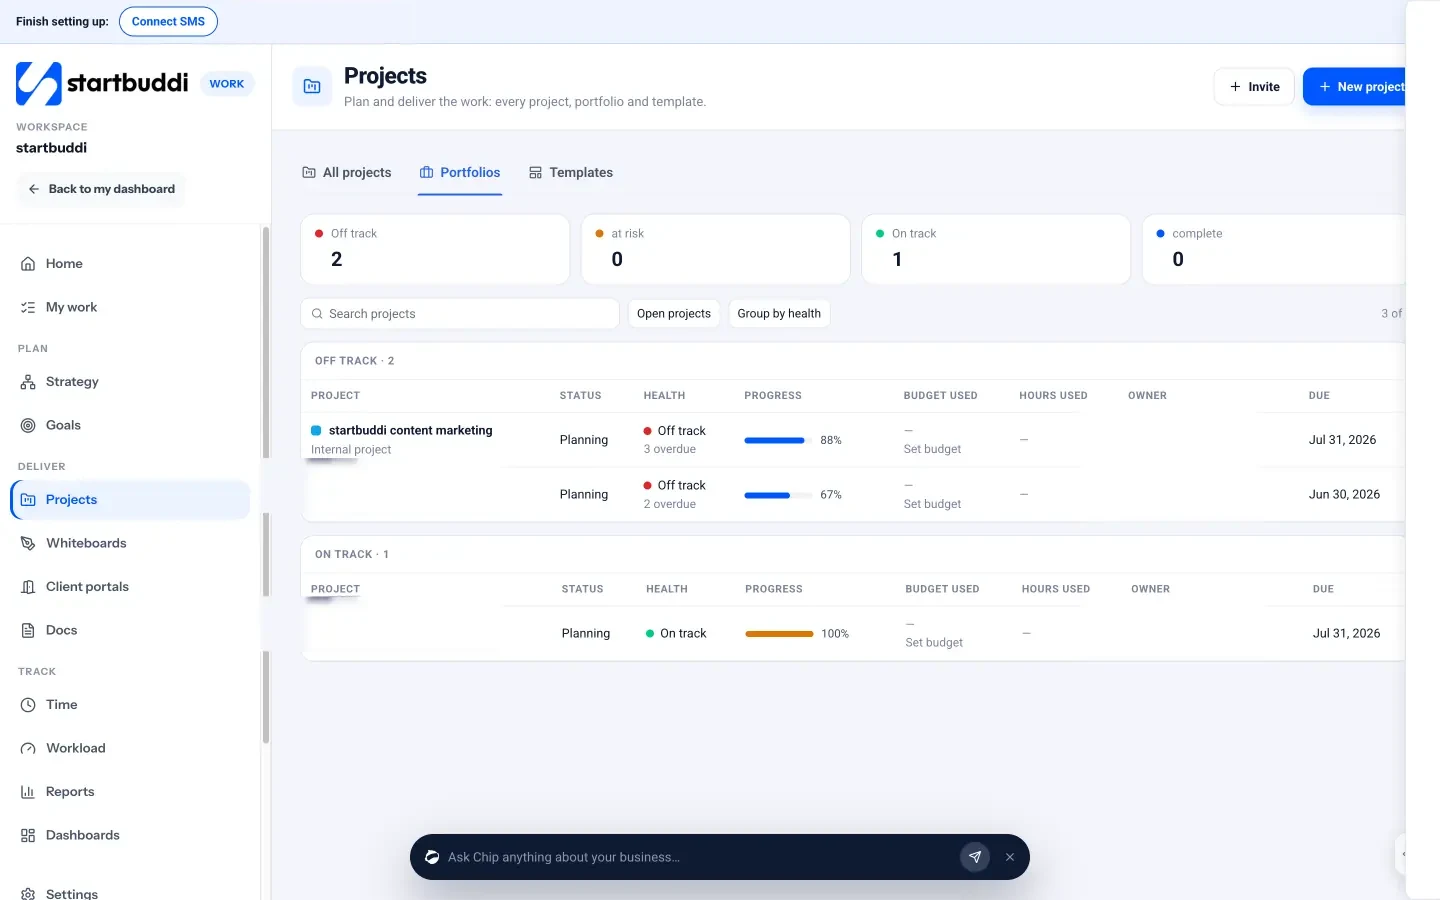
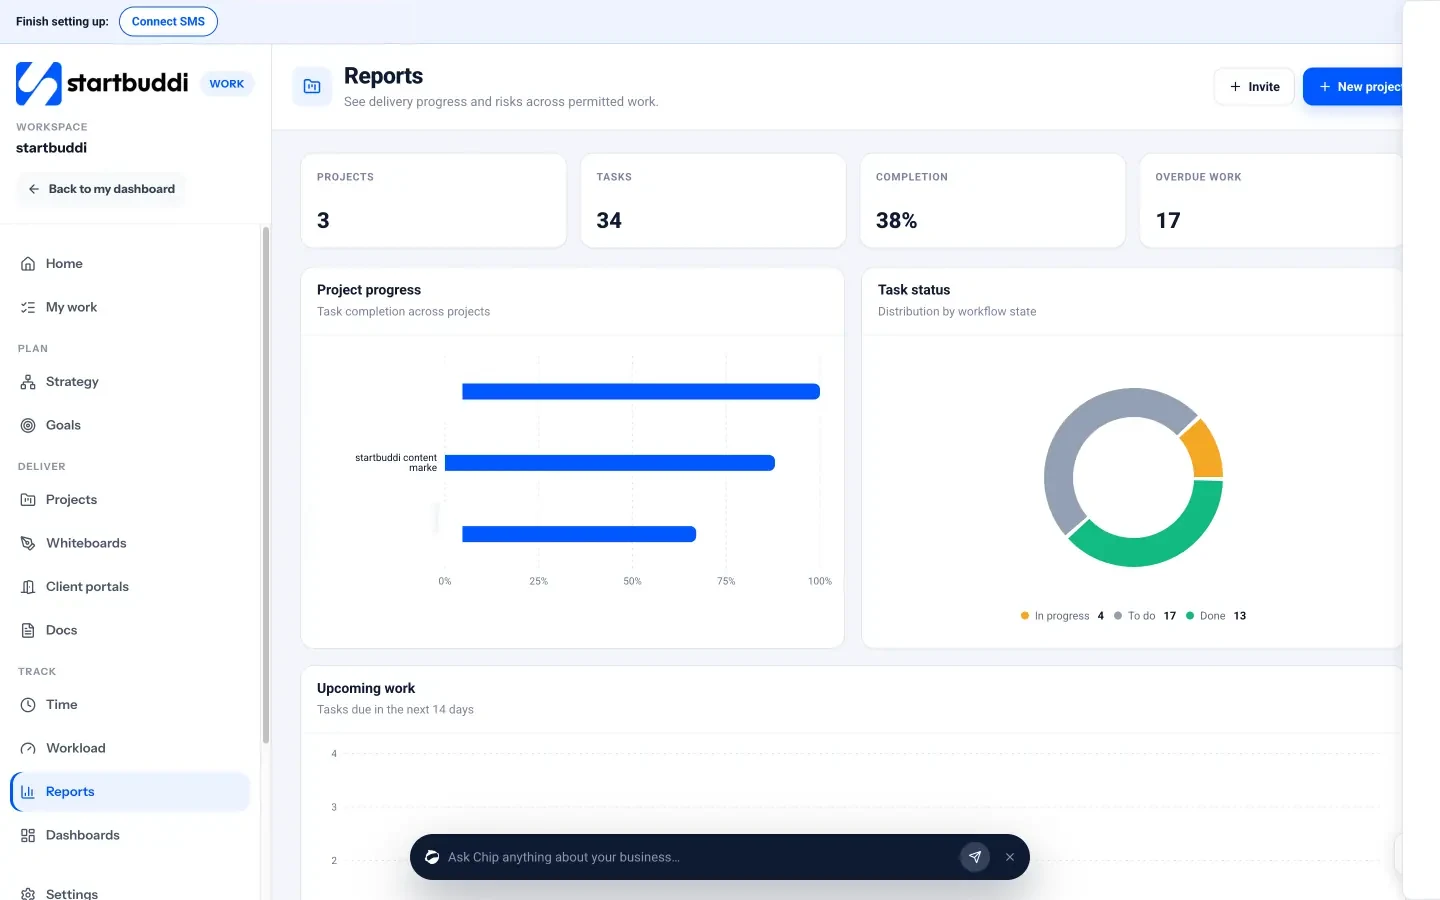
Check health across projects. The Projects list labels each project On track, At risk, Overdue, Complete or Not started. The Portfolios tab puts every project side by side with health, progress, budget used and hours used, grouped by health, status, owner or client. For a quick read on delivery, Reports in Work shows project progress, task status, upcoming work in the next 14 days, overdue work by project and team workload. This is your weekly health check on one screen.
Send the final invoice. Invoices live in Money Manager. Create the invoice for the client, send it, and let them pay online through a connected payment provider or by bank transfer. There is no automatic button that turns logged hours into an invoice yet, so use the billable totals from Time as the basis for hourly invoices. The guide on sending your first invoice walk through it.
Close and archive. Mark the final milestone done, then archive the project from its Settings when everything is wrapped up. The project's Activity tab keeps a record of what happened, which is useful for your retrospective. See time tracking for more on timers and timesheets.
Your next step
Start a timer on your next task today, and book a five-minute weekly health check in your calendar. When your current project finishes, run the closing checklist and a 30-minute retrospective. If you want your projects, client portals, time and invoices in one place, you can try it on the Free plan or start a 30-day trial of a paid plan from the pricing page, then set up your first project in Work.
Tiwalade Joanna Okedara-Kalu is the founder, CEO and CTO of startbuddi, the business system that brings clients, bookings, invoices, projects, marketing and the Chip AI assistant into one place. Tiwalade builds software around how service businesses really work day to day, and writes about client management, getting paid on time and why small businesses outgrow the tools they start with.
Founded startbuddi and leads its product and engineering