Get your business online in a weekend: page, bookings and payments
A weekend plan to get your business online: a clear page on Saturday morning, online bookings by Saturday evening, and payments and launch on Sunday.

You can get your business online in a single weekend without a web designer, a big budget or a five-page website. This guide is for solo founders, freelancers and small service businesses who are still taking every booking and payment through WhatsApp and DMs, and want one simple place customers can find them, book them and pay them.
It’s split into four sessions. On Friday evening you’ll plan: decide the one job your page has to do and gather your words, photos and prices. On Saturday morning you’ll build and publish your page. On Saturday afternoon you’ll set up online bookings with reminders and, if you want, deposits. On Sunday you’ll connect payments and launch. Each chapter covers the thinking first, with examples and templates, then shows how to do it in startbuddi.
By Sunday night you’ll have a live page, a booking link, a way to take payment, and a simple plan to share it and see what’s working.
Friday evening: plan how to get your business online
- Why getting online matters more than it used to
- Decide the one job your online presence has to do
- Know who you're talking to
- Gather your assets in one folder
- Write the words before you design anything
- Three worked examples
- Choose your web address
- Common mistakes to avoid on Friday
- What good looks like by Friday night
- How to prepare in startbuddi
Most people who want to get their business online start in the wrong place. They open a website builder, pick a pretty template and then stare at an empty headline box for an hour. The problem isn't the tool. It's that nobody has decided what the page is for, who it's for, or what a visitor should do next.
So Friday evening is for thinking, not building. In about two hours you'll decide the one job your online presence has to do, gather everything you need in one folder, write the words, and choose your web address. On Saturday and Sunday you'll build fast, because the hard decisions are already made.
Why getting online matters more than it used to
Your customers already look for you on their phones. In Nigeria, for example, mobile devices made up just over half of all web traffic in August 2026, according to StatCounter's platform market share data. In many African markets the share is higher still. When someone hears your name from a friend, sees your Instagram post or gets your number on WhatsApp, the next thing they do is search, tap a link, or ask "do you have a page I can look at?"
If the answer is "just send me a DM", you lose people. Some are shy about messaging a stranger. Some want to check your prices at 11pm without starting a conversation. Some need to show your details to a partner or a boss before they spend money. A simple page answers their questions while you sleep and gives them a clear way to act: book, pay or send an enquiry.
Speed matters too. Google's own research, published in The Need for Mobile Speed, found that 53% of mobile visits were abandoned when a page took longer than three seconds to load. The study is from 2016, and phones and networks have improved since, but the lesson holds: a short, light page that loads quickly beats a heavy site with ten menus.
Decide the one job your online presence has to do
"Getting online" can mean many things: a full website, a shop, a booking page, a digital menu, a portfolio. For a first weekend, pick one main job. Everything else supports it. Here's a quick way to choose.
| If most of your sales happen when… | The main job of your page is… | Your main button says… |
|---|---|---|
| People book your time (salons, coaches, consultants, cleaners, tutors) | Take bookings | Book a session |
| People ask for a price first (builders, caterers, event planners, agencies) | Collect enquiries | Get a quote |
| People buy a fixed product or package (bakers, fashion, digital products) | Take payment | Order now / Pay |
| People need to trust you before they call (lawyers, accountants, B2B services) | Show proof and contact details | Talk to us |
| You're not launched yet | Build a waitlist | Join the waitlist |
Write your answer on one line: "My page exists so that [type of customer] can [action]." For example: "My page exists so that busy professionals in Lekki can book a braids appointment and pay a deposit." That sentence is your filter for every decision this weekend. If a section, photo or link doesn't help that person take that action, leave it out for now.
Know who you're talking to
You don't need a formal customer persona. You need to answer four questions honestly, ideally by looking at your last ten real customers or enquiries:
- Who are they? Individuals or businesses? Roughly what age, location, job?
- What problem made them look for you? Use their words, not yours. "I need my hair done for a wedding on Saturday" is better than "premium hair styling services".
- What almost stopped them buying? Price, trust, distance, timing, not knowing what's included?
- What did they ask before they paid? These questions become your FAQ section.
Scroll back through your WhatsApp chats and DMs. The same five or six questions usually come up again and again: "How much?", "Where are you?", "Do you deliver?", "How long does it take?", "Can I pay in two parts?" Every question you answer on the page is one fewer message you type by hand.
Gather your assets in one folder
The biggest time-waster during a build is hunting for things. Before you open any tool, create one folder on your phone or laptop and put these in it:
- Your logo, ideally a PNG with a transparent background. If you don't have one, your business name in a clean font is fine for now.
- Two brand colours. One main colour for buttons and one neutral. If you have a logo, pick them from it.
- Five to ten good photos. Your work, your products, your space, and one clear photo of you or your team. Real photos beat stock photos, because people buy from people. Shoot in daylight, near a window, with the phone held steady.
- Your price list or starting prices. Even "from ₦25,000" is better than nothing.
- Two or three short testimonials with the customer's permission. A screenshot of a kind WhatsApp message counts, as long as you ask first and hide their number.
- Contact details: business phone, WhatsApp number, email, address or service area, opening hours.
- Your social links.
Compress large photos before you upload them. A photo straight from a modern phone can be several megabytes, which slows your page on mobile data. Most phones have an option to share a smaller copy, and free online compressors do the same job.
Write the words before you design anything
Design follows words, not the other way round. Nielsen Norman Group's classic study How users read on the web found that 79% of test users scanned pages rather than reading word by word. It's an old study, but the habit it describes has only grown on phones. So write for scanners: a clear headline, short paragraphs, and headings that make sense on their own.
Use this simple page outline. It works for a salon, a consultant or a caterer.
- Headline: what you do and for whom, in plain words. "Knotless braids and wig installs in Lekki, done in one sitting."
- One supporting line: why you, or what makes it easy. "Book online, pay a small deposit, and we'll send a reminder the day before."
- Main button: the action from your one-line job. "Book an appointment."
- What you offer: three to six services or products, each with a short description and a starting price.
- Proof: photos of real work, two or three testimonials, any numbers you can honestly stand behind ("over 300 clients since 2022" only if it's true).
- How it works: three steps. "Pick a time. Pay the deposit. Show up and relax."
- Questions: the five or six things people always ask.
- Contact and location: WhatsApp button, phone, address, hours.
- Repeat the main button at the bottom.
Three worked examples
A freelance brand designer in Accra. One-line job: "so that small business owners can request a quote for a logo and brand pack." Headline: "Logos and brand kits for small businesses that want to look established." Services: Logo only, Logo and brand kit, Social media templates, each "from" a price. Proof: six portfolio images and two client quotes. Main button: "Get a quote", which opens a short form asking for business name, budget range and deadline.
A home cleaning service in Nairobi. One-line job: "so that busy families can book a regular clean." Headline: "Trusted home cleaning in Westlands and Kilimani, booked in two minutes." Services: Standard clean (3 hours), Deep clean (5 hours), Move-out clean. How it works: choose a service and time, pay a deposit, the team arrives with supplies. FAQ covers supplies, pets, cancellations and what happens if something breaks.
A small-chops caterer in Ibadan. One-line job: "so that event hosts can see packages and request a quote." A business-style menu page works better than a plain landing page here: packages per head, minimum orders, add-ons, and a "Request a quote" button that asks for date, guest count and location.
Choose your web address
You have two options. You can start on a free address from the tool you use, which is fine for a first weekend, or connect a domain name you own, such as amakabraids.com or kilimaniclean.co.ke. A domain looks more established, is easier to say out loud, and stays yours if you ever change tools.
Tips for picking one:
- Keep it short and easy to spell after hearing it once.
- Avoid hyphens and numbers unless they're part of your brand.
- Consider your country's ending if most customers are local. In Nigeria, .ng and .com.ng names are managed by the Nigeria Internet Registration Association (NiRA) through accredited registrars.
- Buy it from a registrar you trust (GoDaddy, Namecheap, Cloudflare, Whogohost and others). You'll connect it to your page on Saturday using a DNS record. If you want to understand what that record does, Cloudflare has a clear explainer on what a CNAME record is.
Start your free Google listing tonight, too. A Google Business Profile is what shows your name, hours, reviews and map pin when someone searches for you or for "cleaner near me". It's free to create, and Google's help page on signing up for a Business Profile walks you through it: business name, category, whether customers visit you or you visit them, contact details, then verification. Verification can take days, so starting on Friday means it may be ready by the time you launch. Google asks you to create only one profile per business for the area you serve, so don't make duplicates. Once your page is live on Sunday, you'll add its link to the profile. Our guide to setting up a Google Business Profile and getting reviews goes deeper.
Common mistakes to avoid on Friday
- Trying to build a full website. Five pages of "About", "Mission" and "Our values" delay you by weeks. One focused page with one job can be live by Sunday.
- Writing about yourself instead of the customer. "We are a passionate team committed to excellence" says nothing. "We'll clean your flat in three hours and bring our own supplies" says everything.
- Hiding prices. If your prices vary, give a starting price or a range. Pages without any price get more "how much?" messages and fewer serious enquiries.
- Using photos you don't have the rights to. Use your own photos or properly licensed ones.
- Forgetting the basics customers need to trust you: a real phone number, a location or service area, and a way to reach a human.
What good looks like by Friday night
Before you close the laptop, you should have: your one-line job written down, a folder with logo, colours, photos, prices and testimonials, a text document with your headline, services, how it works and FAQ, and a decision about your web address. That's it. If you have those, Saturday is mostly copying and pasting.
How to prepare in startbuddi
If you use startbuddi, everything for this weekend lives in three places: Publish for your pages, Bookings for appointments, and Money Manager for getting paid. They're already connected, so a booking or payment on your page lands on the right contact without any extra setup.
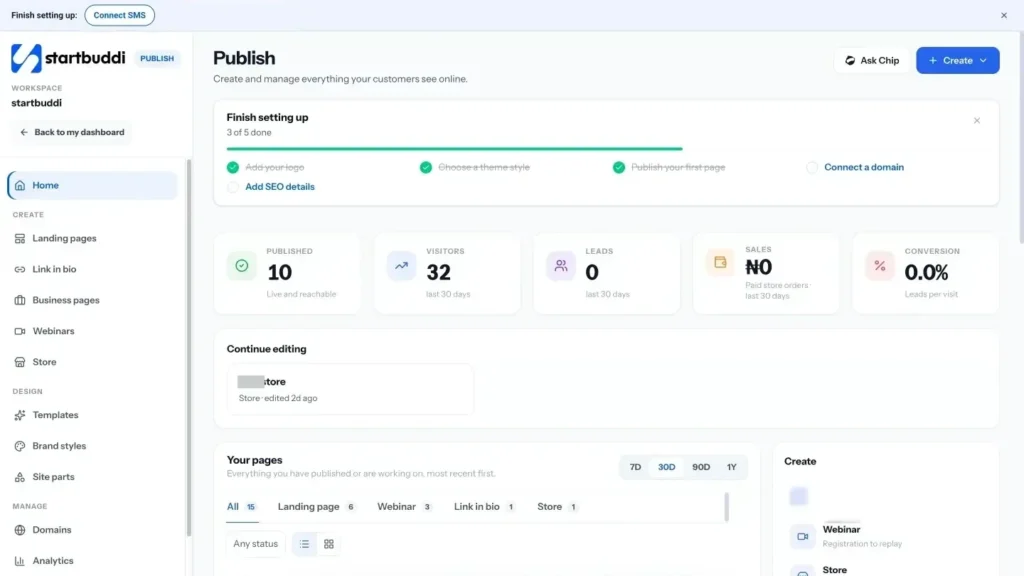
Open Publish from the sidebar. The Publish home shows a short "Finish setting up" checklist: add your logo, choose a theme style, publish your first page, connect a domain, and add SEO details. It's a good running order for the weekend, and it disappears once you've done everything.
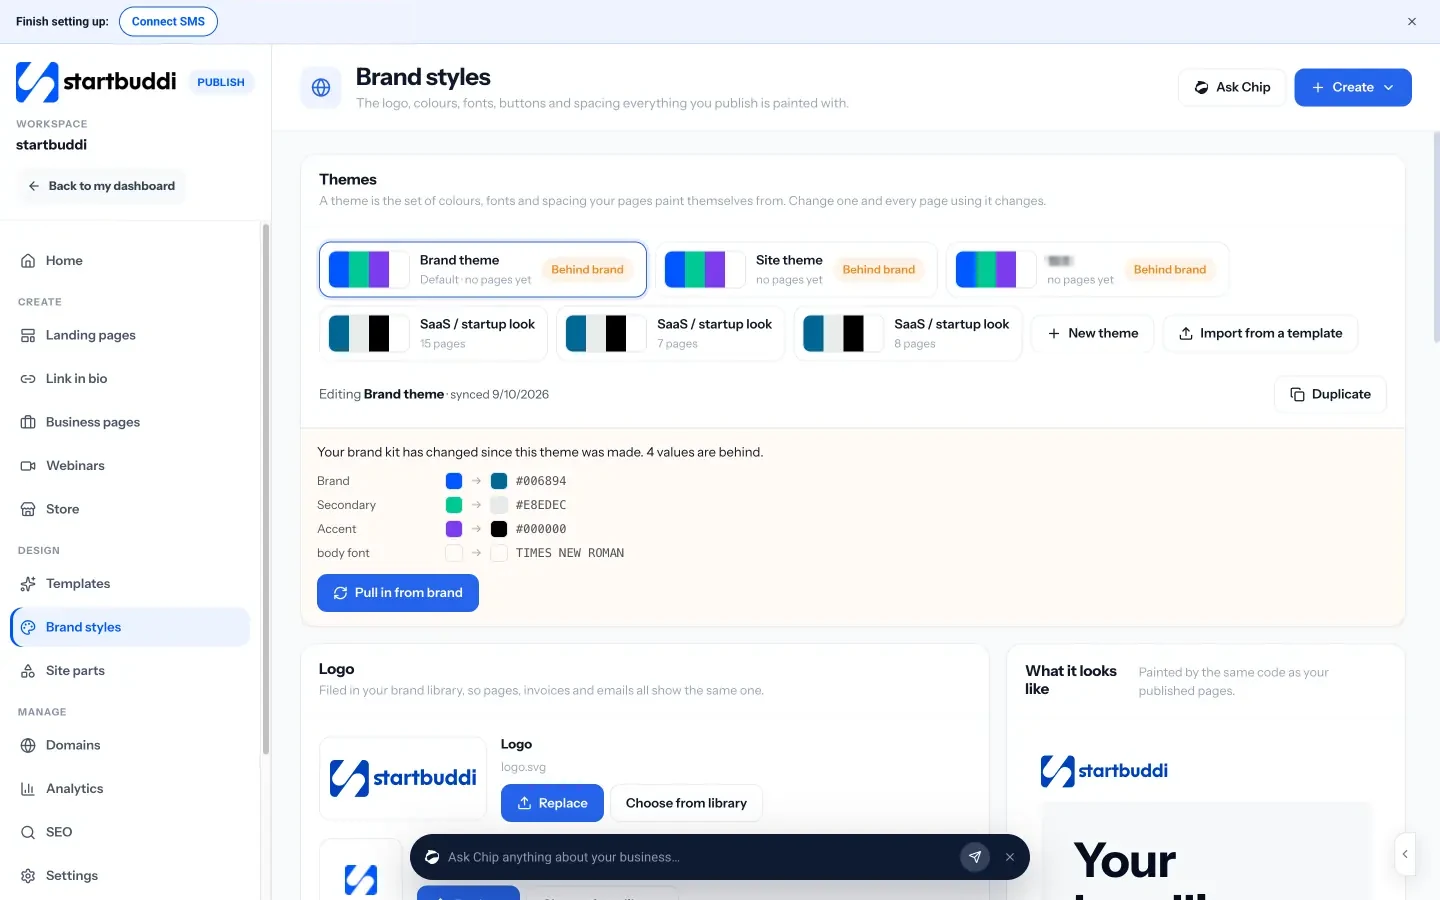
Tonight, do the first two steps. Go to Design, then Brand styles, upload your logo and set your colours and fonts. Your theme then paints everything you publish, so your landing page, business page and booking page all match without you styling each one.
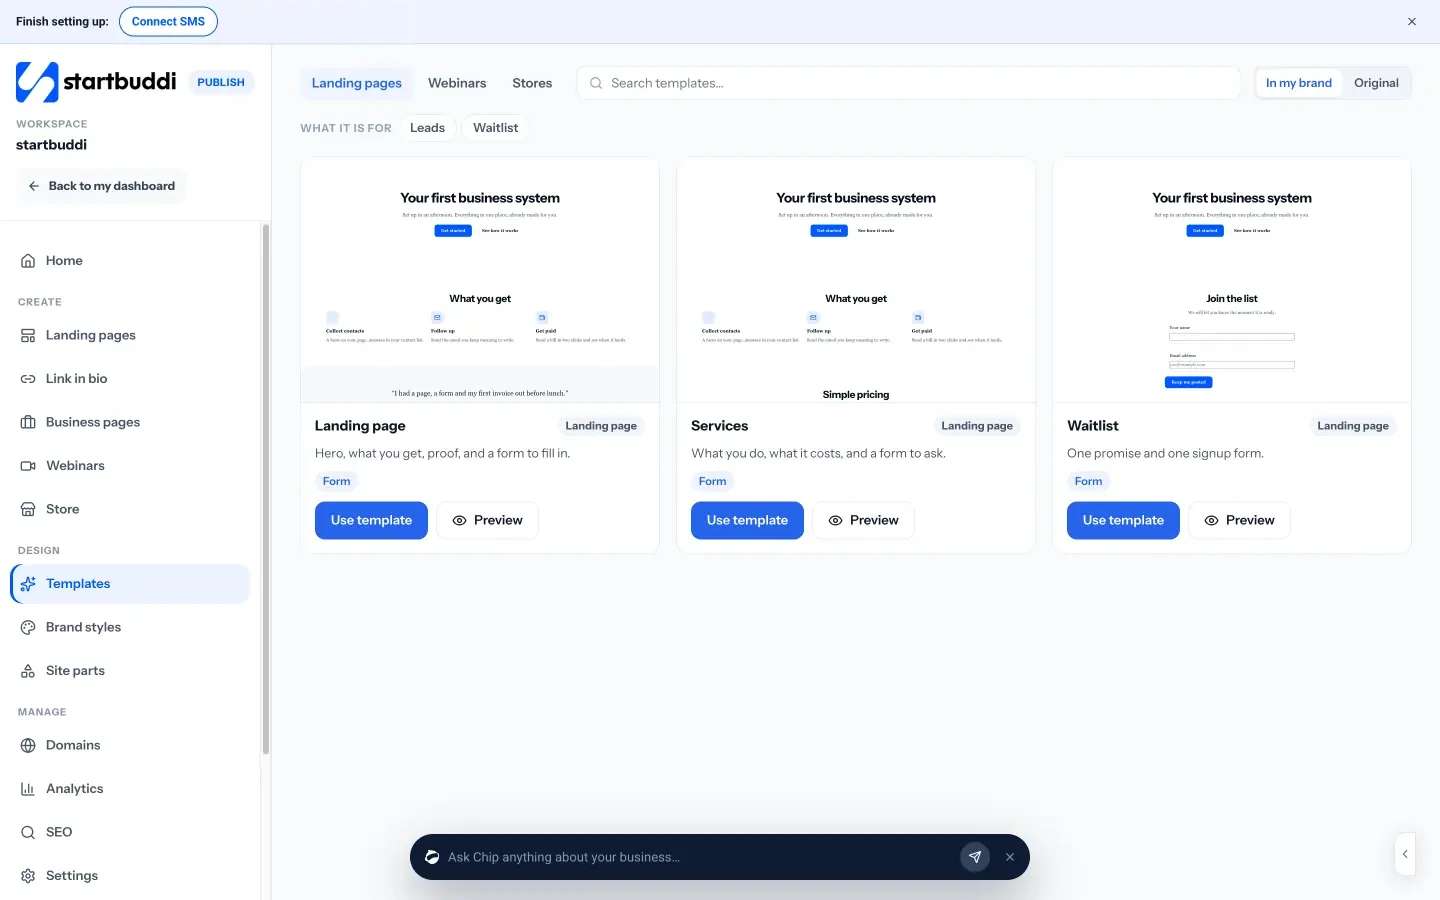
If you'd like to see finished designs before Saturday, open Design, then Templates. You can filter by what the page is for, your industry and the style you like. Don't pick one yet; just note two or three that feel right for your business. There's no pressure to decide tonight, and every template can be changed later.
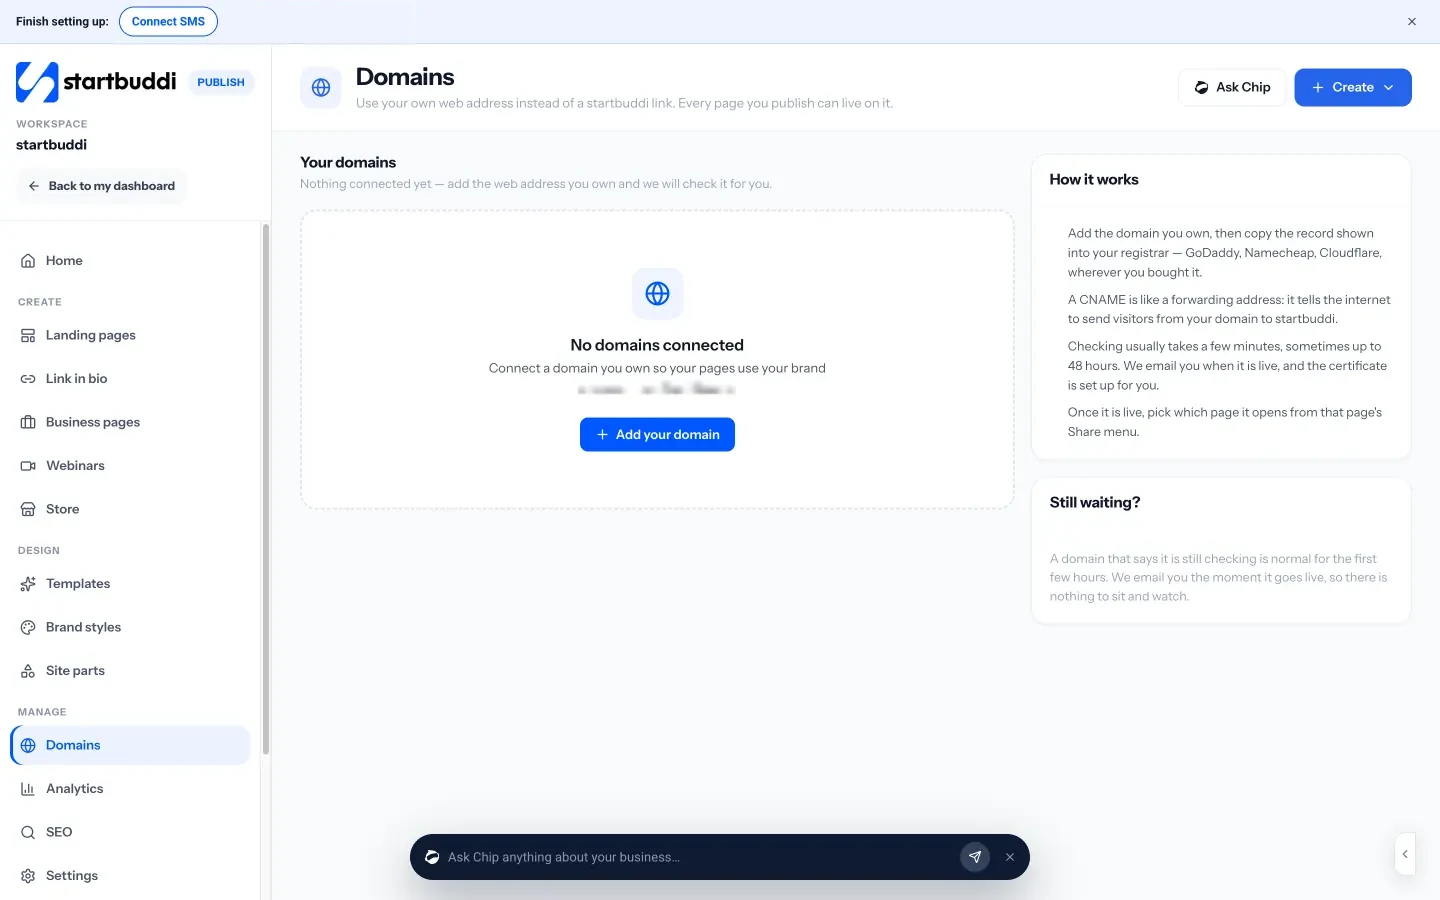
Finally, if you've bought a domain, you can add it tonight so it has time to connect. Go to Manage, then Domains, enter your domain, and copy the one record shown into your registrar. Checking usually takes a few minutes, but it can take up to 48 hours, which is why Friday is a good time to start. You'll learn more about this in chapter 2.
Next up: Saturday morning, when you build and publish your page.
Sources for this chapter
- StatCounter: desktop vs mobile vs tablet market share, Nigeria
- Think with Google: The Need for Mobile Speed (2016)
- Nielsen Norman Group: How users read on the web
- Nigeria Internet Registration Association (NiRA)
- Cloudflare: What is a DNS CNAME record?
Saturday morning: build and publish your page
- Pick the right kind of page
- Build your page section by section
- Write a page that works on a small screen
- Help people find it: search basics that matter
- A worked example: from Friday notes to a finished page
- A simple formula for search titles and descriptions
- Don't skip the legal basics
- Common Saturday mistakes
- What good looks like by Saturday lunchtime
- How to build and publish your page in startbuddi
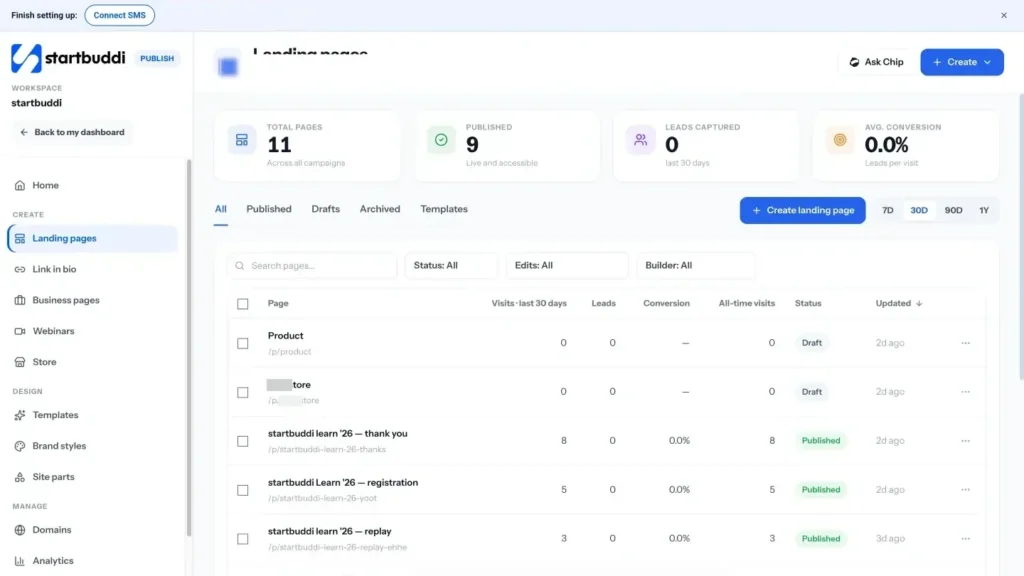
Saturday morning is build time. You'll pick the right kind of page, put your Friday words into it, check it on a phone, fill in the details that help people find it, and press publish. With your folder ready, this takes most people between two and four hours. Don't aim for perfect. Aim for live, clear and useful, then improve it next week with real feedback.
Pick the right kind of page
There are three common shapes for a first online presence. Each suits a different kind of business, and you can add the others later.
| Page type | Best for | What's on it |
|---|---|---|
| Landing page | One offer and one action: book a call, get a quote, join a waitlist, download a guide | Headline, benefits, proof, a form or booking button, FAQ |
| Business page | Businesses with a list of things: a menu, price list, property listings, portfolio, product catalogue | Items with prices, photos and labels, plus buttons for WhatsApp, booking, directions or calls |
| Link in bio | Creators and sellers who live on Instagram or TikTok | A short mobile page of links, products, tips and contact buttons |
A useful rule: if your Friday "one-line job" was about a single action, build a landing page. If your customers need to browse options before they act, build a business page. Link in bio comes on Sunday, as a way to send your social followers to the page you build today.
Build your page section by section
Work from the top down, using the outline you wrote on Friday. Here's what to watch for in each part.
The top of the page (the hero). This is the only part many visitors will see before deciding to stay. It needs your headline, one supporting line, one clear button and one strong photo. Resist the urge to add three buttons. One button with a clear verb ("Book a session", "Get a quote") outperforms a row of choices, because it removes the need to think.
What you offer. Use short cards or rows. Each one gets a name customers would use, a one-sentence description of the outcome, and a price or starting price. If you sell time, include how long it takes. If you sell products, include what's in the box.
Proof. Put your best photo of real work near your testimonials. Short quotes with a first name and a detail ("Chiamaka, bride, March 2026") feel more real than long anonymous paragraphs. Never invent reviews or numbers. Beyond being dishonest, it can breach consumer protection rules in many countries.
How it works. Three numbered steps. This lowers anxiety for first-time buyers, because they can see exactly what happens after they tap the button.
Questions. Answer the questions you collected on Friday in one or two sentences each. Put anything about payment, cancellations and delivery here.
Contact. A WhatsApp button, your phone number and your location or service area. If customers visit you, add opening hours and directions.
Write a page that works on a small screen
Most of your visitors will see your page on a phone, often on mobile data. Before you publish, look at it on the smallest screen you can find and check:
- Can you read the headline without zooming?
- Is the main button visible without scrolling far, and big enough to tap with a thumb?
- Do paragraphs stay short (two to four lines on a phone)?
- Do photos load quickly? If not, compress them.
- Does the WhatsApp button open a chat with the right number?
- Is anything cut off, overlapping or too small?
Also check your page with someone who has never seen it. Hand them your phone and ask, "What does this business do, and how would you book or buy?" If they can't answer in ten seconds, simplify the top of the page.
Help people find it: search basics that matter
You don't need to become an SEO expert this weekend. Google's own SEO starter guide makes the point that the basics are about helping people and search engines understand your page. For a small business page, that means four things:
- A clear page title for search results. Include what you do and where: "Knotless braids in Lekki, Lagos | Amaka Braids". Keep it under about 60 characters so it isn't cut off.
- A short description of one or two sentences that says what you offer and why someone should click. This often appears under your title in results.
- Words customers actually search for, used naturally in your headline and service names. "Home cleaning in Kilimani" beats "Sparkle Solutions premium hygiene".
- Descriptions on your images (alt text). They help people who use screen readers and help search engines understand the photo. "Knotless braids, waist length, finished in one sitting" is better than "IMG_4432".
Add a social image too. It's the picture that shows when your link is shared on WhatsApp, Facebook or LinkedIn. A good one makes people much more likely to tap.
A worked example: from Friday notes to a finished page
Here's how the home cleaning business from chapter 1 turned its notes into a page in under three hours.
Top of the page. Headline: "Trusted home cleaning in Westlands and Kilimani, booked in two minutes." Supporting line: "Vetted cleaners, our own supplies, and a reminder the day before." One button: "Book a clean." Photo: a bright, tidy living room they had actually cleaned, taken with the owner's permission.
Services. Three cards: Standard clean (3 hours, from KSh 2,500), Deep clean (5 hours, from KSh 4,500) and Move-out clean (priced by size, "Get a quote"). Each card says what's included in one sentence.
Proof. Four before-and-after photos and two short quotes from regular clients, each with a first name and area.
How it works. "1. Pick a service and time. 2. Pay a small deposit to hold the slot. 3. We arrive with everything we need."
Questions. Do I need to be home? Do you bring supplies? What if I have pets? What if something breaks? How do I cancel?
Contact. WhatsApp button, phone number, service areas and hours.
What they left out is just as important: no "About our mission" section, no staff biographies, no blog. All of those can come later if customers ask for them.
A simple formula for search titles and descriptions
| Part | Formula | Example |
|---|---|---|
| Search title | What you do + where + business name | Home cleaning in Westlands, Nairobi | Kilimani Clean |
| Description | Who it's for + the outcome + how to act | Reliable home cleaning for busy families in Westlands and Kilimani. Book online in two minutes and pay a small deposit. |
| Social image | Your best real photo with your logo | A spotless living room with the logo in one corner |
Don't skip the legal basics
If your page collects names, emails or phone numbers, you're handling personal data, and most countries expect you to say what you do with it. In Nigeria, the Nigeria Data Protection Commission oversees the Nigeria Data Protection Act 2023, which applies to organisations processing personal data of people in Nigeria. In the UK, the Information Commissioner's Office explains how to write a privacy notice and what goes in it, and offers a free generator for small businesses.
In plain terms, a basic privacy notice explains what details you collect, why, how long you keep them, who you share them with (for example your payment provider), and how people can ask you to see or delete their data. Link to it from your page footer. If you take payments or bookings, add simple terms or a cancellation policy too; chapter 3 covers that.
This is general information, not legal advice. Check the rules that apply in your country, or ask a qualified adviser if you're unsure.
Common Saturday mistakes
- Endless tweaking of colours and fonts. Set your brand once and move on. Customers care more about clear prices and a working button.
- A menu full of exits. On a single landing page, a navigation menu gives people many ways to leave before they act. Keep it simple.
- Forms that ask too much. Ask only what you need to reply. Name, contact and one or two questions is plenty for a first enquiry.
- No test submission. Always fill in your own form, or make a test booking, before you share the link.
- Publishing and forgetting. Put a reminder in your calendar to review the page in two weeks, using what customers ask you.
What good looks like by Saturday lunchtime
A published page, on a free address or your own domain, that loads quickly on a phone, says clearly what you do and for whom, shows prices or starting prices, has real photos and honest proof, gives one clear action, and has a privacy notice linked. When a friend reads it, they understand your business without asking you a single question.
How to build and publish your page in startbuddi
In startbuddi, everything you publish lives in Publish. Every Create button opens the same short flow, so the steps are the same whether you're making a landing page or a business page.
- Click + Create and choose Landing page or Business page.
- Choose how to start. Build with Chip lets you describe the page in a sentence; Chip designs it, writes the words and fills the rows, and shows the credit price before anything is charged (a landing page costs 15 Chip credits, a business page 25). Start from a template and Start blank are free. All three end in the same editor.
- Fill in a few details, such as the page name and web address, then press Create and open editor. Nothing is saved until you press create.
If you use Chip, paste your Friday outline into the description. Chip won't make up prices, reviews or numbers; it leaves those as placeholders for you to fill, which is exactly what you want. Your work saves as you go, and publishing is a separate step, so nothing goes live by accident.
Your landing pages appear in Create, then Landing pages, with how many leads each has captured. Every form submission creates or updates a contact in Customers, with the page it came from saved on the record, so follow-up can start straight away. You can read more on the landing pages product page.
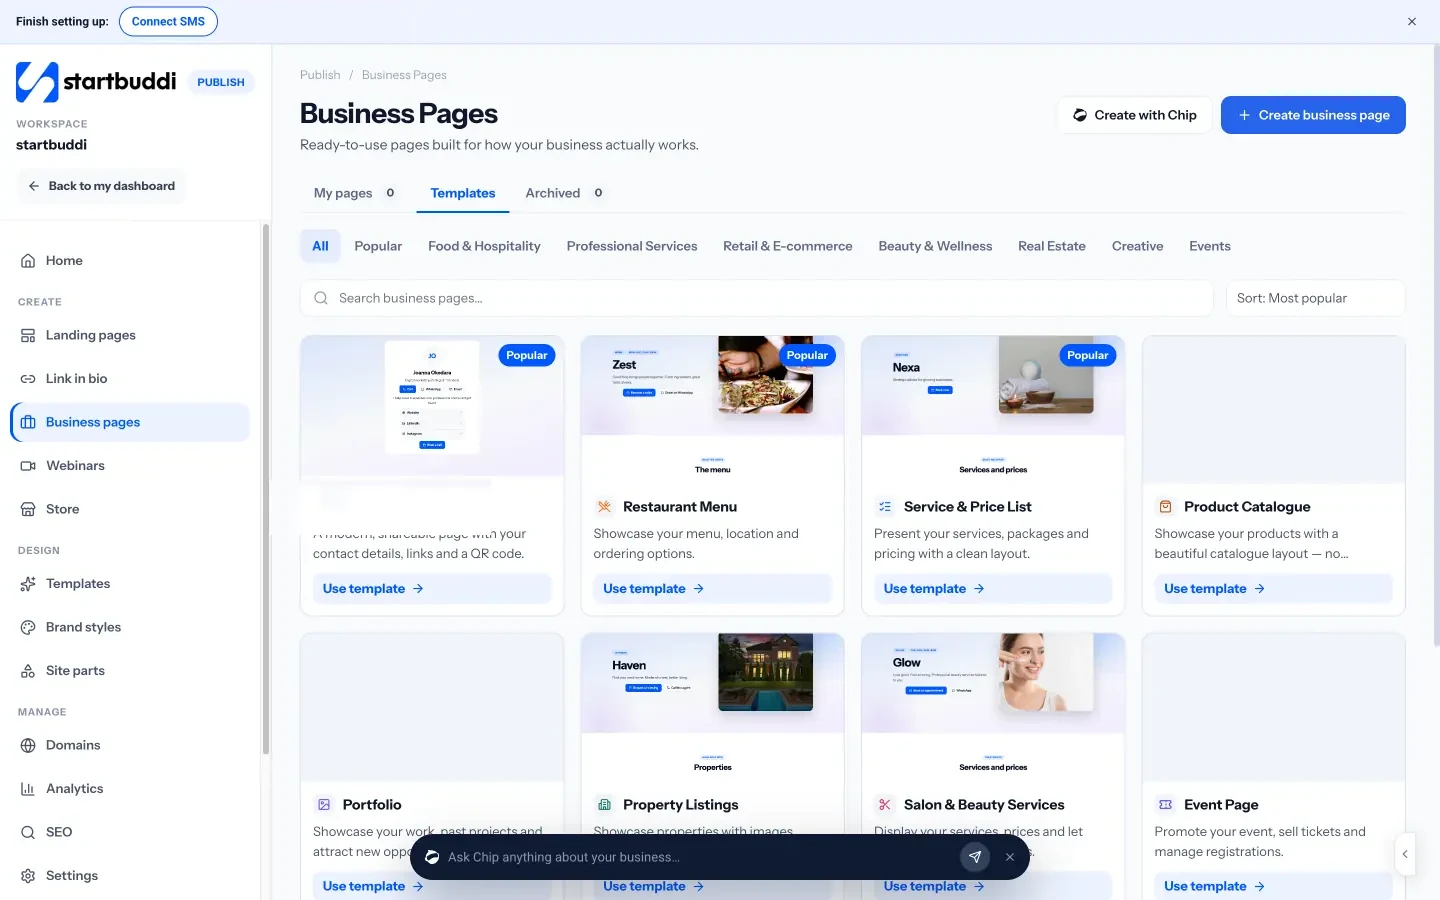
If you chose a business page, you'll pick what kind: a restaurant menu, a service and price list, a digital business card, salon and beauty services, property listings, a product catalogue, a portfolio or an event page, among others. Add a WhatsApp number when asked; it becomes the button people tap to reach you. Then add your items, such as dishes or services, with prices, photos and labels, choose a layout and publish. The business pages page lists every type.
Before you publish, open the page settings and fill in how it looks in search and when shared: a title, a description and a social image. The SEO screen under Manage keeps these details for all your pages in one place, and it's also where you can connect tracking tools such as Google Analytics, Google Search Console or the Meta Pixel if you use them.
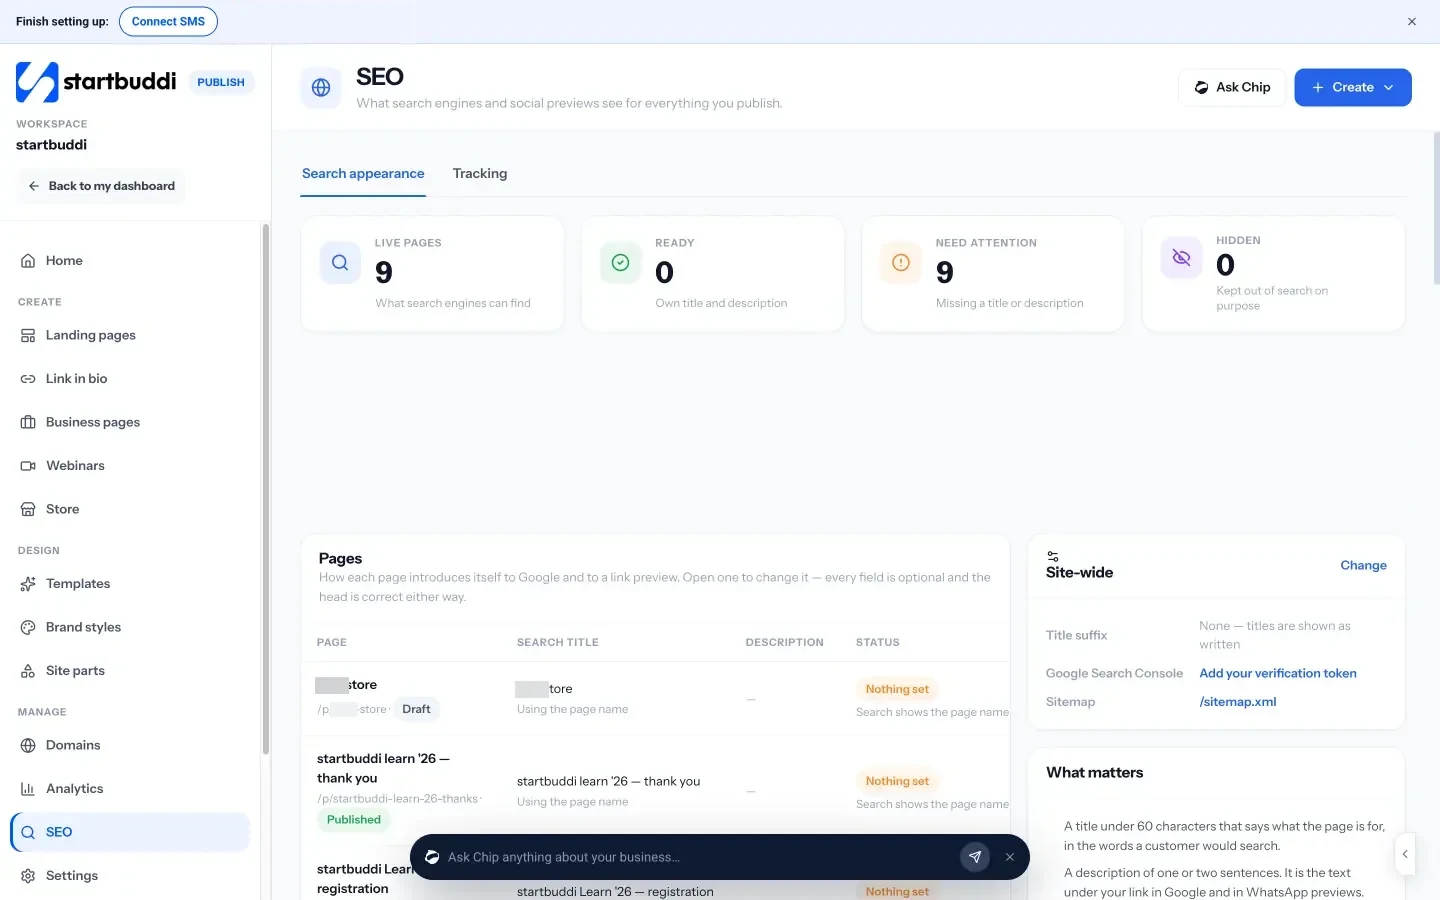
When you open Publish in the editor, you'll see a publish check. It looks for things like a missing SEO title or description, broken links, a form that isn't connected, a missing social image, pictures without descriptions, and a privacy policy when the page collects details. These are suggestions, not blockers, but it's worth fixing each one. You can also schedule a page to go live later. In Publish settings you'll find a place for your legal pages and a cookie notice.
To use your own web address, go to Manage, then Domains. Add the domain you own and copy the record shown (a CNAME pointing to domains.startbuddi.com) into your registrar. startbuddi checks it and sets up the security certificate for you, and emails you when it's live. Then choose which page your domain opens from that page's Share menu. You can't buy a domain inside startbuddi; you bring one you already own.
One note on plans: pages on the Free plan carry a small "Powered by startbuddi" line in the footer. Any paid plan lets you take it off, and there's no limit on how many pages you can publish on any plan.
Next up: Saturday afternoon, when you let people book you online.
Sources for this chapter
- Google Search Central: SEO starter guide
- Nigeria Data Protection Commission
- ICO: How to write a privacy notice and what goes in it
Saturday afternoon: let customers book you online
- Design services people can choose without asking you
- Set availability rules that protect your day
- Ask the right questions before the booking
- Decide on deposits
- Write a cancellation policy people respect
- Reminders and no-shows
- Why not just keep booking on WhatsApp?
- If more than one person takes bookings
- Common booking mistakes
- What good looks like by Saturday evening
- How to set up bookings in startbuddi
If you sell your time, the back-and-forth of booking is where most of your admin goes. "Are you free Thursday?" "What about 3pm?" "Can I come at 4 instead?" Each appointment can take five or six messages, and every message is a chance for the customer to go quiet. An online booking page replaces all of that with one link: the customer picks a service, sees only the times you're actually free, enters their details and, if you like, pays a deposit.
This chapter is for Saturday afternoon. You'll design your services, set rules for when people can book, decide on deposits and a cancellation policy, and set up reminders. Even if you mainly sell products, read the section on availability rules and reminders; they apply to deliveries and collections too.
Design services people can choose without asking you
A booking page is only as good as the list of things people can book. Good services have four qualities:
- A name the customer understands. "Initial consultation (30 min)" rather than "Discovery session".
- A fixed length. If jobs vary, create two or three sizes instead of one vague option: "Small flat deep clean (4 hours)" and "Large house deep clean (6 hours)".
- A clear price. If the final price depends on the job, show a starting price and say what changes it.
- A short description of what's included and anything the customer must do to prepare. "Come with washed, detangled hair" saves you an hour.
Start with three to five services. Too many choices slows people down. If you have twenty treatments, group them and put the most popular ones first.
Worked example: a solo hair stylist. Instead of listing every style, she offers four services: "Knotless braids, shoulder length (4 hours)", "Knotless braids, waist length (6 hours)", "Wig install (2 hours)" and "Consultation for wedding hair (30 min, free)". Each has a starting price and a line about preparation. The free consultation catches brides who aren't ready to commit but will book once they've met her.
Set availability rules that protect your day
Your availability rules decide which times appear on your booking page. Get them right and your calendar fills the way you want. Get them wrong and you'll have back-to-back bookings with no time to eat. Think about each of these:
| Rule | What it means | A sensible starting point |
|---|---|---|
| Working hours | The days and times you take bookings | Your real working hours, minus the first and last half hour |
| Buffer | Gap after each booking | 15 minutes for most services; 30 to 60 if you travel between clients |
| Minimum notice | How late someone can book | At least a few hours, so a booking never surprises you |
| Advance window | How far ahead people can book | 30 days for most services; longer for events or weddings |
| Days off | Holidays, events or time away | Block out public holidays and planned breaks now |
| Daily cap | Maximum bookings per day for a service | Useful for long, tiring jobs |
If you already use a personal calendar, check how your booking tool handles it. Some tools read your calendar and hide busy times; others only add bookings to it. Know which you have, and block out personal commitments where the booking tool can see them.
Ask the right questions before the booking
Booking questions let you collect what you need before the customer arrives. Keep them short, and only ask what changes how you prepare. A cleaner might ask "How many bedrooms and bathrooms?" and "Any pets?". A consultant might ask "What would you like to get out of this call?" and "Rough budget?". A photographer might ask "Where is the shoot?" and "How many people?".
Each extra question costs a little patience. Two or three is usually right. Name, email, date and time are collected anyway.
Decide on deposits
Asking for money up front is one of the most effective ways to cut no-shows, because people are less likely to skip something they've already paid for. It also filters out time-wasters. The question is how much. Here's a simple way to think about it:
- Short, low-cost services (under an hour, low price): no deposit, or full payment up front if the price is small enough that it doesn't put people off.
- Long services or ones that block your whole day: a deposit of 20% to 50%, enough that a no-show still covers some of your lost time.
- Services where you buy materials first (cakes, custom orders, hair extensions you supply): a deposit that at least covers the materials.
- Free consultations: no deposit, but a clear reminder and an easy way to cancel.
Work out what a missed slot costs you in lost income, and set the deposit so it covers a fair share of that. A deposit is easier to explain when you frame it as holding the slot for them, not as a sign you don't trust them. Whatever you choose, say it clearly on the booking page and in the confirmation: how much, whether it's refundable, and what it's taken off.
Write a cancellation policy people respect
A good cancellation policy is short, fair and visible before someone books. It answers three questions: how late can I cancel or move my booking without losing money, what happens if I cancel later than that, and what happens if I don't turn up?
A simple template you can adapt:
You can cancel or move your booking for free up to 24 hours before your appointment. If you cancel with less than 24 hours' notice, or don't arrive, your deposit isn't refunded. If we need to cancel, we'll refund you in full or rebook you at a time that suits you.
Check local rules before you set it. In the UK, for example, customers who book a service online usually have a 14-day right to cancel under the Consumer Contracts Regulations 2013. If they ask you to start within those 14 days, you can charge for what you've already provided. Rules differ by country, and our free booking policy writer can help you draft a clear version.
This is general information, not legal advice.
Reminders and no-shows
Most no-shows aren't rude; people simply forget. A reminder the day before, and another a couple of hours before for important appointments, solves much of it. The reminder should include the date and time, the address or meeting link, what to bring, and a way to cancel or reschedule. Making it easy to cancel sounds odd, but a cancellation 24 hours ahead lets you fill the slot; a silent no-show doesn't.
A reminder template you can adapt:
Hi Ada, a quick reminder that your deep clean is booked for tomorrow, Thursday, at 10am at your Kilimani address. Our team will bring all supplies. Need to move it? Use the link in your confirmation email, or reply here before 10am today.
When someone does miss a booking, follow up the same day with a friendly message and a link to rebook. Many will apologise and come back. Read how to reduce no-shows for appointments for more ideas.
Why not just keep booking on WhatsApp?
Many small businesses run their whole diary through WhatsApp, and it works while you're small. The trouble starts when you're busy. Messages get buried, two people get promised the same slot, and nobody reminds anyone. You also can't take a deposit inside a chat without sending a separate link and checking your account by hand.
You don't have to choose one or the other. Keep WhatsApp for conversation, and use your booking link to close the deal: "Here's my calendar, pick any time that suits you." Customers who prefer to chat still can, and the booking itself ends up in one organised place with a reminder attached.
If more than one person takes bookings
If you have a partner or staff, decide how bookings are shared before you go live. The two common approaches are letting customers choose a person (good when clients have a favourite stylist or trainer) and sharing bookings in turn across the team, often called round robin (good when any team member can do the job). Each person should set their own working hours, and someone should own the daily check of new bookings so nothing slips through.
Common booking mistakes
- Offering every hour of the day. Leave room for breaks, travel and admin. An over-full calendar leads to lateness and burnout.
- No buffer between bookings. Clients run late. Give yourself at least 15 minutes.
- Hiding the deposit until checkout. Surprises at payment cause drop-offs. Say it on the service description.
- Forgetting timezones. If you serve clients abroad, make sure your booking page shows times in the right timezone.
- Never testing. Book yourself a slot, pay the deposit with a small amount, and check every email you receive.
What good looks like by Saturday evening
Three to five clearly named services with fixed lengths and prices; working hours with buffers; holidays blocked out; two or three booking questions; a deposit where it makes sense; a short cancellation policy on the page; reminders switched on; and one test booking done from start to finish.
How to set up bookings in startbuddi
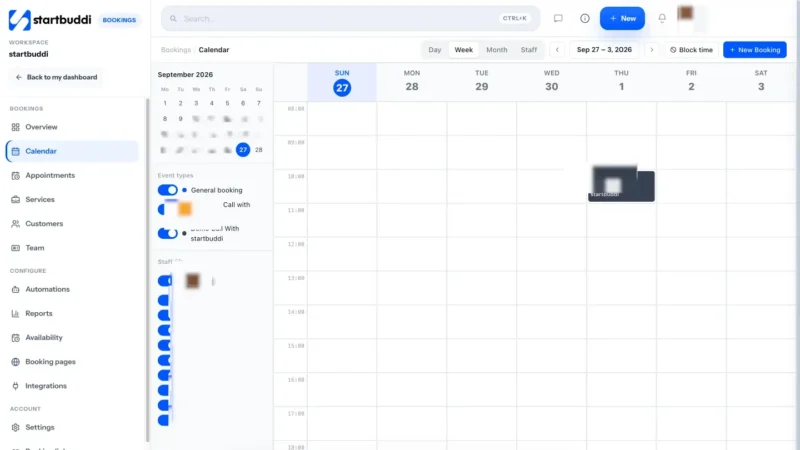
Open Bookings from the sidebar. Start with your services: go to Services and click Create Service. Give it a name, a description, a duration (15, 30, 45, 60 or 90 minutes, or longer in the full editor) and a colour, and choose which team member takes it. Then open the service to set the price and currency. To ask for money up front, turn on Require payment to book and choose whether to take the full amount or a deposit. The booking is confirmed once they've paid, and the slot is held while they pay.
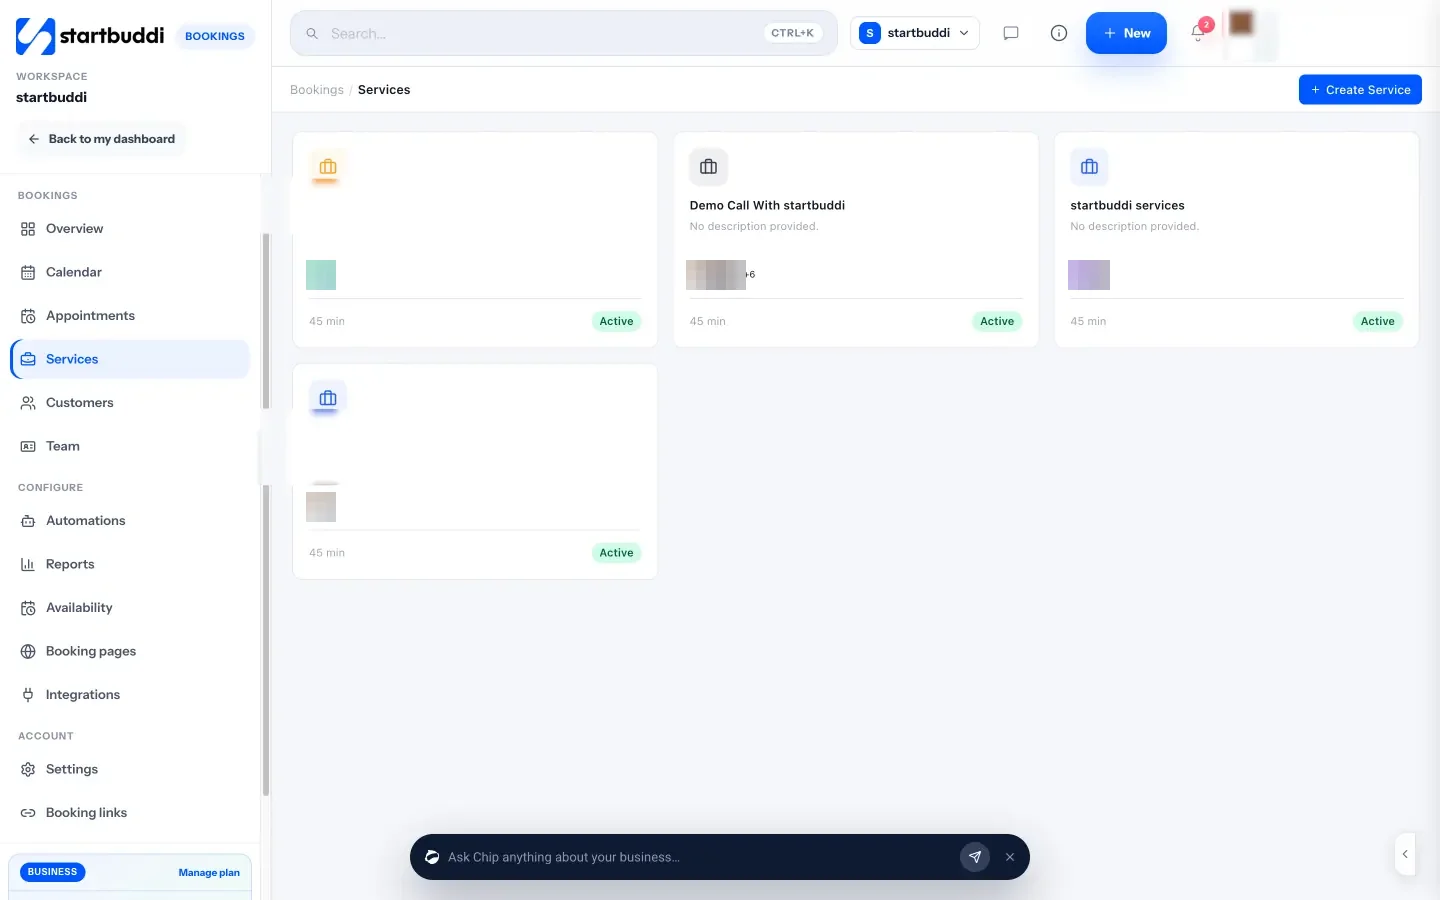
In the same editor you can add Booking questions. Answer types include short and long answers, single and multiple choice, and a rating. You can save an answer to the customer's contact record, or keep it in the booking notes only. If you're stuck, Chip can suggest questions for the service; its suggestions are drafts, so keep what fits.
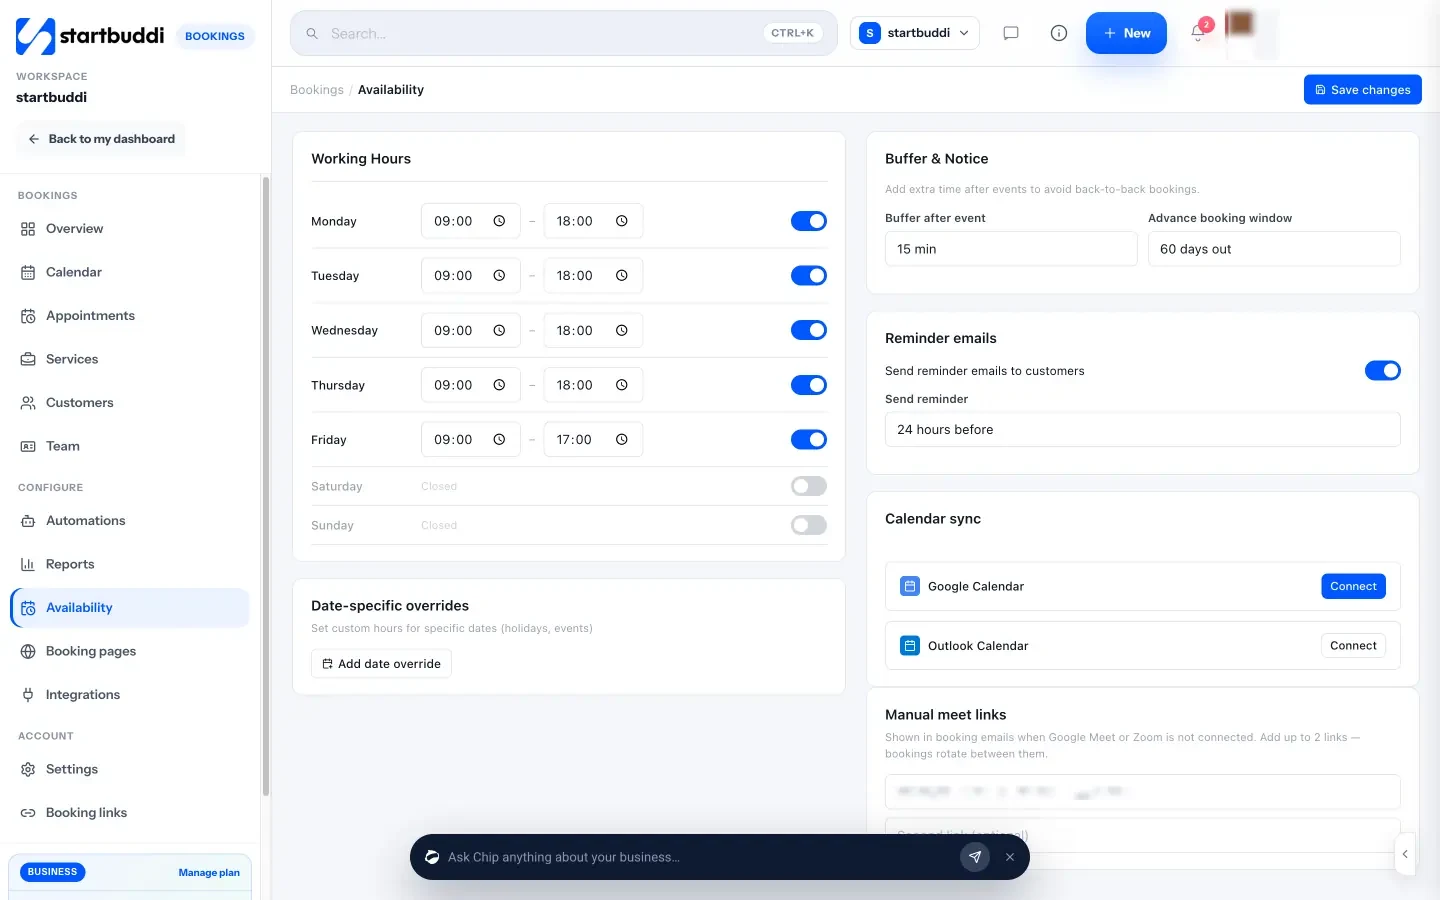
Next, go to Availability. Set your Working Hours for each weekday and your Buffer & Notice: a buffer after each booking of up to 60 minutes and an advance window of 7 to 90 days. This is also where you choose when reminder emails go out, from 1 to 48 hours before, and connect Google Calendar. One thing to know: calendar sync sends your bookings to Google Calendar, but it doesn't read your other calendar events to block times. Use Block time in the Calendar tab for personal commitments.
In Settings, set your default timezone, the sender name and reply-to email for booking emails, your accent colour, and welcome and thank-you messages. You'll also find Follow-up messages for after a no-show and after a completed booking, with editable text. Put your cancellation policy in the service description or welcome message so people see it before they book.
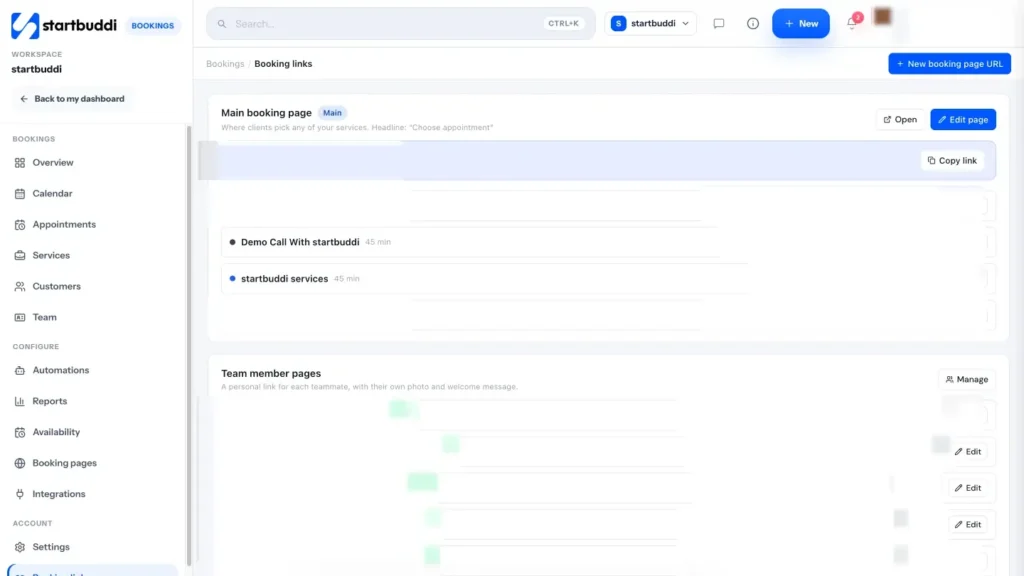
Finally, share your link. The Overview tab shows your booking page link with a copy button, and Share booking link lets you copy it, share it on WhatsApp or by email, get an embed code for your website, or download a QR code for your shop window or business card. The Booking links tab lists every public link, including one per service, which is handy when you want to send a customer straight to a specific appointment. You can also add a booking button to the landing page or business page you built this morning.
When bookings come in, the Overview's Needs attention list shows anything you need to confirm, decline or follow up, and you can mark someone as a no-show to send your follow-up email. Every person who books also becomes a contact in Customers.
If you have a team, the Team tab lets you add team members, set each person's hours with Set my hours, and include them in the booking rotation, which shares incoming bookings across the team. In a service's staff assignment you pick who can host it, and guests see the next available host.
A note on plans: the Free plan includes one live service and one booking page, which is enough to test the whole flow. Starter includes 10 live services and Growth 25, and every paid plan starts with a 30-day trial. Taking deposits needs Paystack or Stripe connected in Money Manager, which you'll do tomorrow. See the Bookings page for everything else it does.
Next up: Sunday, when you set up payments and launch.
Sources for this chapter
Sunday: take payments and launch
- Choose how customers will pay you
- Understand the fees before you set prices
- Match the payment tool to the sale
- Build trust at the moment of payment
- Plan for refunds and disputes
- Launch: tell people you're open
- Measure your first week
- Your first 30 days after launch
- Common Sunday mistakes
- How to get paid and launch with startbuddi
You have a page and a booking link. Sunday is about closing the loop: making it easy for people to pay you, then telling the world you're open. By tonight a stranger should be able to find you, understand what you do, book or buy, and pay, all without sending you a single message. Then you'll set up a simple way to see what's working.
Choose how customers will pay you
Different customers prefer different ways to pay, and the right mix depends on where they are. Across much of Africa, bank transfers, cards, USSD and mobile money are all common. In the UK, Europe and North America, cards and digital wallets dominate. A good starting point is to offer at least two ways: one instant online option (card or transfer through a payment provider) and one fallback (direct bank transfer).
| Method | Good for | Watch out for |
|---|---|---|
| Payment provider (for example Paystack or Stripe) | Instant confirmation, cards, transfers, mobile money, automatic receipts | A fee per transaction; you need to verify your business |
| Direct bank transfer | No provider fee, familiar to local customers | You have to check your account and match payments by hand |
| Cash or POS on the day | Walk-ins and returning regulars | No protection against no-shows unless you take a deposit online |
| PayPal or similar | Some international clients | Fees and payouts vary; check before you rely on it |
Understand the fees before you set prices
Payment providers charge a fee on each payment, and it's worth knowing yours before you set prices. Paystack, for example, publishes its rates on its pricing page. For local Nigerian transactions its fee starts at 1.5% plus ₦100, with the ₦100 waived on payments under ₦2,500 and the total fee capped at ₦2,000, according to Paystack's support article on transaction pricing. So on a ₦20,000 deposit you'd pay ₦400 in fees and receive ₦19,600. International cards cost more. Stripe lists its rates by country on its pricing page. Fees change, so always check the current page for your country.
You have two honest choices: absorb the fee as a cost of doing business (many small businesses do, and build it into their prices), or show it clearly as a separate charge. Don't hide it. A surprise fee at checkout is one of the fastest ways to lose a sale.
Match the payment tool to the sale
There's more than one way to ask for money online. Use the one that fits the moment:
- Deposit at booking: built into your booking page, so the customer pays as they pick a time. You set this up yesterday.
- Payment link: a link for a fixed amount you can drop into WhatsApp, Instagram DMs or email. Perfect for "yes, I'll take it" moments in a chat. Our glossary explains what a payment link is in more detail.
- A pay page: one link listing your products or services with prices, so people can pay without asking first. It suits sellers who post on social media.
- QR code: printed on your counter, van, market stall or business card, it opens your payment page on the customer's phone.
- Invoice: for bigger jobs with line items, due dates and a proper record. Use it when a client needs paperwork for their own accounts.
Worked example: the small-chops caterer. She uses her business page for the menu and a quote form. When a customer confirms, she sends an invoice for the full amount with a 50% deposit due now, paid through a payment link. On the day, the balance is paid by transfer. Walk-in tasting orders at her kitchen are paid by scanning a QR code taped to the counter. Four tools, one simple rule: the bigger and more custom the order, the more formal the paperwork.
A message template for sending a payment link. Keep it short, specific and friendly, and make the next step obvious:
Hi Bisi, thanks for confirming! Here's the link for the 50% deposit (₦45,000) for your 40-guest small-chops order on 14 June: [link]. Once it's paid, your date is locked in and I'll send a receipt. The balance is due on the day. Any questions, just reply here.
Notice what it includes: the customer's name, the exact amount, what it's for, the date, what happens after they pay, and when the rest is due. Nobody has to scroll back through the chat to work out what they're paying for.
Build trust at the moment of payment
People hesitate at checkout when something feels off. A few details make a big difference:
- Use your real business name on the payment page, so it matches what they saw on your page and in their bank statement.
- Say exactly what they're paying for, and whether it's a deposit or the full price.
- Explain what happens next: "You'll get a confirmation email and a reminder the day before."
- Link your cancellation and refund policy.
- Send a receipt or confirmation every time, even for bank transfers.
Keep a simple record of every payment: date, customer, what it was for, amount and method. You'll need it for your accounts and taxes, and it makes refunds and disputes easy to handle.
Plan for refunds and disputes
Sooner or later someone will ask for their money back. Decide in advance how you'll handle it, so you respond calmly rather than emotionally. A simple approach: follow your written cancellation policy, refund through the same method the customer paid with, and confirm the refund in writing. If a customer disputes a card payment with their bank, your payment provider will ask for evidence. Your booking confirmation, the policy they saw before paying, and any messages about the job are what you'll need, which is another reason to keep everything in one place.
Launch: tell people you're open
A page nobody visits does nothing. Spend an hour on Sunday afternoon sharing it everywhere your customers already are. Here's a launch checklist:
- Test everything once more on your phone: open the page, tap every button, make a test booking and a small test payment.
- WhatsApp status: post a photo of your work with one line and your link. "We now take bookings online. Pick a time and pay a deposit here:"
- Message your past customers. A short personal note works better than a broadcast: "Hi Tolu, we've made booking easier. You can now pick a time and pay online here. Thanks for your support."
- Social profiles: put the link in your Instagram, TikTok and Facebook bio, and pin a post about it.
- Google Business Profile: add your page link as your website and your booking link where the profile allows it.
- Email signature and business cards: add the link, or print a QR code.
- Tell five people who send you work (friends, partners, suppliers) and ask them to share it.
Measure your first week
After a week, look at four numbers: how many people visited your page, how many tapped the main button, how many booked or bought, and how many paid. If lots of people visit but few tap, your headline or offer isn't clear. If many tap but few finish, something in your booking or payment steps is getting in the way: too many questions, a surprise deposit, or a confusing price. If very few visit, the problem is sharing, not your page.
Change one thing at a time and check again next week. Small, steady improvements beat a big redesign.
Your first 30 days after launch
The weekend gets you live. The next month makes it work. Here's a light routine that takes about 20 minutes a week:
- Week 1: reply to every enquiry within a few hours, and ask your first online customers what nearly stopped them booking.
- Week 2: fix the most common question by adding it to your FAQ or service descriptions. Ask two happy customers for a short testimonial.
- Week 3: add your new testimonials and one or two fresh photos. Ask satisfied customers to leave a Google review.
- Week 4: look at your four numbers again, compare them with week 1, and decide on one improvement for next month.
Keep sharing your link in between. Every time you post your work, finish with "Book online at…" so it becomes a habit for you and your customers.
Common Sunday mistakes
- Only accepting one way to pay. Offer at least a provider option and a bank transfer fallback.
- Launching without a test payment. Always pay yourself a small amount first to see what the customer sees.
- Sharing once and stopping. Mention your link regularly, not just on launch day.
- Mixing personal and business money. Settle payments into a business account if you have one; it makes tax time far easier.
How to get paid and launch with startbuddi
Start in Money Manager, then Settings. The How you get paid tab lists four ways to be paid. Paystack covers cards, bank transfer, USSD and mobile money in Nigeria, Ghana, Kenya and South Africa: enter your business name, bank and account number, and payments settle straight to your bank. Stripe covers cards worldwide, paid into your own Stripe account. You can also add bank transfer details and a PayPal link, which are shown on invoices; those two are confirmed by hand when the money lands. startbuddi never holds your money, and takes no cut of your payments; your provider's own fees still apply.
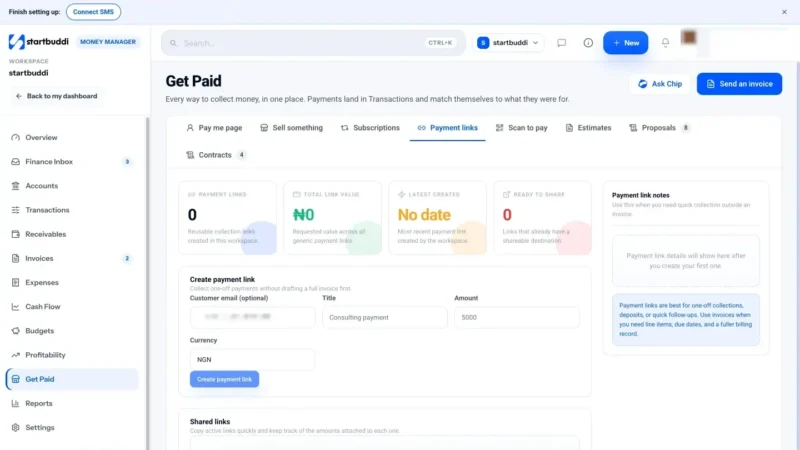
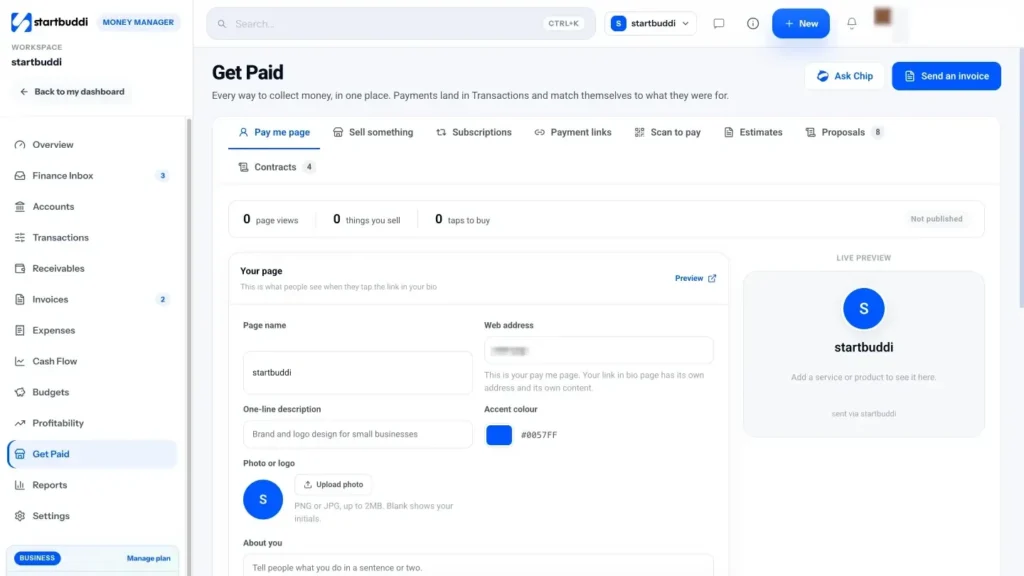
Once a provider is connected, the booking deposits you set up yesterday start working. Then open Get Paid, which gathers every way to collect money in one place:
- Payment links: enter a title and amount, click Create payment link, then copy it into a chat or send it by email. The link shows as paid once the customer pays.
- Pay me page: one page with your photo, a short description, your links and the things you sell, each with a price.
- Sell something: pick a product or type an amount and get a payment link instantly, which is handy at a counter or market stall.
- Scan to pay: printable QR codes for your pay me page and each active payment link.
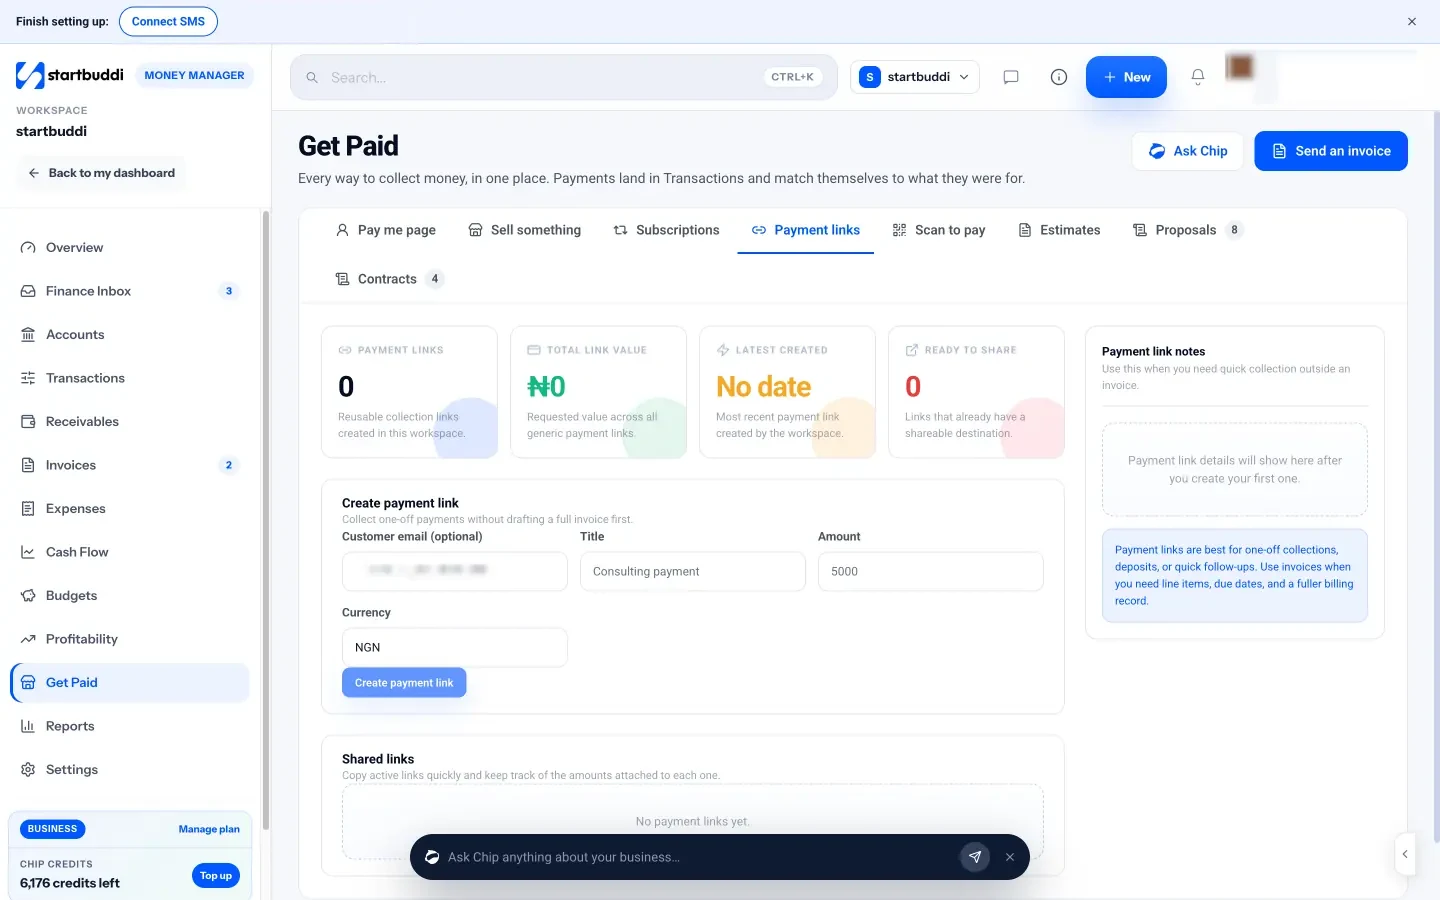
Not sure which of these to use first? Get Paid has an Ask Chip button. Ask it which way suits your next sale, whether that's an invoice, a payment link, your pay me page or a subscription, and why, and it will talk you through the trade-offs. As with everything Chip does, it suggests and you decide. A sensible order for most service businesses is: connect a provider, turn on deposits for your bookable services, create one payment link to test with yourself, then set up your pay me page or link in bio for social media.
Every payment lands in Transactions and matches itself to what it was for, whether that's a booking, an invoice, a sale or a link. You can read more on the Get Paid page.
For bigger jobs, use Invoices in Money Manager. An invoice can carry your line items, due date and tax, and the customer can pay it online through your connected provider or by the bank transfer details you added. Invoices from a booking are one click away too: open the booking and choose Generate Invoice.
For social media, go back to Publish and open Link in bio. It's one mobile page for everything: links, social icons, a WhatsApp button, a booking block that lets people book time with you, and money blocks for products, tips or payments, with checkout through your connected Paystack or Stripe account. Pick a theme or use your brand, choose your handle in Settings, turn on Live on the web, and copy the link into your Instagram or TikTok bio. There's more on the link in bio page.
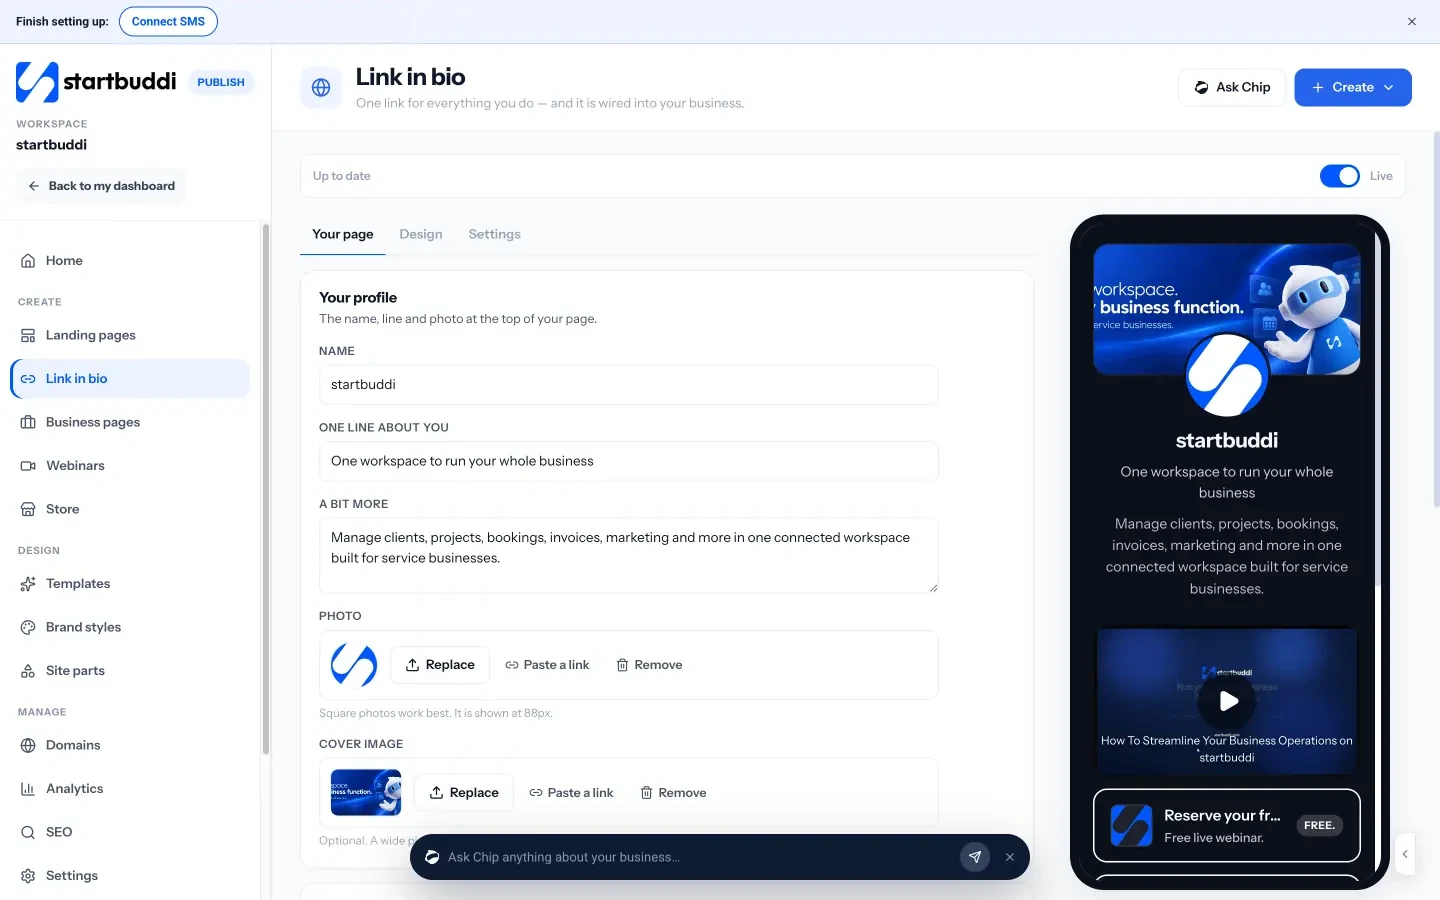
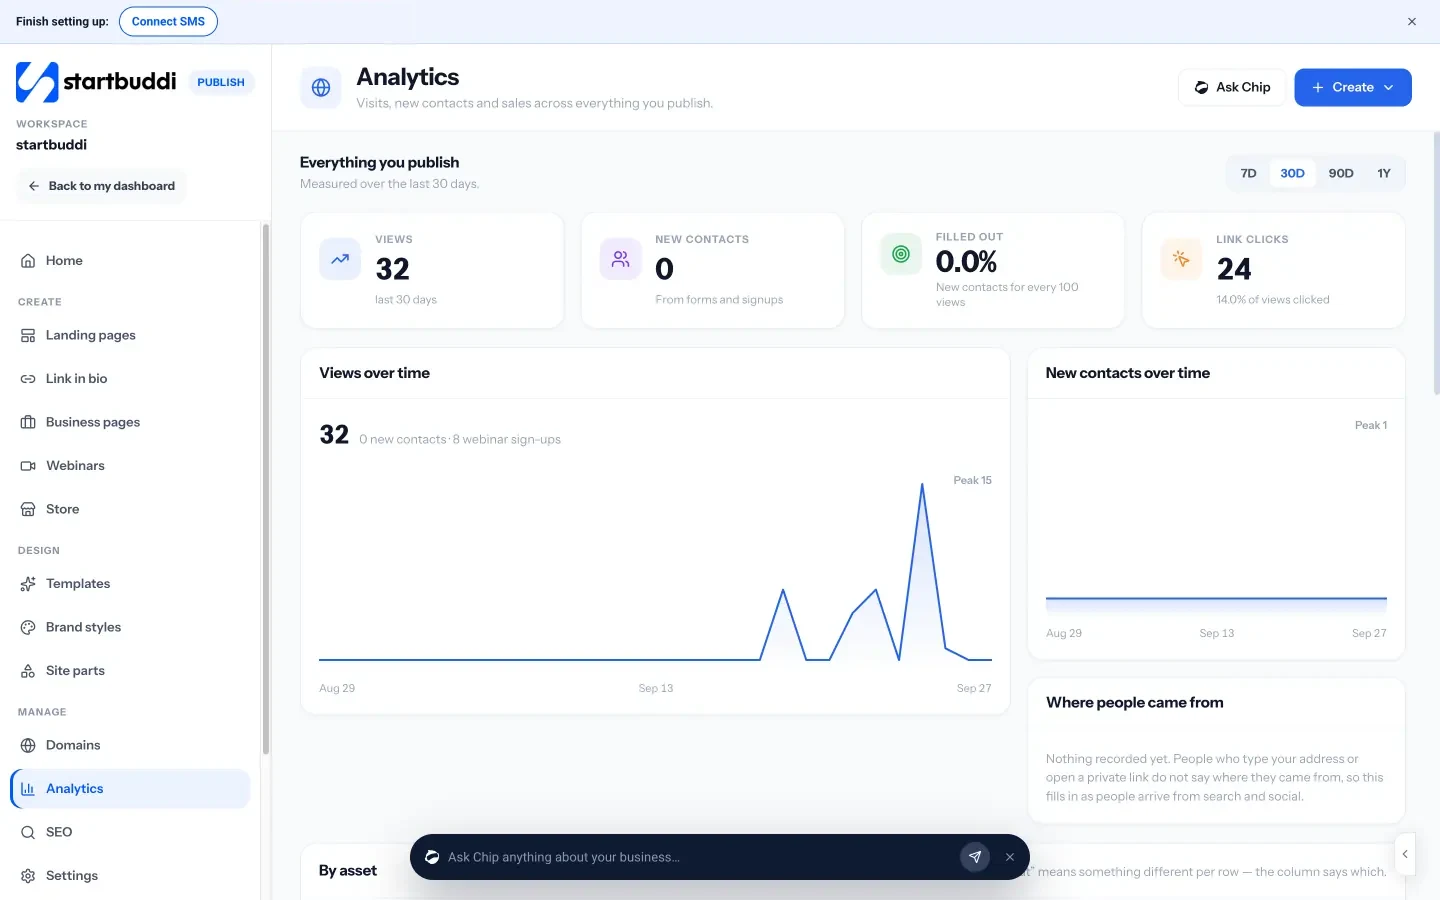
A tip for measuring: add ?src=instagram to the link you put in your Instagram bio, and ?src=tiktok to your TikTok one. Link in bio analytics then shows where visits came from, alongside visits, taps and money earned.
For your pages, open Manage, then Analytics in Publish to see visits, leads and where visitors came from. In Bookings, the Overview shows today's bookings, revenue and conversion. Between the three, you have the four numbers from your first-week review in one place.
That's the weekend done. You have a page, a way to book, a way to pay, and a plan to share it. If you started on the Free plan, you can test everything; when you're ready to run more services or remove the small startbuddi footer, compare the plans on the pricing page. Every paid plan starts with a 30-day trial.
Sources for this chapter
Tiwalade Joanna Okedara-Kalu is the founder, CEO and CTO of startbuddi, the business system that brings clients, bookings, invoices, projects, marketing and the Chip AI assistant into one place. Tiwalade builds software around how service businesses really work day to day, and writes about client management, getting paid on time and why small businesses outgrow the tools they start with.
Founded startbuddi and leads its product and engineering