How to Use Subscribers and Automations on startbuddi
If you have ever wondered how to keep your clients engaged without doing everything manually, this guide is for you. You will learn how to manage your subscribers, set up automations that follow up on their own, and track how your emails are performing, all inside startbuddi.
What Are Subscribers on startbuddi?
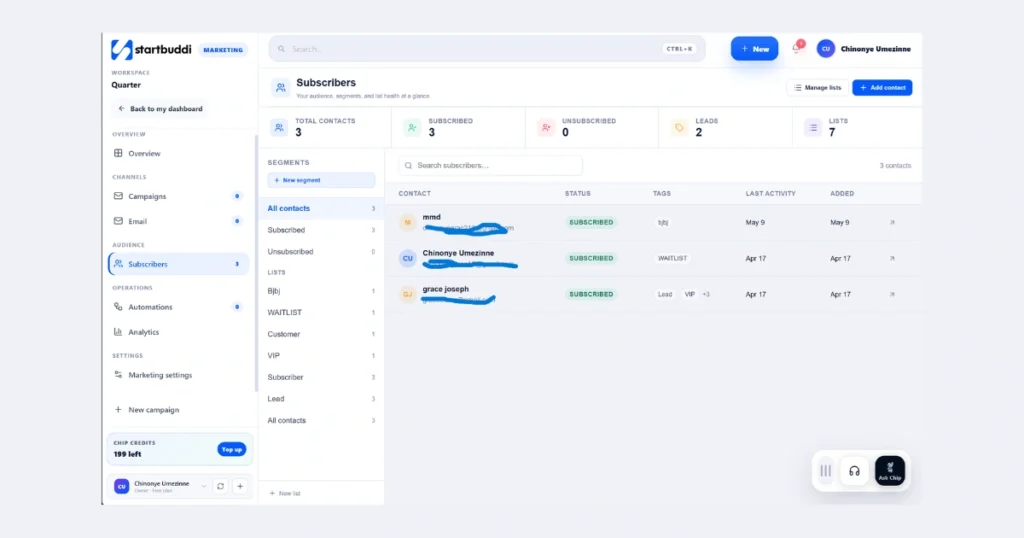
On startbuddi, your subscribers are simply your total contacts. Every person you add to your contact list counts as a subscriber. So if you have 10 contacts saved, you have 10 subscribers.
Under the Subscribers section, you will see these categories:
- Total Contacts – everyone in your list
- Subscribed – people who are actively receiving your emails
- Unsubscribed – people who have opted out
- Leads – potential clients who have not yet bought from you
- List – your organized groups of contacts
How to Add a New Contact
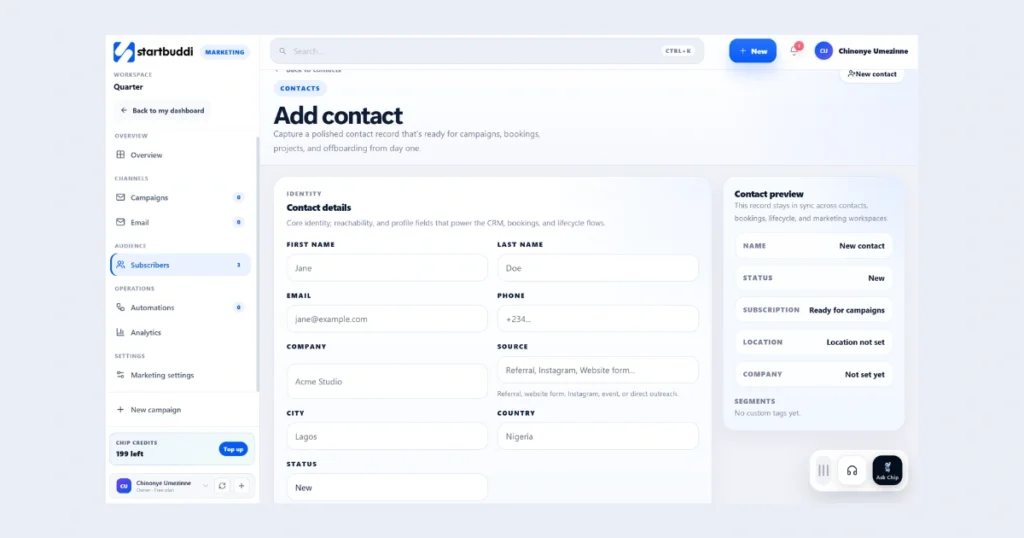
To grow your subscriber list, you need to add contacts manually. Here is the information you will fill in for each contact:
- First name and last name
- Email address
- Phone number
- Company name
- Source (where you found them or how they found you)
- City and country
- Status
- Segment (choose one: Lead, Customer, Subscriber, VIP, or any custom segment you create)
- Tags
- Notes
Once you fill in all the details, click Save Contact. That person is now part of your subscribers list.
What Are Automations?
Automations are workflows that run on their own after you set them up. You do not have to do anything manually once they are live. Think of them as your follow-up system working in the background 24/7.
Every automation starts with a trigger, which is an action that tells the system when to send a message or take the next step.
How to Set Up an Automation (Step by Step)
Here are the 8 steps to set up an automation
Step 1 – Choose Your Goal
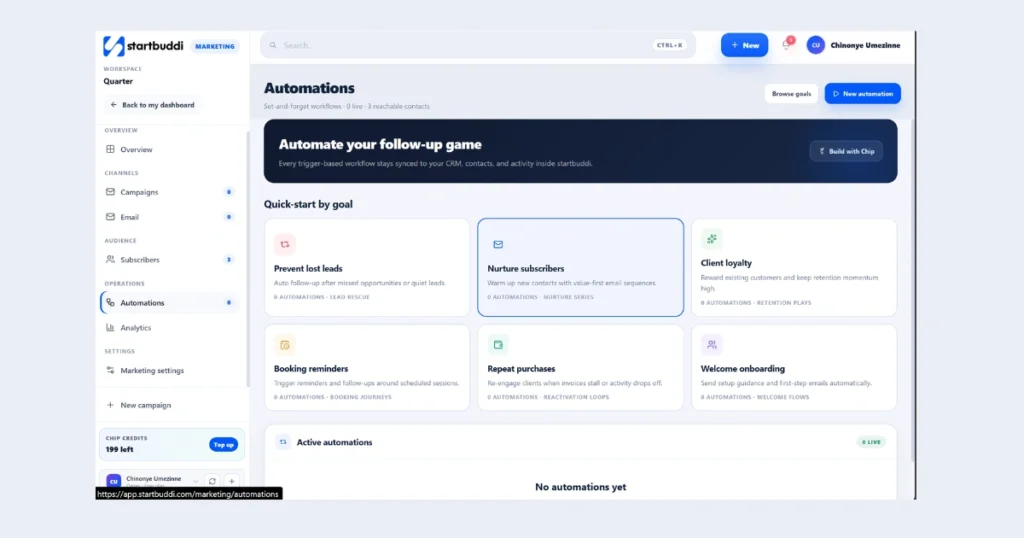
When you open Automations, you will see these goals to pick from:
- Prevent Lost Leads
- Nurture Subscribers
- Client Loyalty
- Booking Reminders
- Repeat Purchases
- Welcome and Onboarding
Pick the goal that matches what you want to do. For this example, we will use Booking Reminders.
Option A – Build It Yourself (Manual Setup)
Step 2 – Create a New Automation
Click on Booking Reminders, then click New Automation at the top. Wait less than 10 seconds for it to load.
Step 3 – Pick Your Trigger
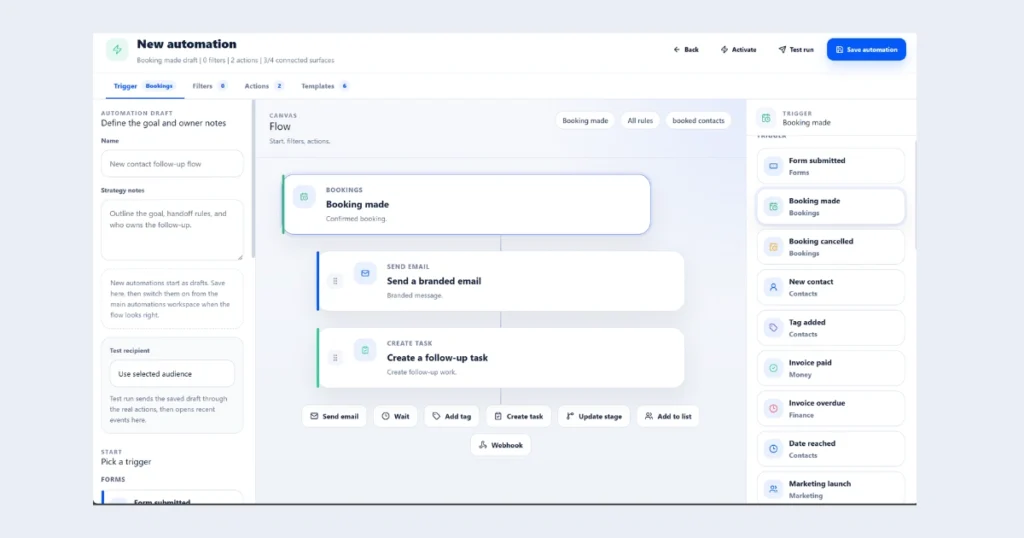
You will see a list of triggers on the screen:
- Form Submitted
- Booking Made
- Booking Canceled
- New Contact
- Tag Added
Since your client has already made a booking and you want to send them a reminder email, click Booking Made. This means the automation will fire as soon as a booking is recorded.
Step 4 – Add a Send Email Action
After selecting your trigger, you will see Send Email. Click on it, then click on the Branded Message option inside Send Email.
Step 5 – Choose Your Action Type
You will now see the Action Type options:
- Send Email – sends an email to your contact
- Add Tag – adds a tag from your contact list (for example, VIP or Paid Client)
- Create Tag – creates a brand new follow-up tag
- Update Stage – moves the contact to a different stage
- Add to List – adds the contact to a specific list
- Webhook – connects to an outside tool
For a simple booking reminder, leave it on Send Email.
Step 6 – Choose Your Email Template
Under Email Template, you will see these options:
- Custom Email – you write your own email from scratch
- Monthly Client Newsletter
- Win Back
- Post-Session Recap
- Invoice Payment Reminder
Click Custom Email. Then fill in your subject line and open the email builder. Inside the email builder, you can use the Chip AI Assistant to write the email for you in seconds. Once the email is ready, save it.
Step 7 – Add a Follow-Up Tag (Optional)
After saving your email, you can go back and add a follow-up task or tag to the automation. For example, you can add a tag that marks the contact as someone who received a booking reminder.
Step 8 – Save Your Automation
Click Save Automation once. Your automation is now live and will run automatically for every contact that triggers it.
Option B – Use a Starter Blueprint (Faster Setup)
If you do not want to build everything from scratch, StartBuddi gives you ready-made blueprints. These are called Starter blueprints, and they include:
- Lead Capture Welcome Flow
- New Client Onboarding
- Booking Reminder Stack
- Invoice Overdue Recovery
- Cancellation Win Back
- Manual Reactivation Burst
Since you are setting up a booking reminder, click Booking Reminder Stack. startbuddi will lay out the full automation structure for you. You then just go through each step, write what you want to say, add your tags, and save. It is much faster than building from scratch. If you also want to send emails to a bigger audience at once, you can learn how to create a new campaign and reach more people with less effort.
Understanding Your Analytics
After your automations are running, check the Analytics section to see how they are performing. Here is what each number means:
- Open Rate – how many people opened your email
- Click Rate – how many people clicked a link inside your email
- Delivered – how many emails were successfully sent
- Revenue – how much money came in from your emails
- Bounce Rate – how many emails did not reach the inbox
- Auto Runs – how many automations are currently active
- Deliverability – a combined overview of delivery rate, open rate, click rate, bounce rate, and unsubscribes
Frequently Asked Questions
A subscriber is anyone in your contacts list. A lead is a specific segment you assign to contacts who have not yet become paying customers.
It is a ready-made automation template inside startbuddi that sets up a full booking reminder workflow for you. You just fill in your content and save. It is the faster way to get started.
Add Tag pulls from tags that already exist on your contact. Create Tag makes a brand-new tag, usually for a new follow-up action you are setting up.
Yes. When you open the email builder inside your automation, you can use the Chip AI Assistant to write the email for you.
Conclusion
Setting up your subscribers and automations on startbuddi does not have to be complicated. Once you add your contacts, pick your goal, and build your first workflow, the system does the heavy lifting for you. Whether you build from scratch or use a Starter Blueprint, you are always just a few clicks away from a follow-up system that runs itself